
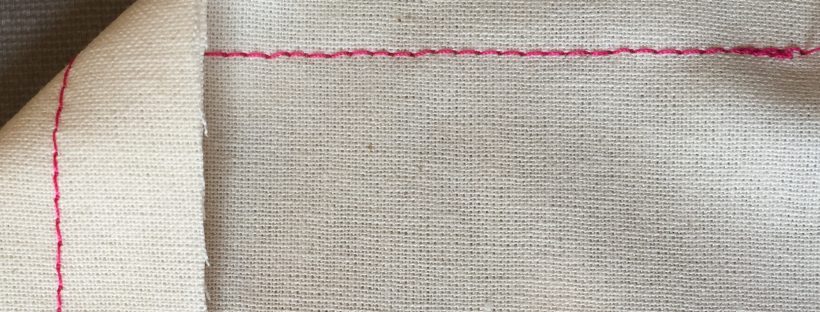
‘Thread tension’ is the resistance that you feel on the thread as it goes through the sewing machine. The perfect ‘thread tension’ will lead to lovely, flat and even stitches that look the same on both sides of the fabric. This perfectly balanced stitch is what you should try to achieve with all of your sewing projects. If your stitches are not like this, then you will need to find out why and correct the issue.
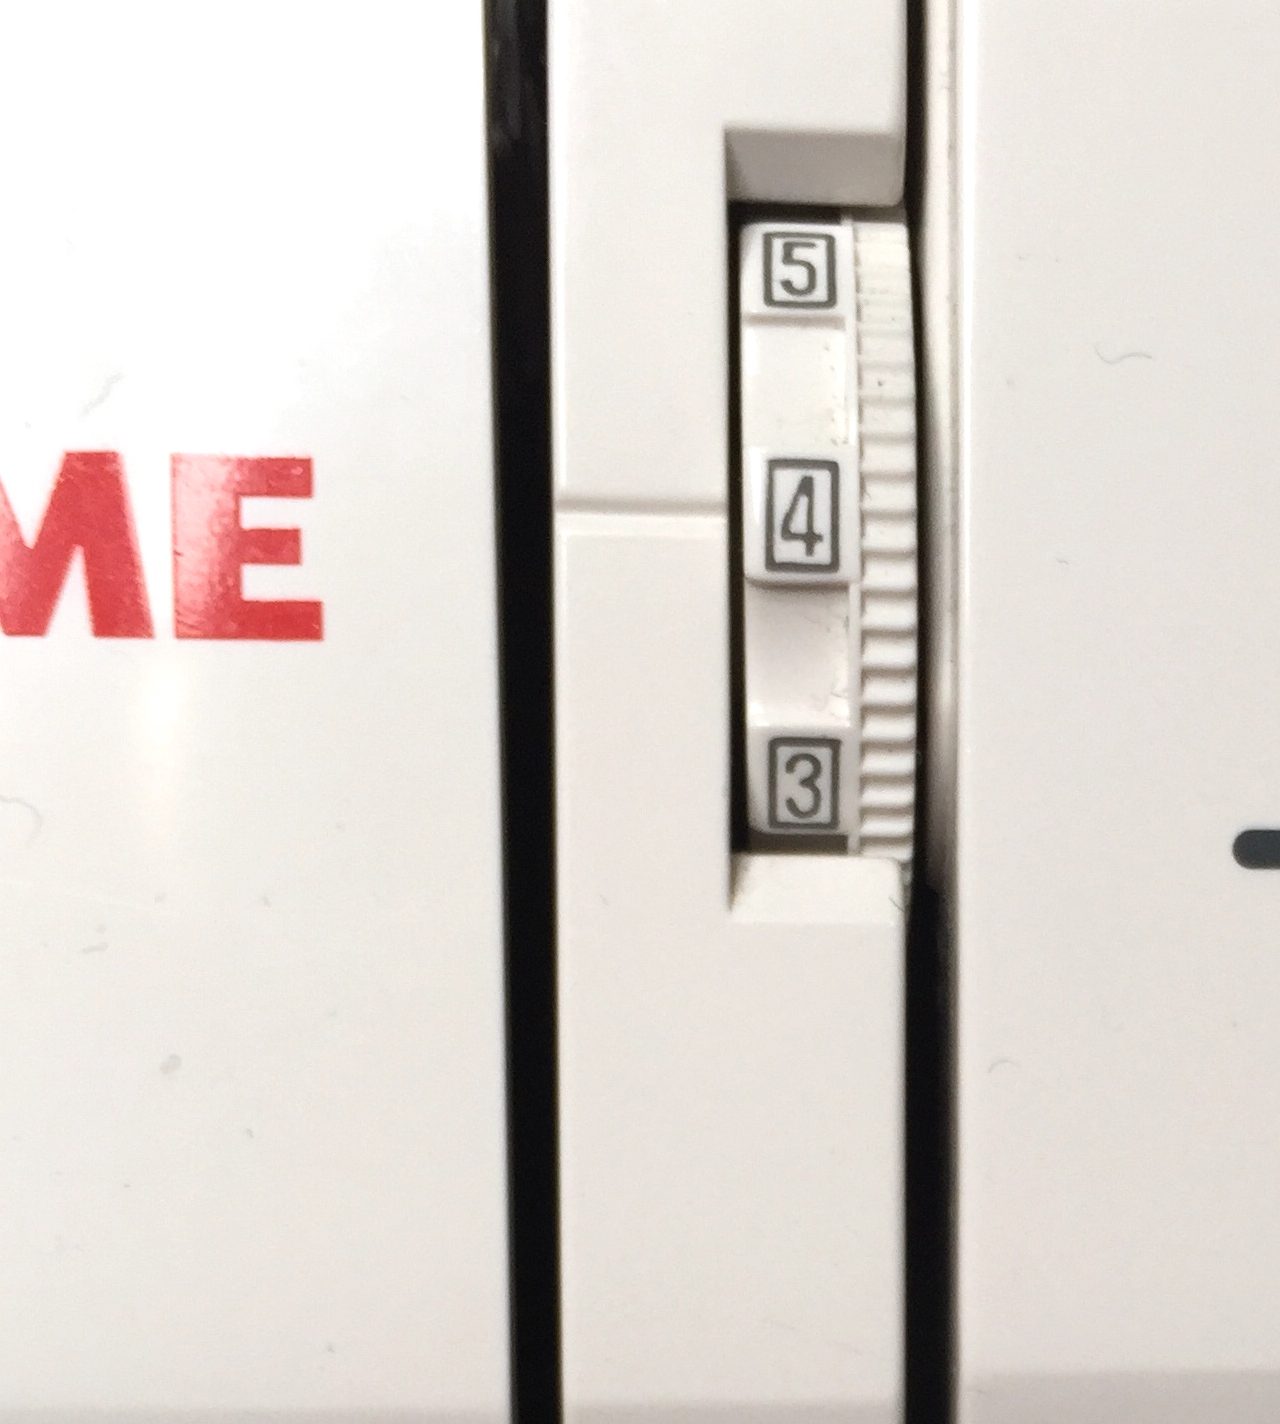
All sewing machines have a series of ‘tension devices’ to ensure that the top thread and bobbin thread have the tension they need to produce flat and even stitches. The most prominent of these is the tension regulator. You’ve probably noticed the tension regulator on your sewing machine. It’s usually a dial with the numbers 3, 4, and 5 highlighted or circled. This regulator tightens, or loosens, the tension discs that the thread passes down through before it goes up and through the looper.
There are many factors that can cause problems with your stitches, and so before you move the tension regulator you must first check a few things…
Incorrect threading is responsible for more tension problems than any other factor. If there is an obvious problem with your stitches, such as baggy, messy stitches that don’t hold the fabric together sufficiently, or tight stitches that ruche the fabric up, then you’ve probably not threaded your machine up properly. See if you can figure out whether the issue is with the top thread, or the bobbin thread, and go through the checklist below to see if you can fix it. If you can’t easily find the problem, then it is a good idea to unthread your sewing machine and thread it again!
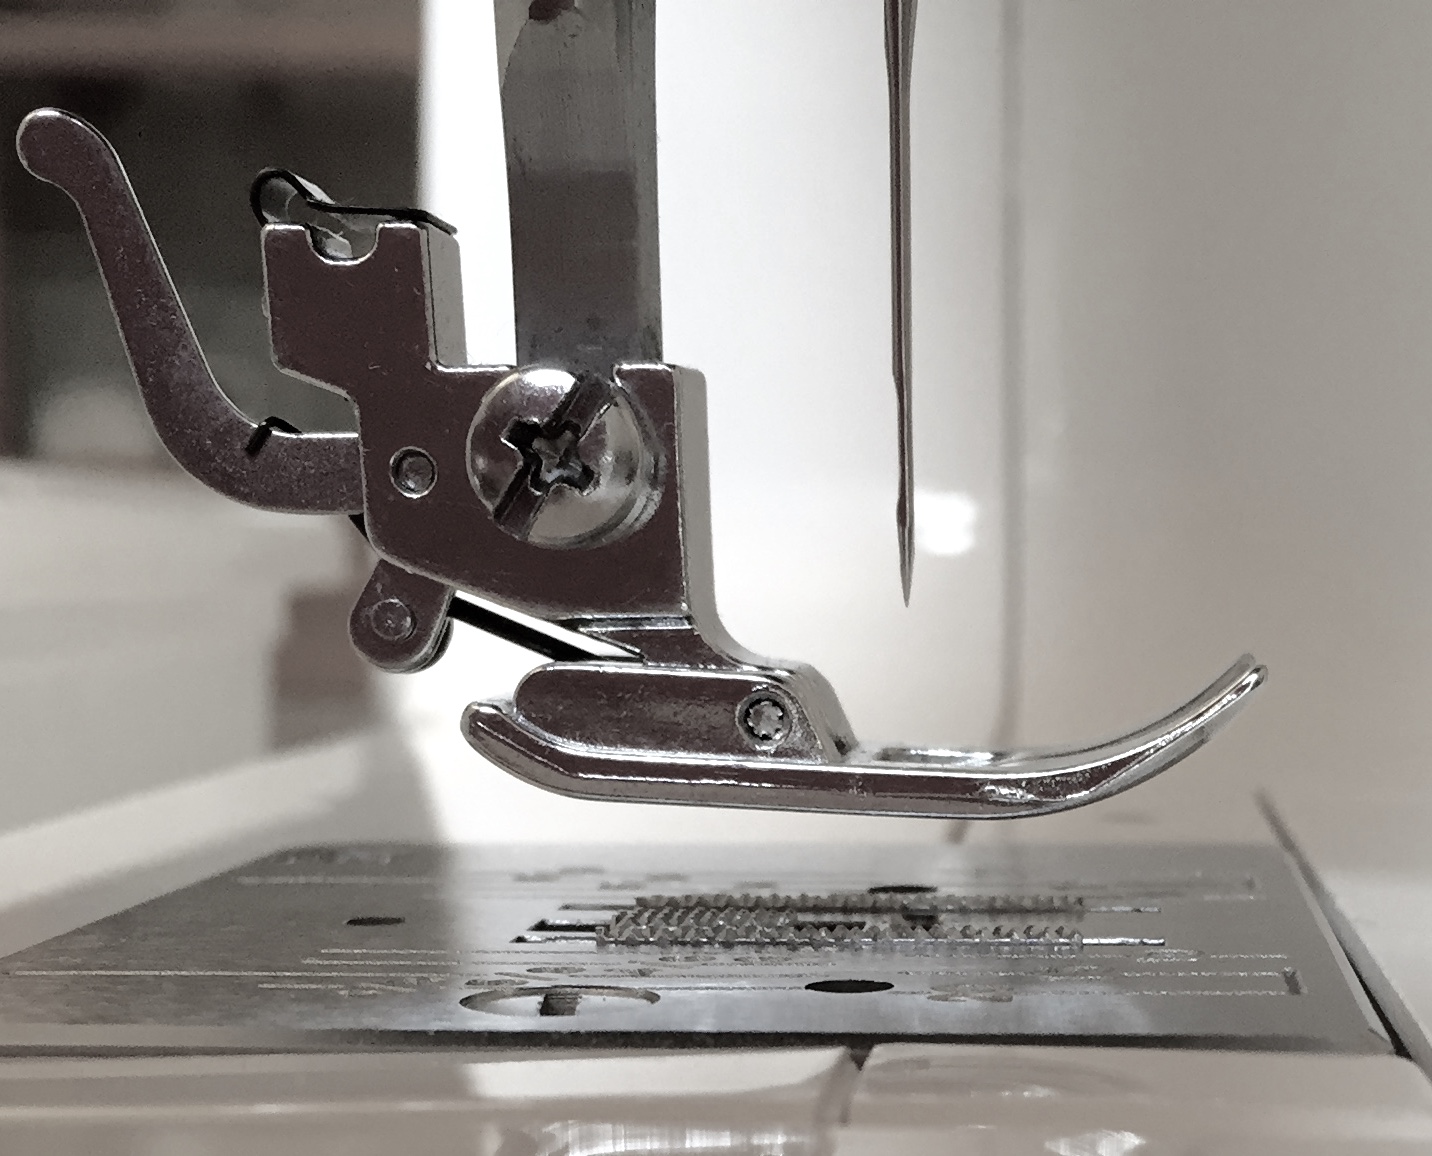
- Did you use all thread guides? If the top thread comes out of the looper, you will get a big noisy mess! The hook near the needle really helps to stop the thread bouncing out of the looper as you stitch.

- Did you thread your top thread with the presser foot up? The tension discs, operated by the tension regulator, open when the presser foot is up, and close when the presser foot is down. If the top thread isn’t able to get between the tension discs, then it will have no tension and create a very loose top thread. Make sure the presser foot is up when threading the top thread.
- Is thread unwinding freely from the spool? If it is catching somewhere, it will lead to a very tight top thread.
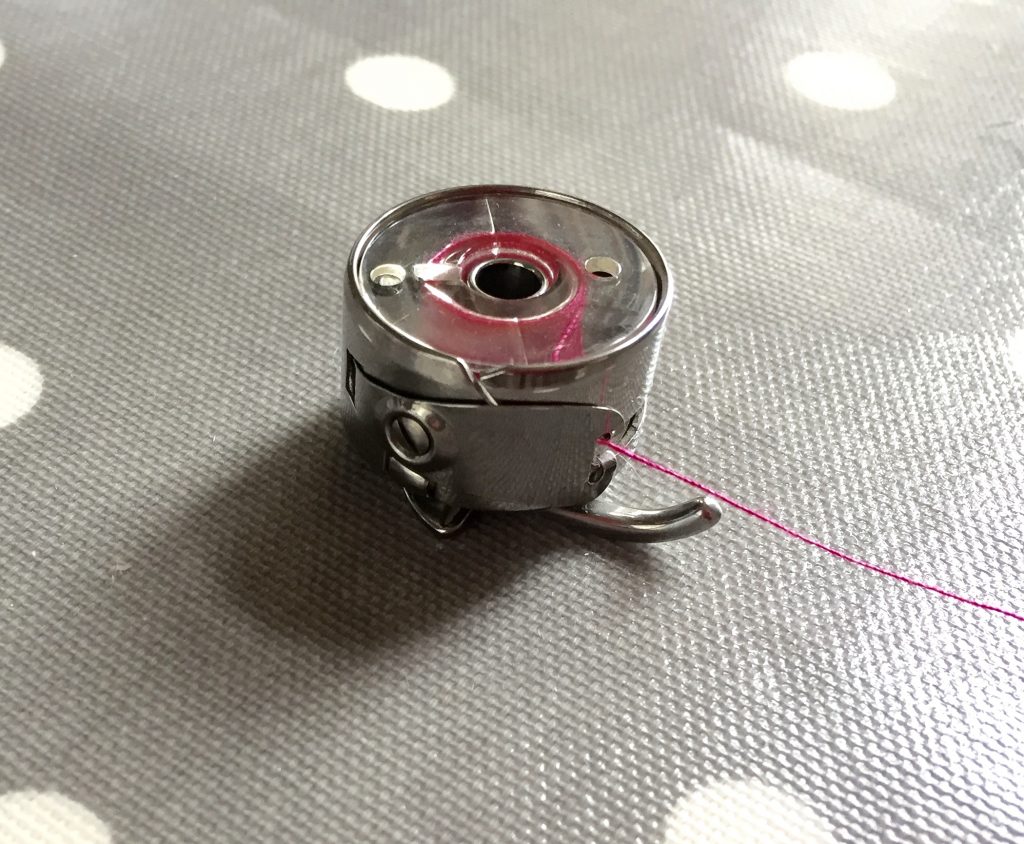
- Is the thread on the bobbin flat, and evenly wound? You must make sure you wind the bobbin using the bobbin tension guide. Messy bobbin = messy stitch!

- Is the thread unwinding freely from the bobbin case? Remove any thread from the outside of the bobbin, as it could get caught and stop its flow. This would create a tight bobbin thread.
- Is the bobbin inserted into the bobbin case correctly? If not, you will have a very loose and messy bottom thread. On front loading machines, make sure the thread is going clockwise as you drop it into the bobbin case. Also, the thread must go behind the flat bobbin-case spring, which squeezes the thread against the bobbin case as it comes out, creating the necessary tension for a flat stitch. This is a common mistake, so please check, even if you think you did it right! On a top loading sewing machine, check the bobbin thread has tension on it. If not, take it out and pop it in again, following the directions indicated.
Other less common factors could be…
Damaged machine parts… Check for rough or damaged surfaces where the thread passes through and could get caught. Some parts, such as needles, are easily damaged but easily replaced.
Clogged up Machines… This could restrict the flow of the thread. Fluff and thread ends can get stuck between the tension discs, under the needle plate, and around the bobbin/bobbin case. “Floss” between the tension discs, and check in the bobbin area and under the needle plate for fluff (lint) and thread ends.
Needles, threads, and fabrics… A needle that’s too large or small for the thread can effect the stitch because the size of the hole adds to, or reduces the total top tension.
USING THE TENSION REGULATOR
So, any major problem should be fixed by going through the checklist above, but to get a perfect stitch, you may still need to adjust the top thread tension using the Tension Regulator. Many sewers are nervous to touch the Tension Regulator, but actually it’s very straightforward. There is a way to adjust the bobbin tension too, but only if absolutely necessary!
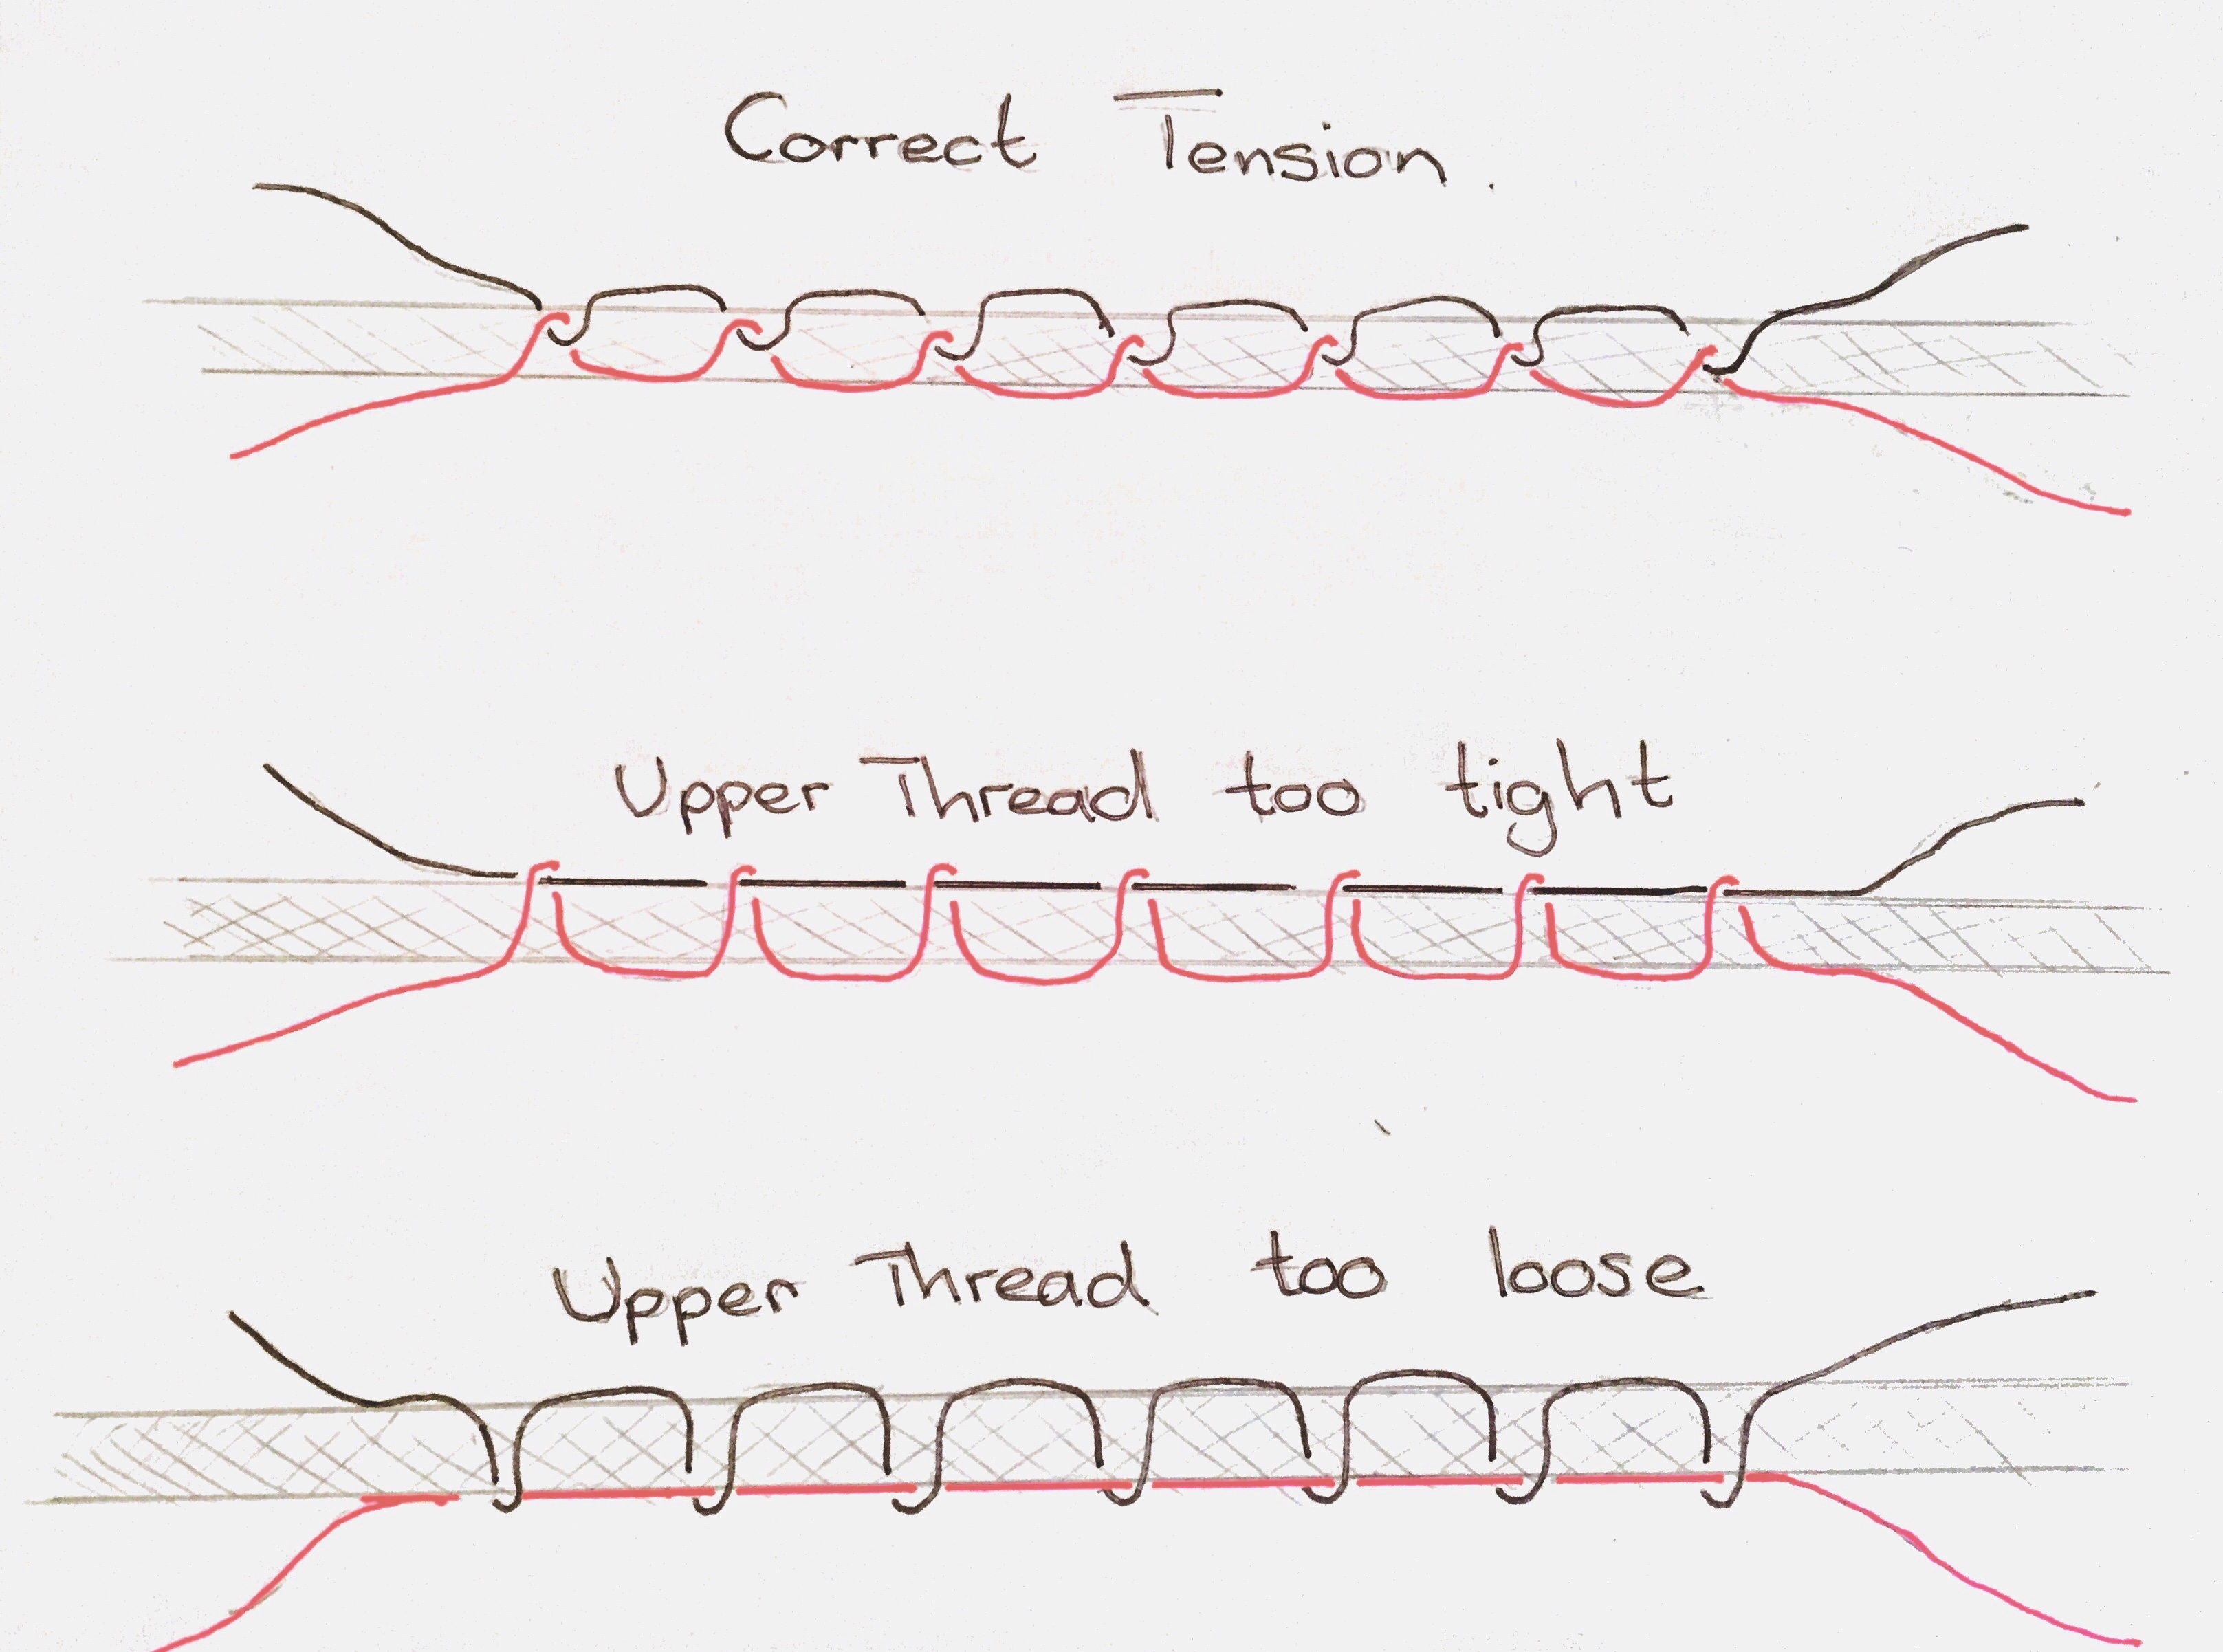
First of all, to know which way to turn the tension regulator dial, you first need to inspect a sample of stitching on the default tension setting (number 4). It may help to have a different colour on the top thread, to the bobbin thread.
- If the bobbin thread shows on the top side of the fabric, the top thread tension is too tight (or bobbin thread is too loose).
- You can loosen the top thread tension, by turning the tension regulator dial a little towards a lower number.
- If the top thread shows on the under side of the fabric, the top thread tension is too loose (or bobbin thread is too tight).
- You can tighten the top thread tension by turning the tension regulator dial a little towards a higher number.
It is important to turn the dial a tiny bit at a time, as even a tiny turn makes a difference to the tension.
Adjusting the bobbin thread tension…
As I said before, you can adjust the bobbin tension too, but only as a last resort! This usually gets tweeked back to perfection when you get your machine serviced, and is unlikely to be the issue. However, for those of you who would like to know, you can adjust the bobbin thread tension by tightening or loosening the tiny screw that holds the flat bobbin-case spring in place and squeezes the thread as it comes out of the bobbin case. Again, it is important to turn the screw a tiny bit at a time as even a tiny turn makes a difference to the tension.
I hope this little blog has been helpful, and you can now understand how to get perfectly flat and lovely stitches! Happy Sewing x