
So many of my students have all the skills needed for dressmaking but are apprehensive about following a commercial pattern because they look so complicated and wordy. They are wordy, but only because they are trying to give you all the information you may need. Much of this information is general stuff or irrelevant to the garment you are making. Once you have worked your way through a few patterns you will find it easier to skip to the bits you need.
My advice is…“Just have a go! What’s the worst that could happen?”
You may well make lots of mistakes, but, honestly, that’s one of the best ways to learn. I would recommend, however, that you use a cheap cotton to try out a garment… before cutting into anything special!
To help get you started I have put together a step by step list…
1. Work out your size…
- Don’t expect to be the same size as you are in the shops! Unfortunately pattern sizes are usually bigger.
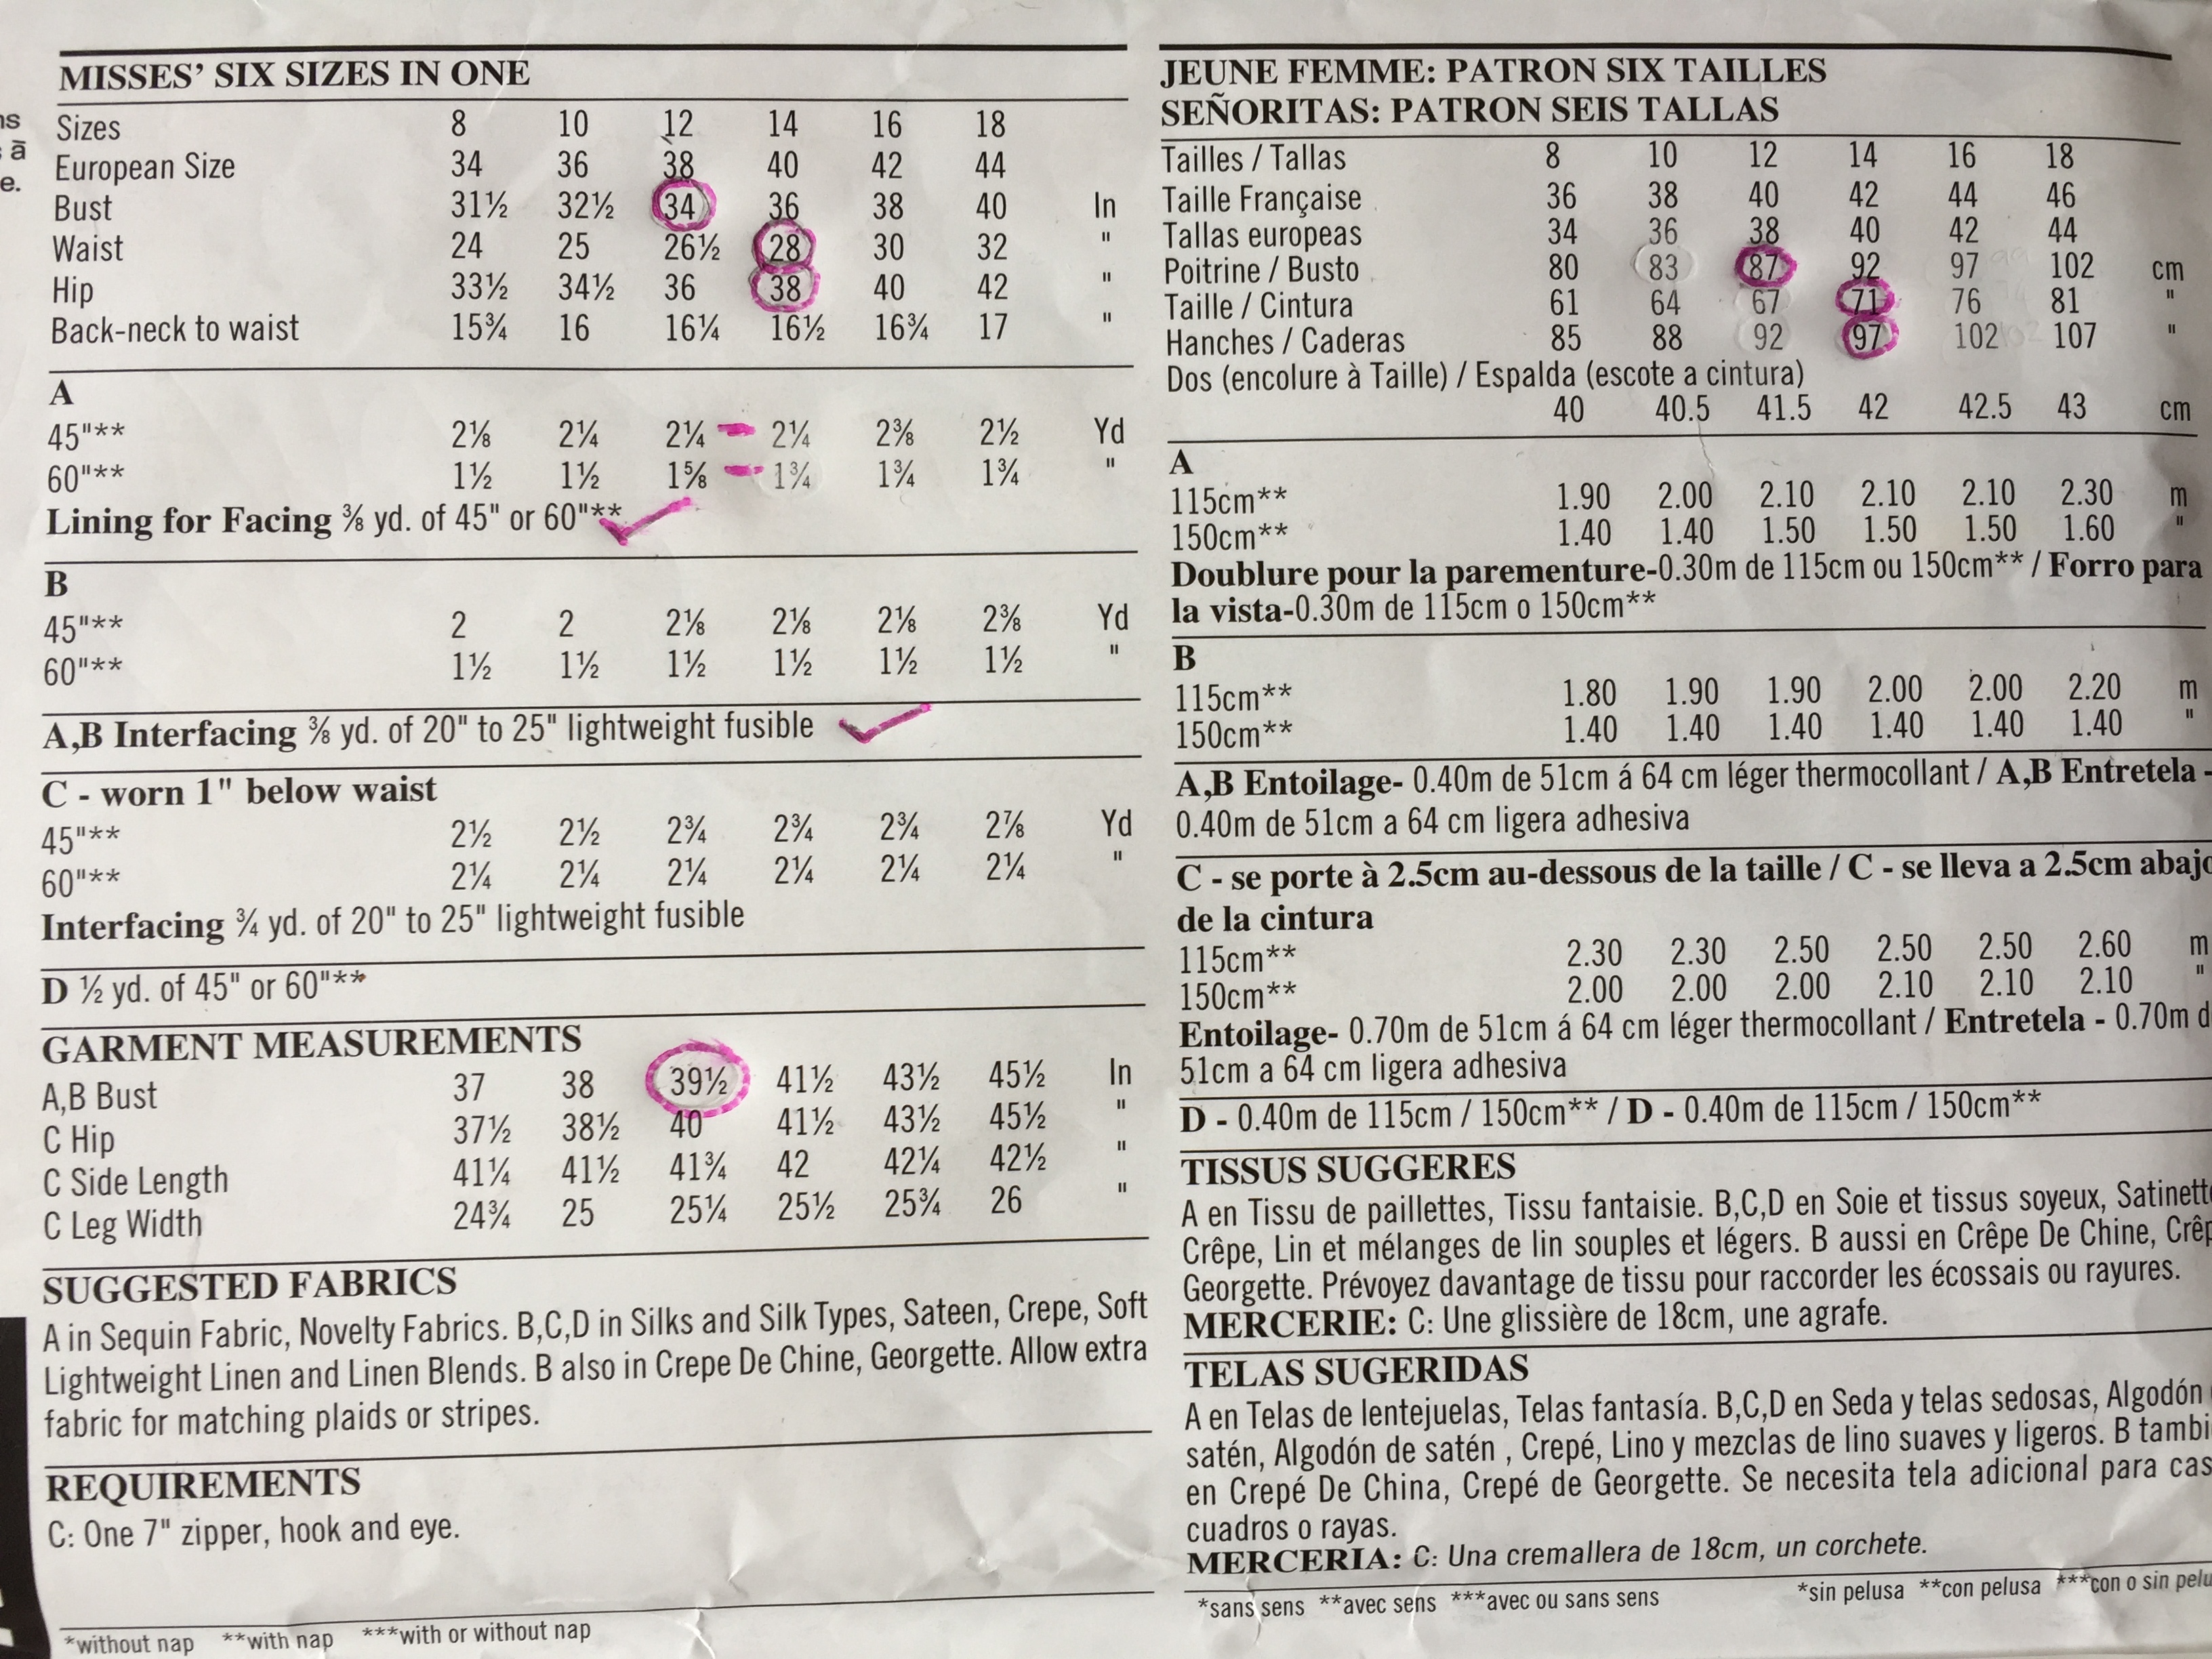
- You MUST measure your bust, waist and around the fullest bit of your hips. Find and ring these measurements on the measurement chart, which is usually located on the back of the pattern envelope but can sometimes be found on the pattern sheets. You will probably be a combination of sizes, which is fine.
- These measurements are usually offered in inches or cm. Inches are an English measurement and cm are used by the French. I prefer to use cm if possible as it is a smaller measurement and so more accurate.
- Also check the garment measurements. They can be found on the back of the envelope or on the pattern pieces. These are the measurements the actual garment will be. They are bigger than your size as they include a certain amount of ‘Ease’. Ease is added to give room to move but also depends on the design of the garment. Some garments, like coats, have a lot of ease and other garments such as a bodice has very little. If you prefer a slimmer fit, you can choose a size with less ease.
- To conclude this section… in the shops I am a size 10 but looking at the pattern measurements below my size is a combination of size 12 and size 14. Looking at the finished garment measurements, I would go with a size 12 as the pattern has lots of ease and I don’t like my garments too roomy.
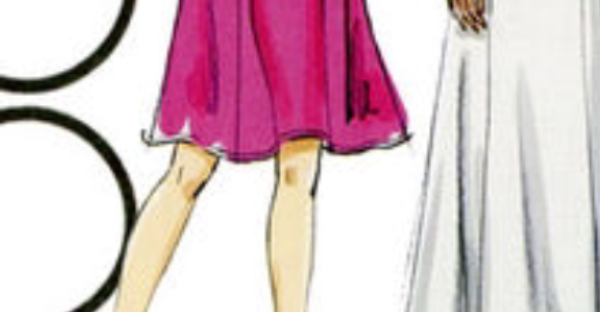
New Look Pattern by Simplicity
2. Use your size to work out how much fabric to buy…
- To work out how much fabric to buy, go to the size you decided on or the largest size you measured. Look further down the chart, on the back of the envelope and go to the style you want to make. Take a note of how much fabric you will need in each width.
- Fabric comes in two widths 45” /115cm or 60”/150cm This is because you may well need to buy more fabric if the fabric you want to use is the narrower width. Fabric amounts are usually given in metres/yards for each width.
- When choosing your fabric, pay careful attention to its thickness and how it hangs. Your garment won’t look how you’d expect it to look if you choose a fabric just by its appearance on the roll! Choosing the correct fabric is such a difficult thing to get right and will take practice. Dressmaking patterns generally suggest suitable fabrics so maybe go by those to start with.
- It is advisable to wash and press your fabric before you cut out or at least give it a good steam with the iron. This will help to avoid shrinkage.
- The pattern envelope will also tell you what else you will need, such as interfacing, thread and fastenings.
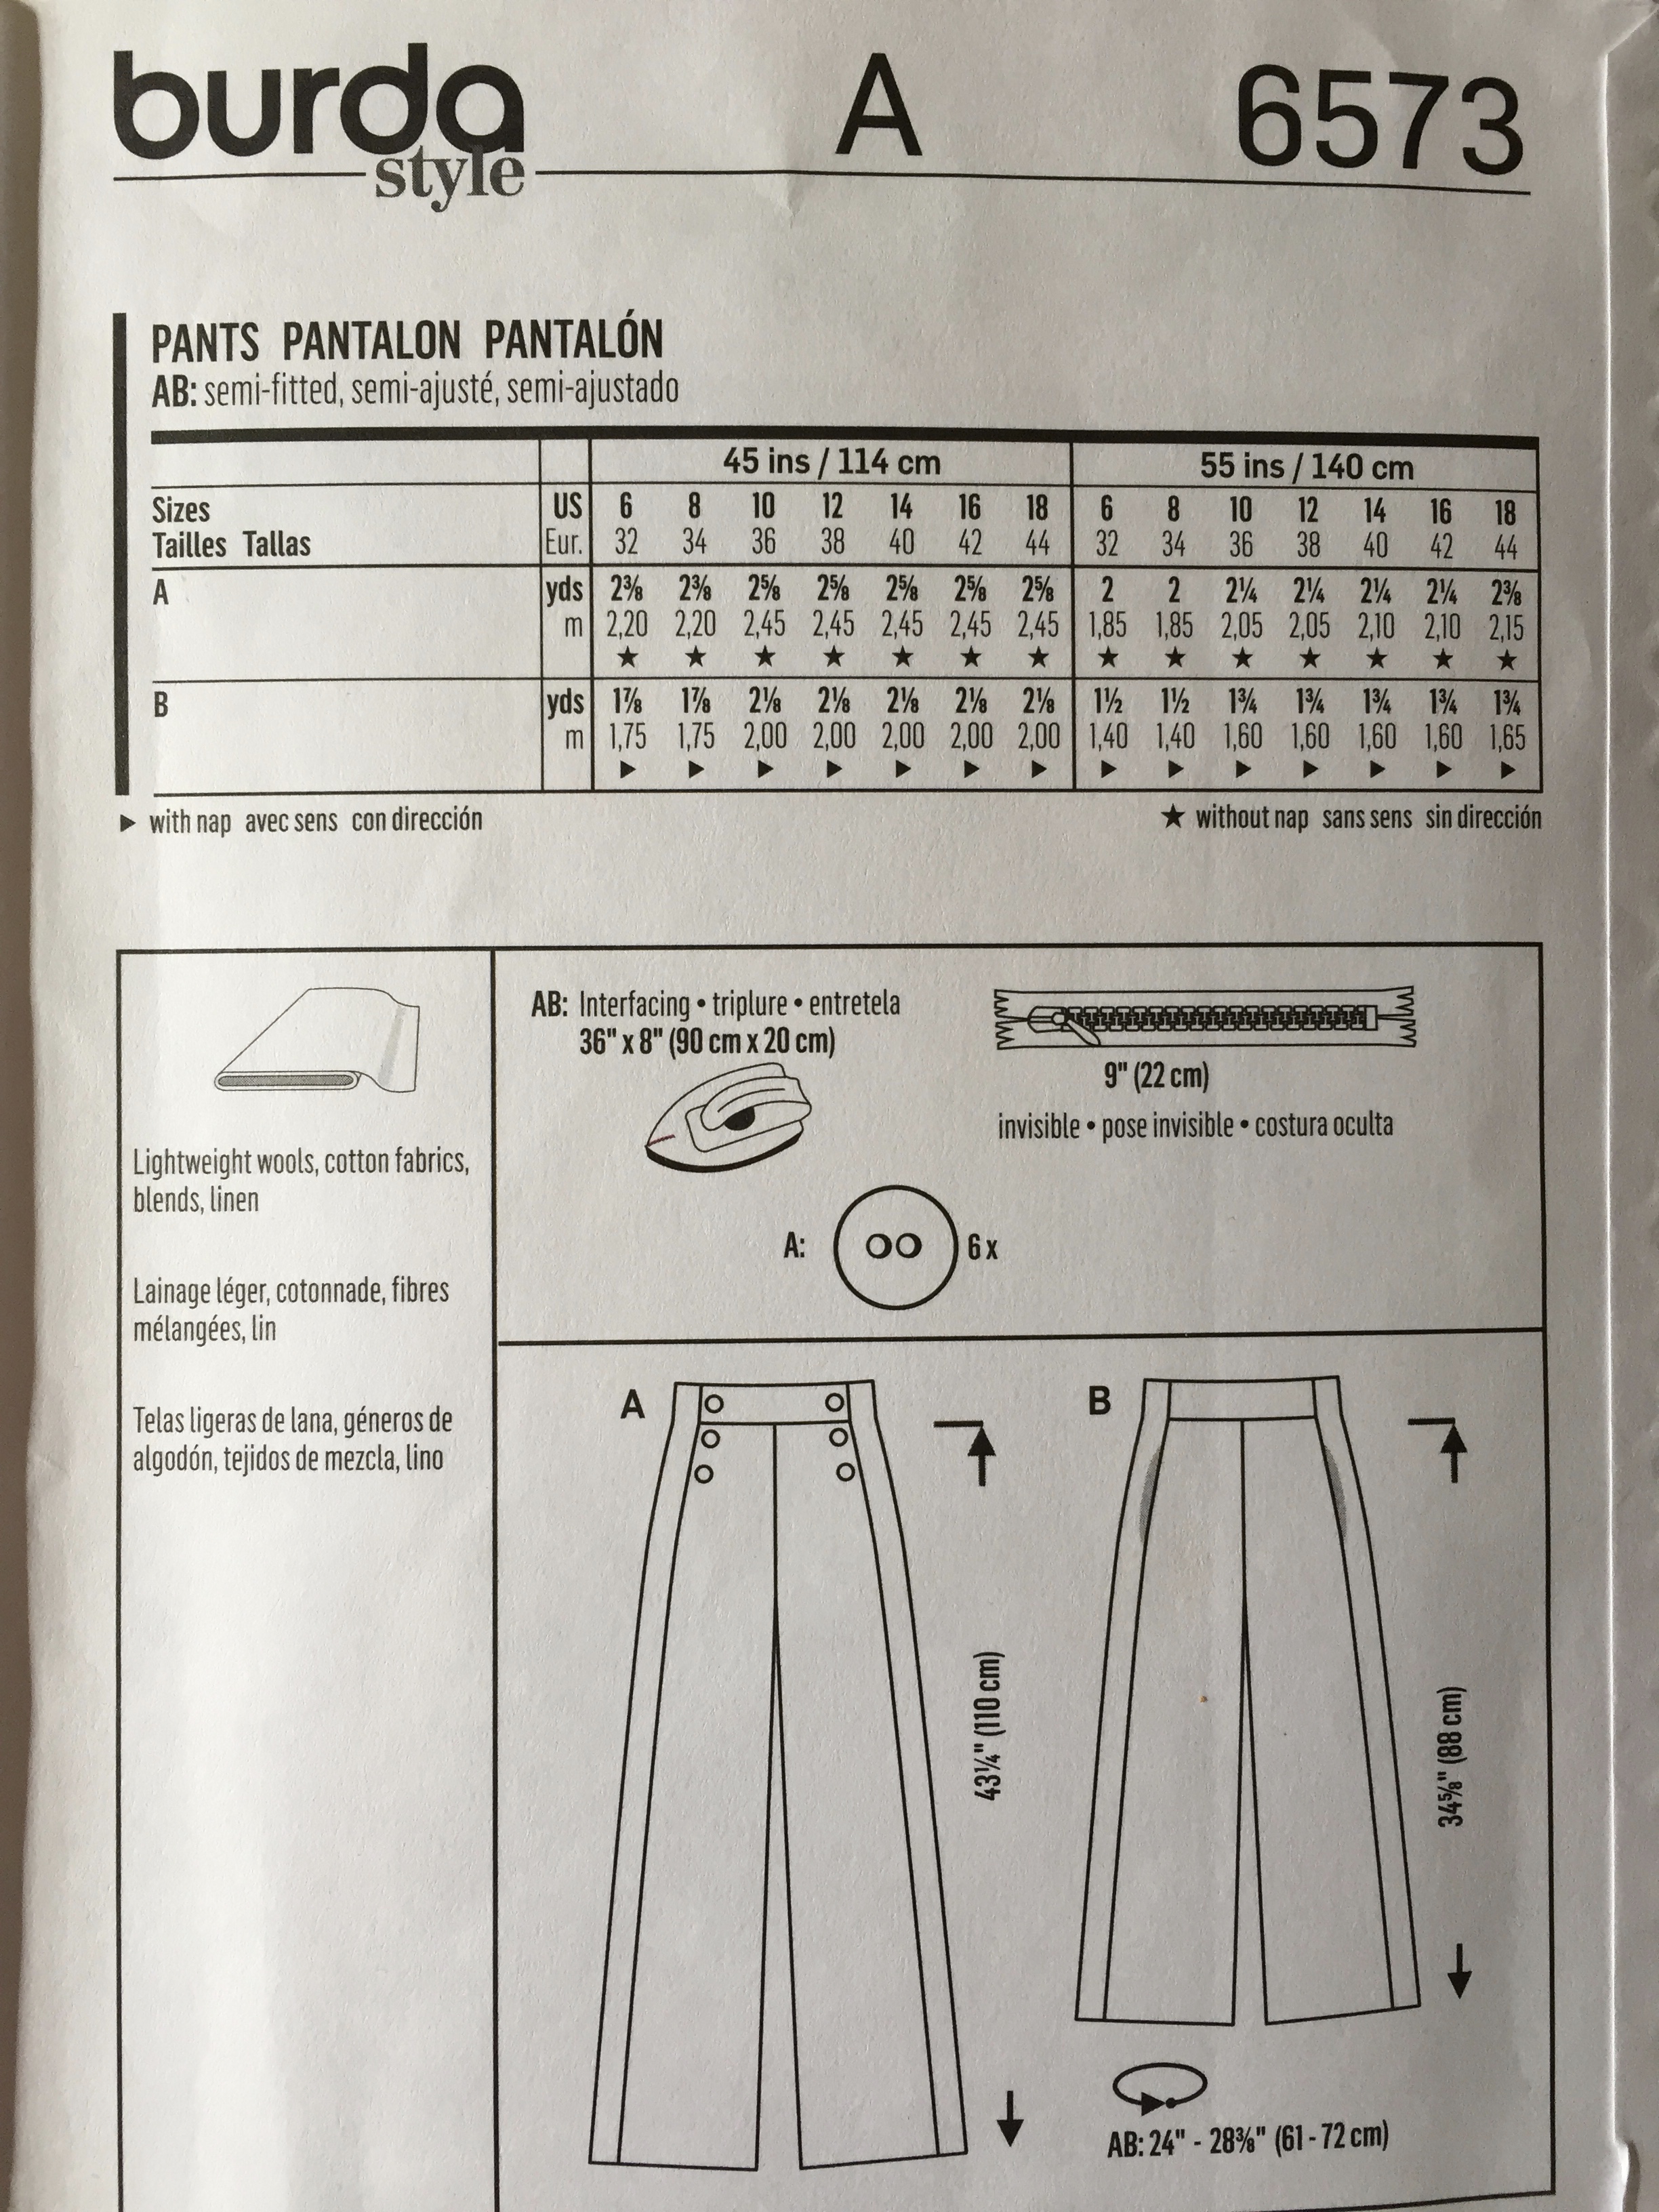
Burda Pattern
3. Cutting out the paper pattern pieces…
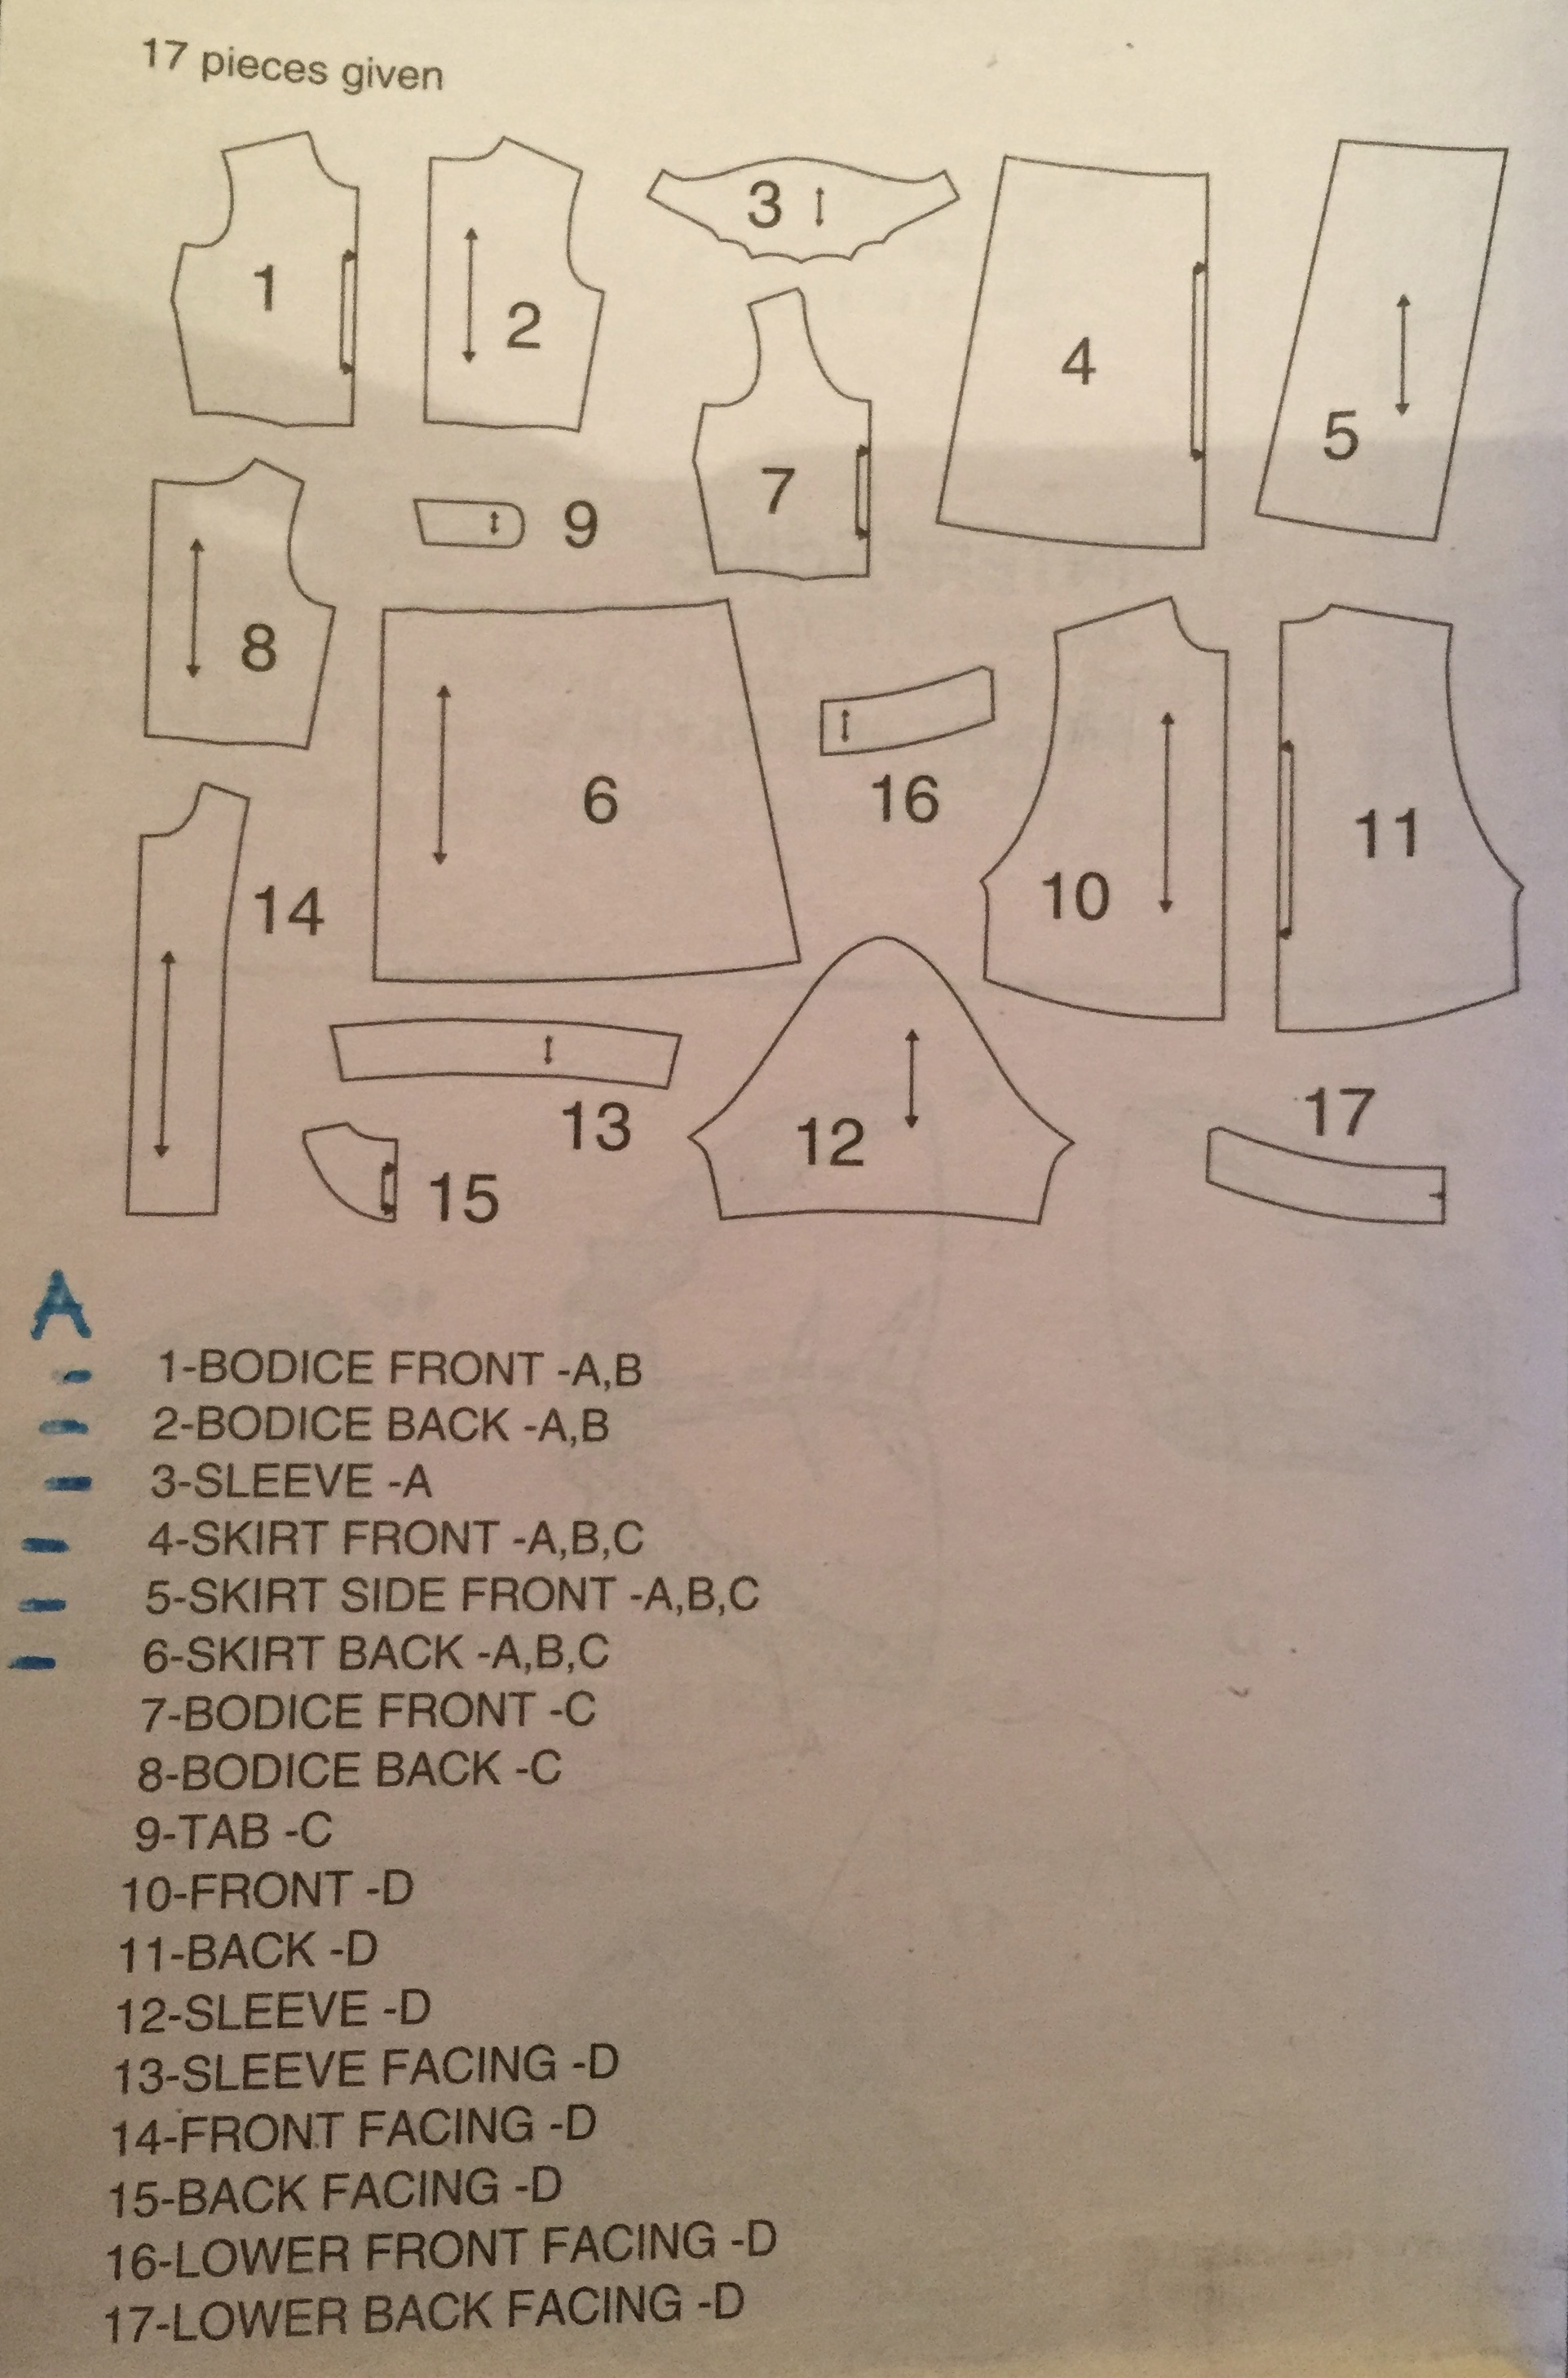
- Take everything out of the envelope and find the instruction sheets. Usually on the first page of the instructions there will be a list of pattern pieces. Work out, depending on the style you want, which pattern pieces you will need.
- You can cut out your pattern pieces directly from the pattern sheets or, if you think at some point you may want to make a different size, you can trace your size onto a separate piece of paper. You can buy pattern paper from Amazon or Ebay or you could use any thin paper as long as it’s big enough for the pattern pieces.
- Press the pattern pieces with a cool iron so that they are nice and flat. If you are a combination of sizes just move gradually and smoothly from one size line to another at the appropriate place.
- At this point, if you haven’t already, you need to measure the length of your body… back neck to waist and also waist to desired hem length. Check it against the measurement chart. If the size you are cutting is longer or shorter than your measurement, there are places on the pattern where you can lengthen or shorten it. To lengthen, cut between the lines and add the necessary amount. To shorten, fold between the lines and pleat out the necessary amount.

Cynthia Rowley Pattern by Simplicity
4. Cutting out the fabric pattern pieces…
- For help with placing your pattern pieces on the fabric, locate the relevant cutting layout in the instructions or on the pattern sheets. There will be several options depending on the style you are making and whether your fabric is 115cm wide or 150cm wide. Most cutting layouts are for fabric ‘WITH NAP’. This means the fabric has a direction, such as a pattern or shine. If this is the case, all the pattern pieces must be placed in the same direction from top to bottom down the length of the fabric.
- Most of the time you will be instructed to fold your fabric in half, with the right sides together, along the length. The selvages should be together with the fold of the fabric on the opposite side. This way you will end up with two of each pattern piece or one on the fold.
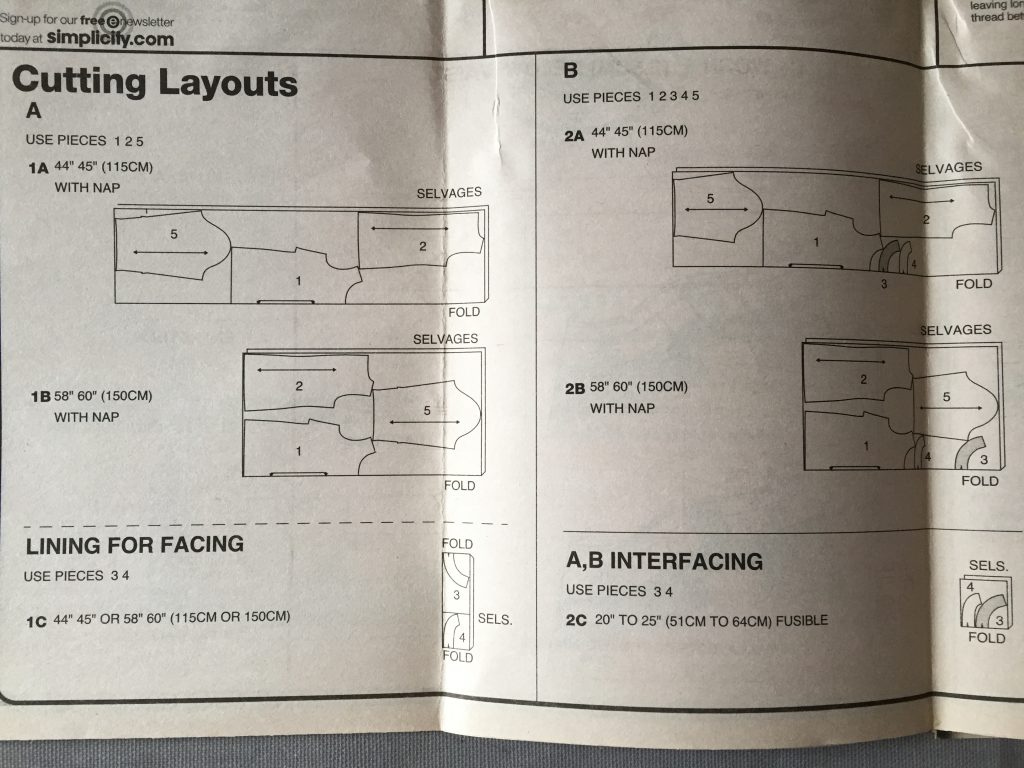
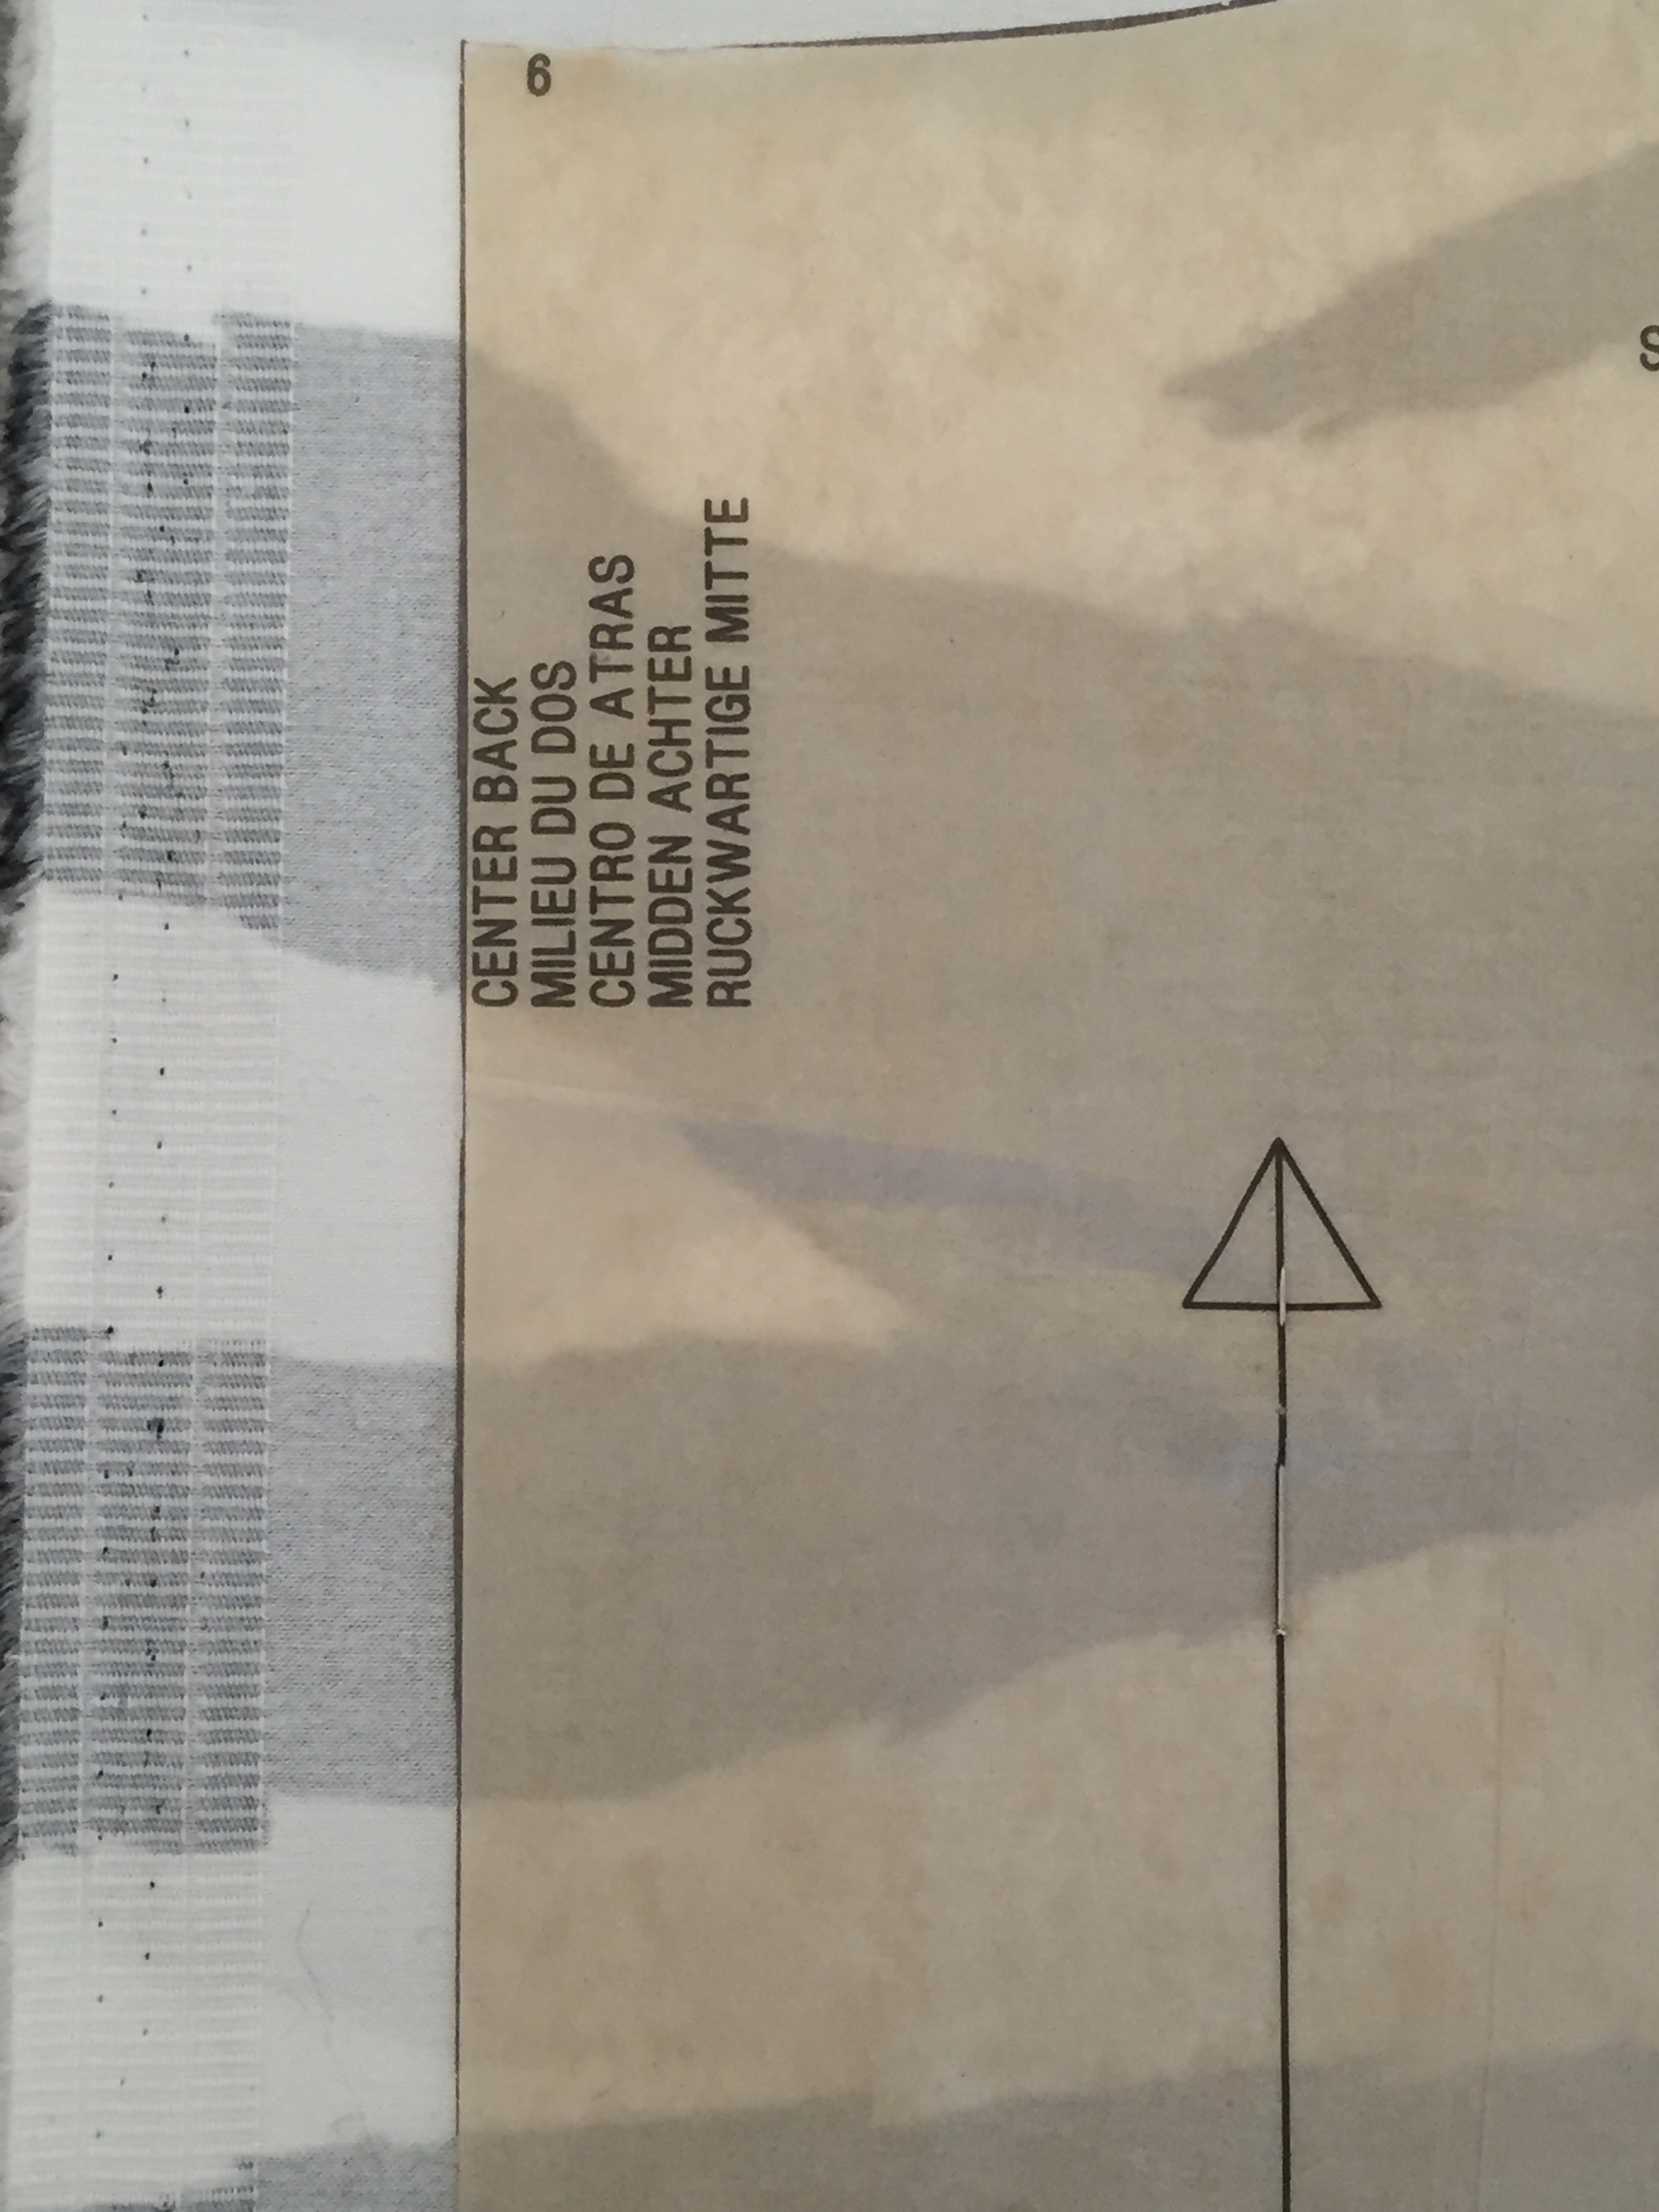
- Pay careful attention to keeping the pattern pieces straight by placing the double-ended arrow symbol (indicating the straight grain) parallel to the selvage. The selvage is the self-finished edge of the fabric that runs down the length on both sides. If this double ended arrow symbol is pointing to an edge it means you need to put this edge on the fold of the fabric.
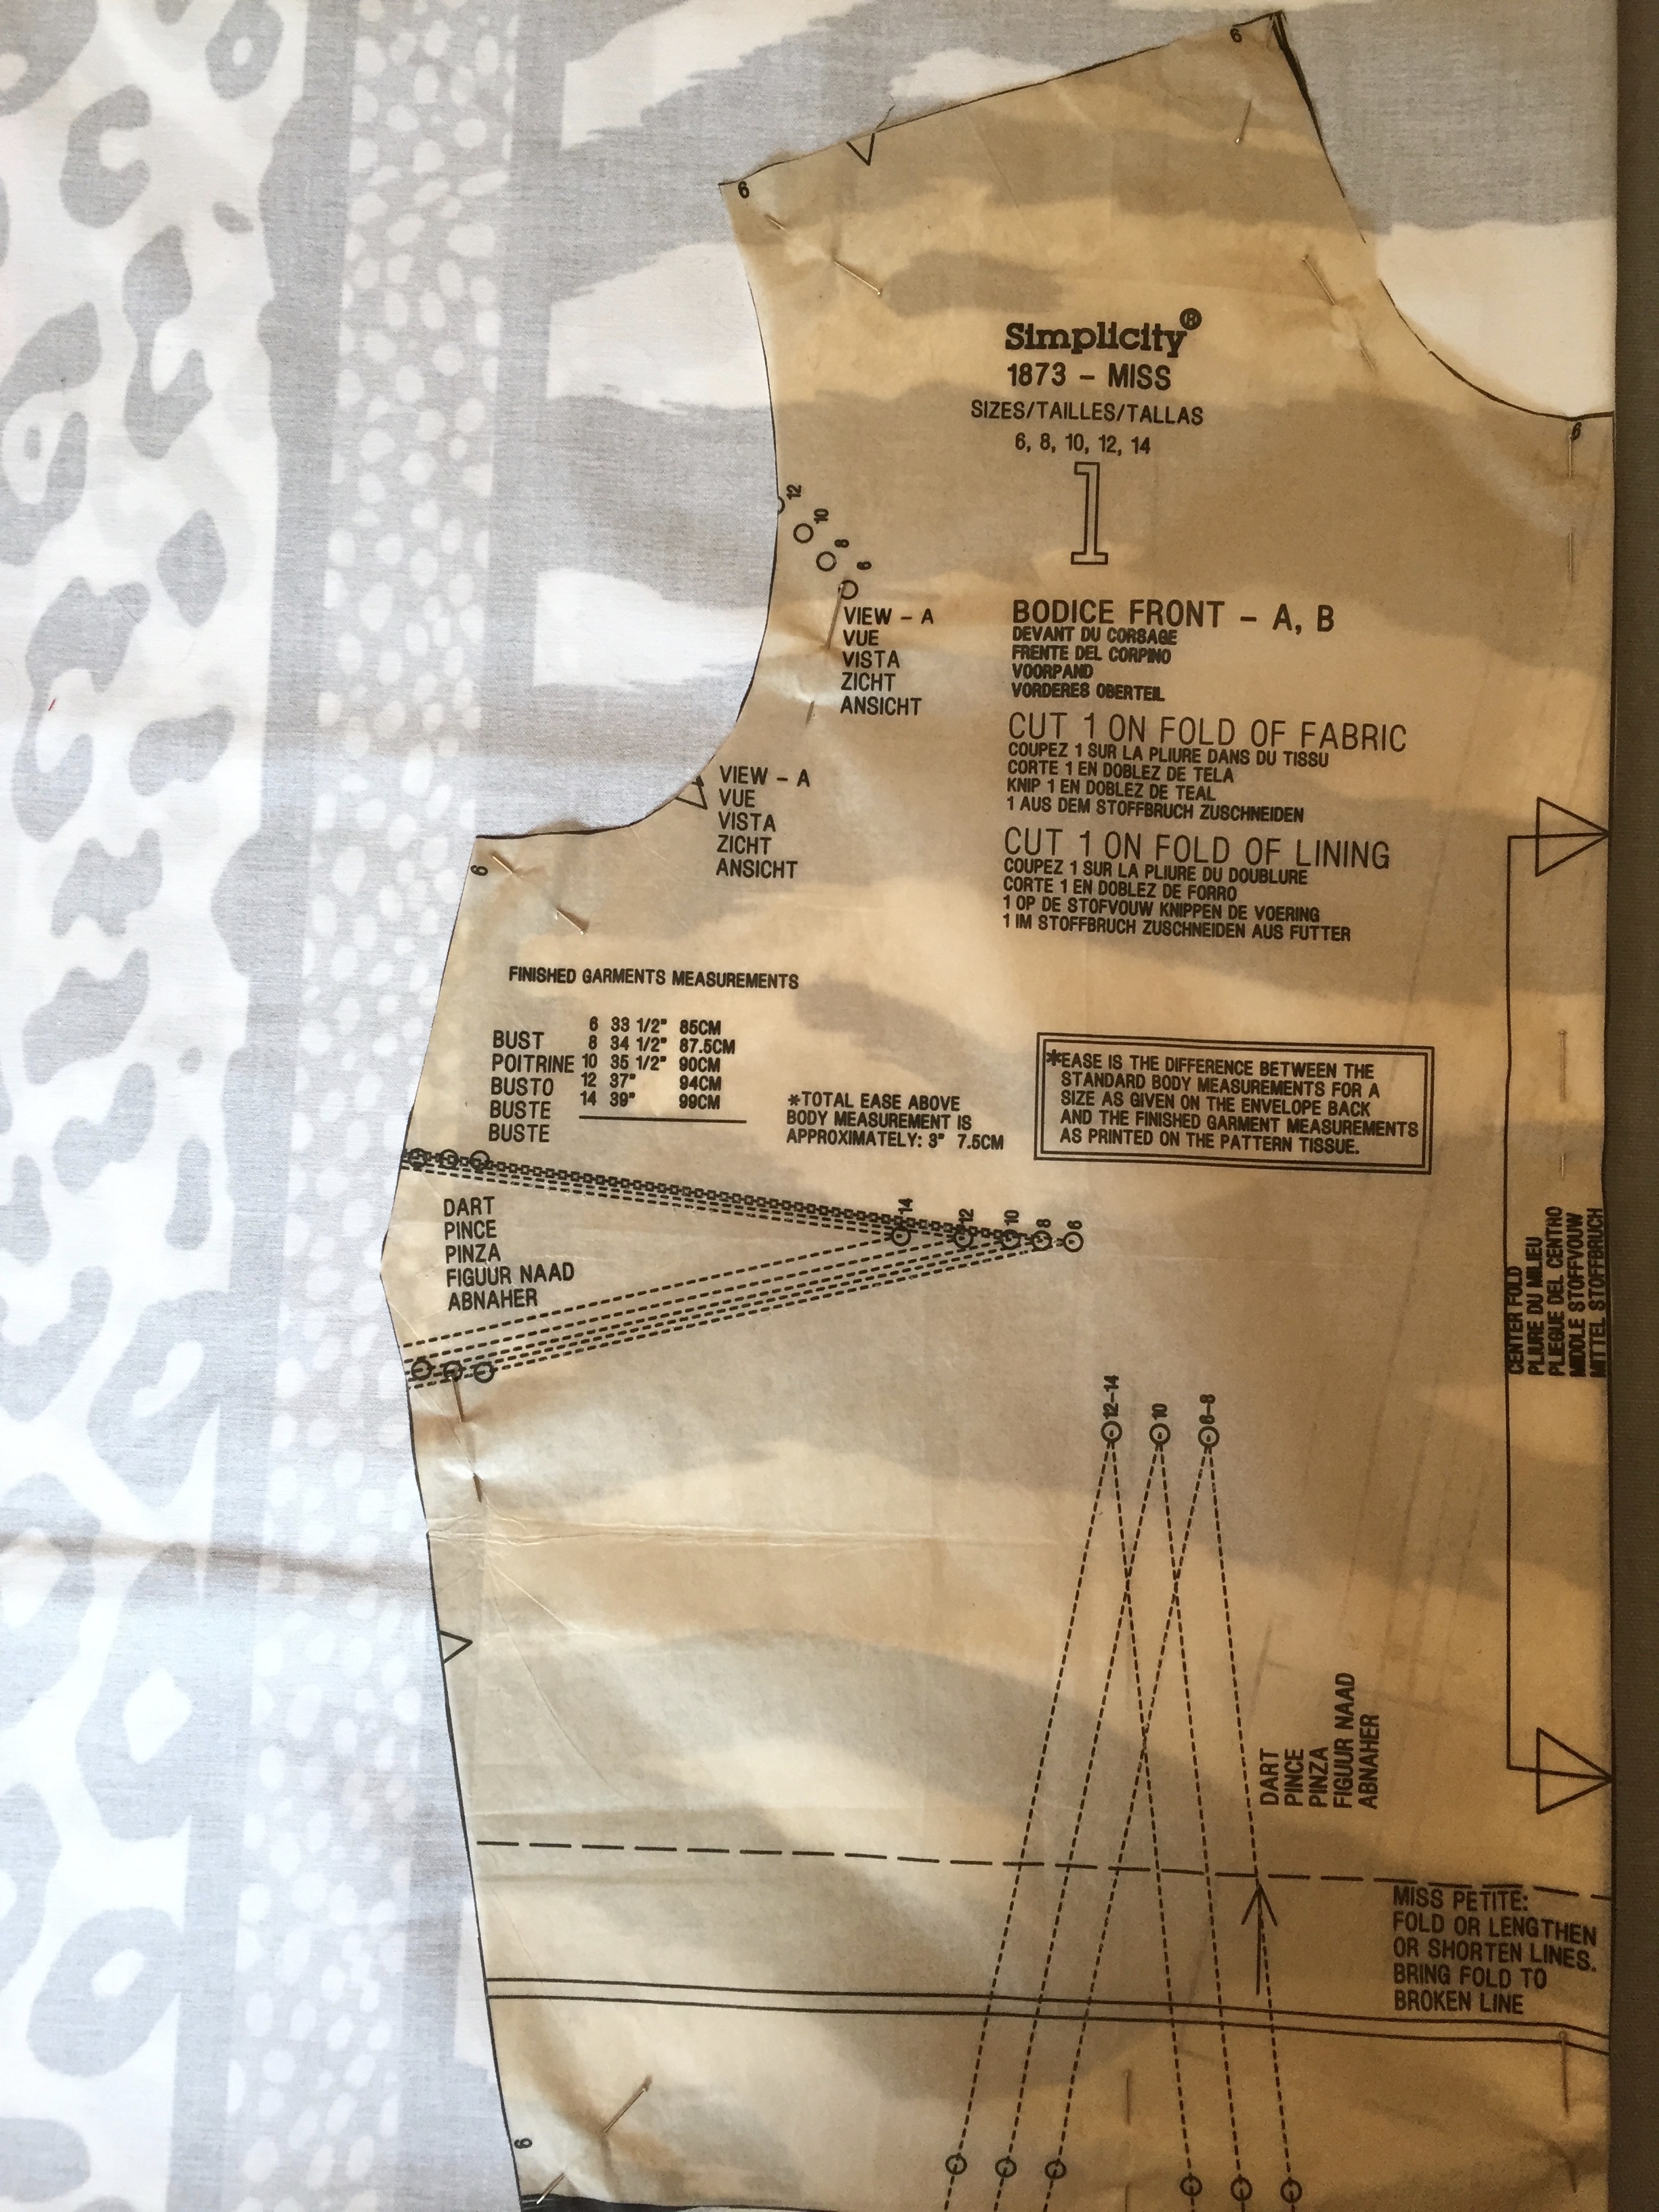
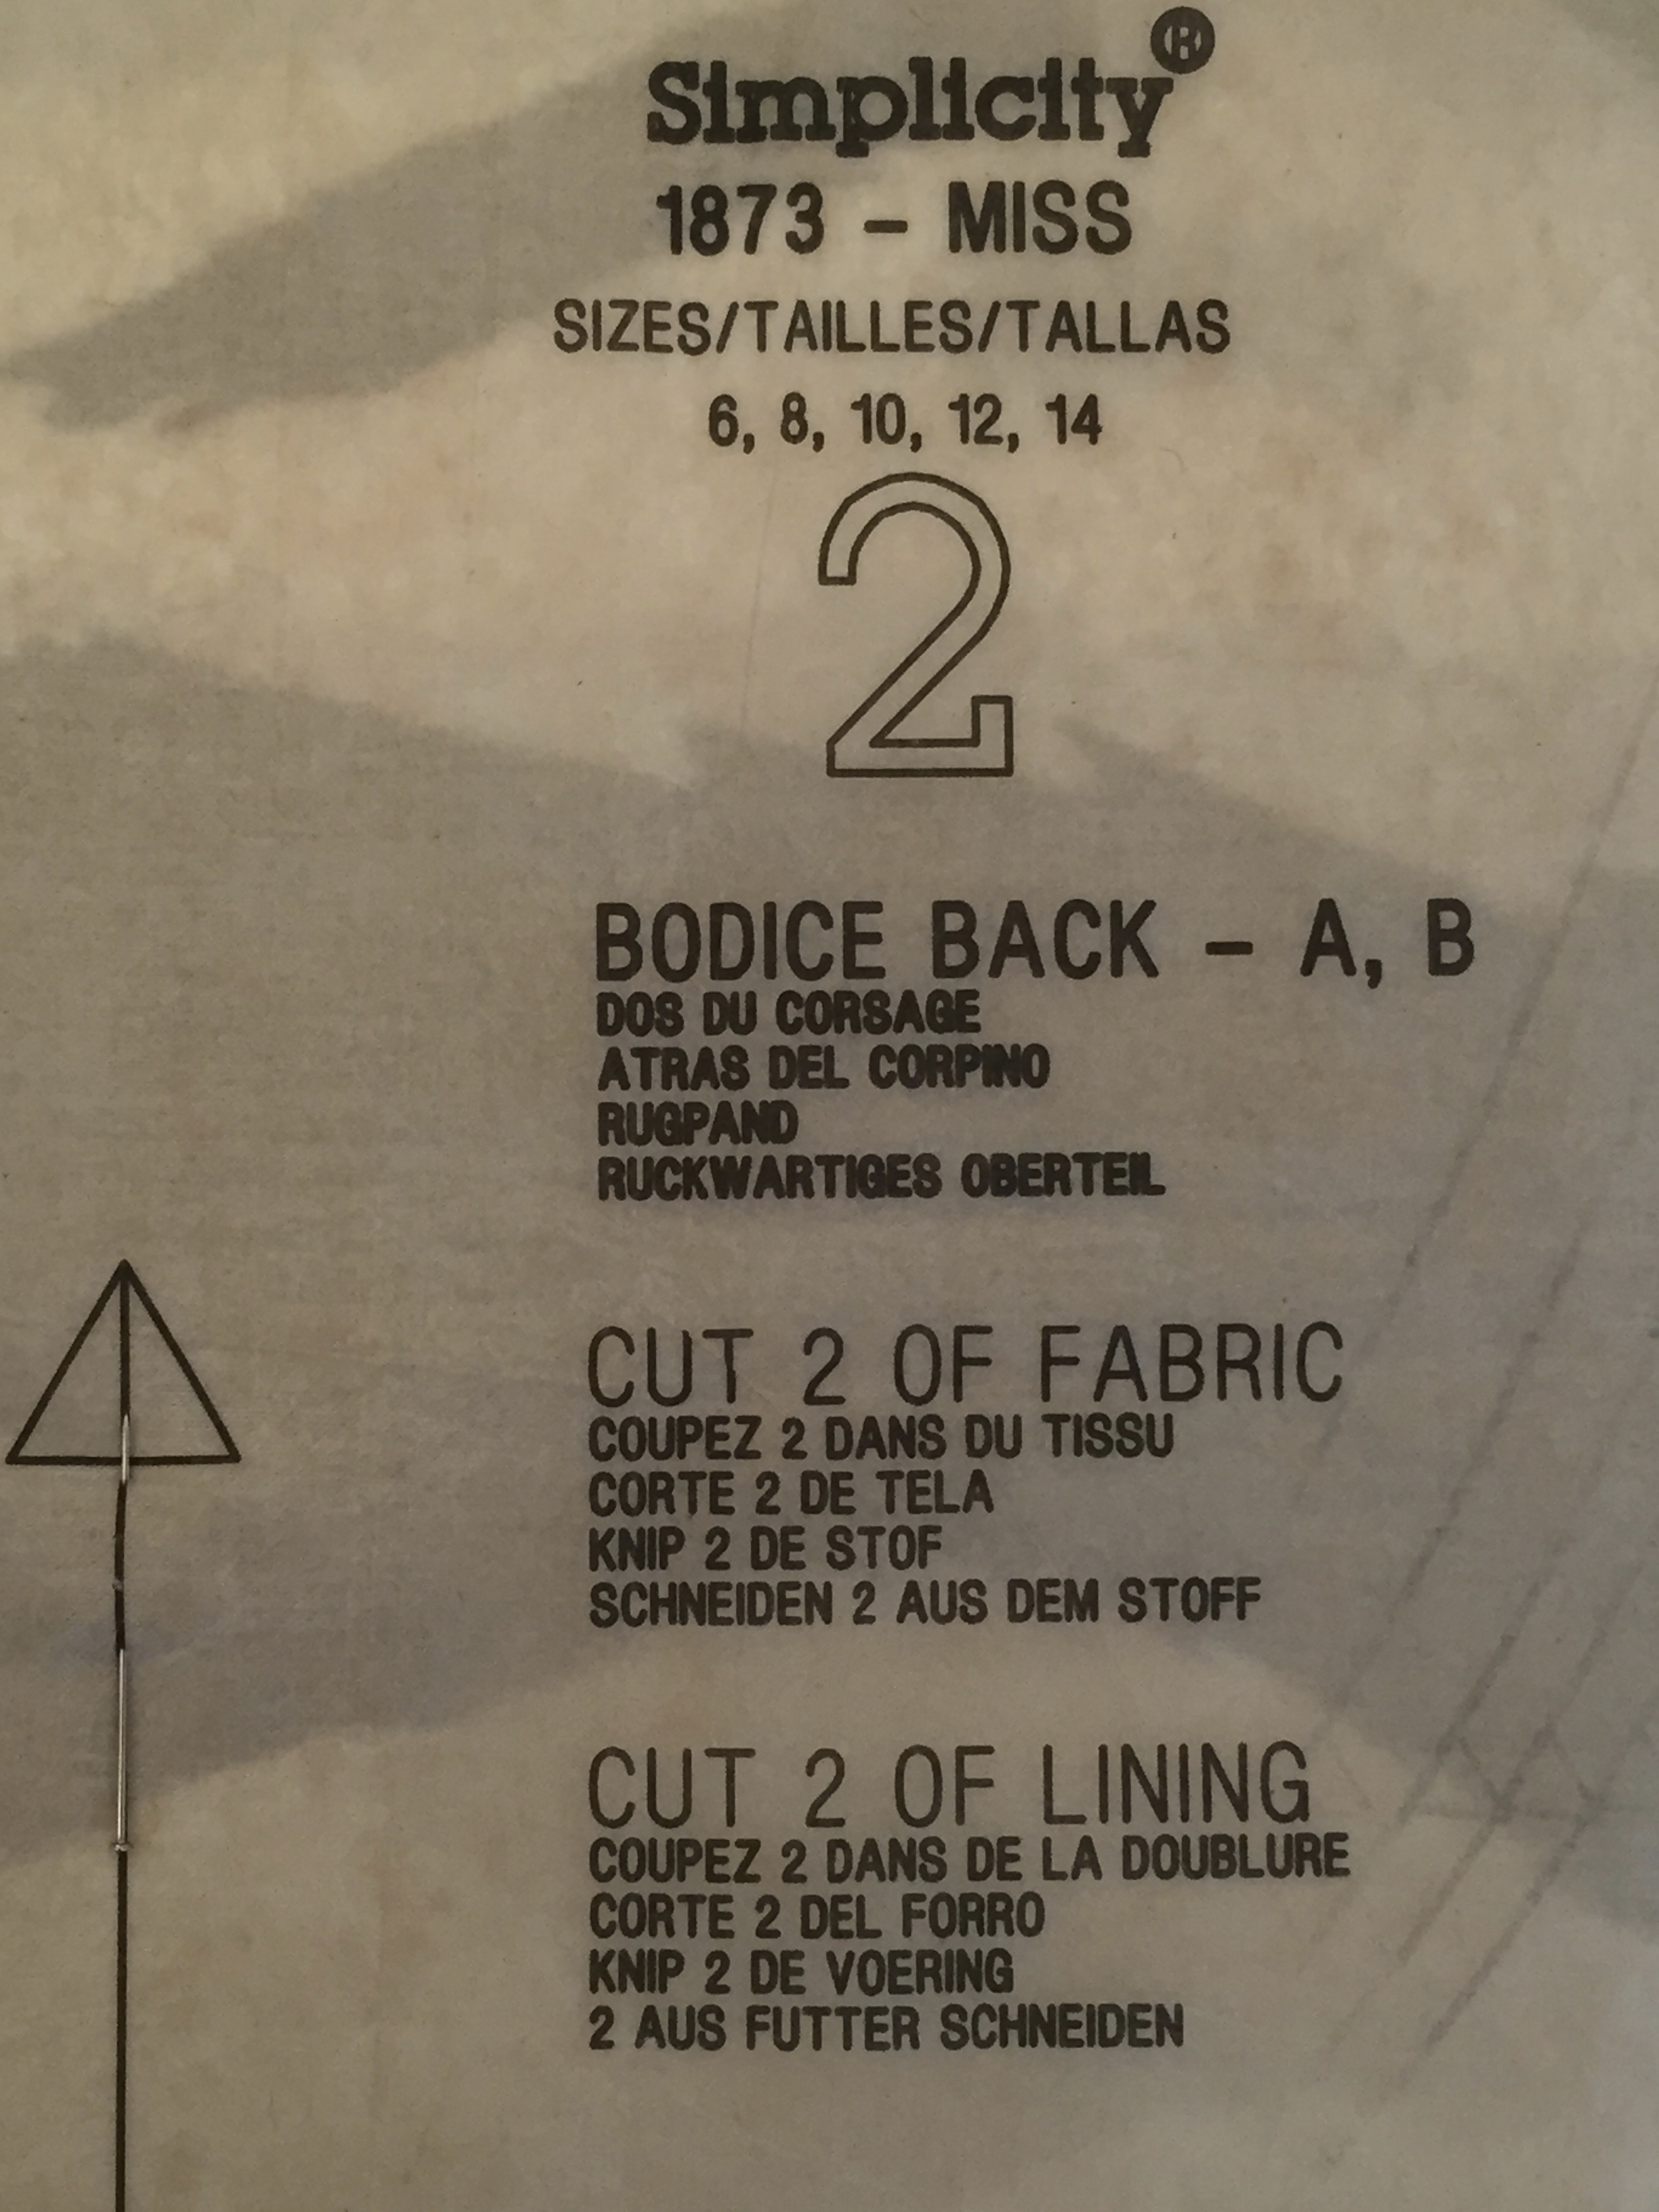
- You must also take note of any other instructions written on the pattern pieces especially how many you need of each and whether you need one in lining & interfacing too.
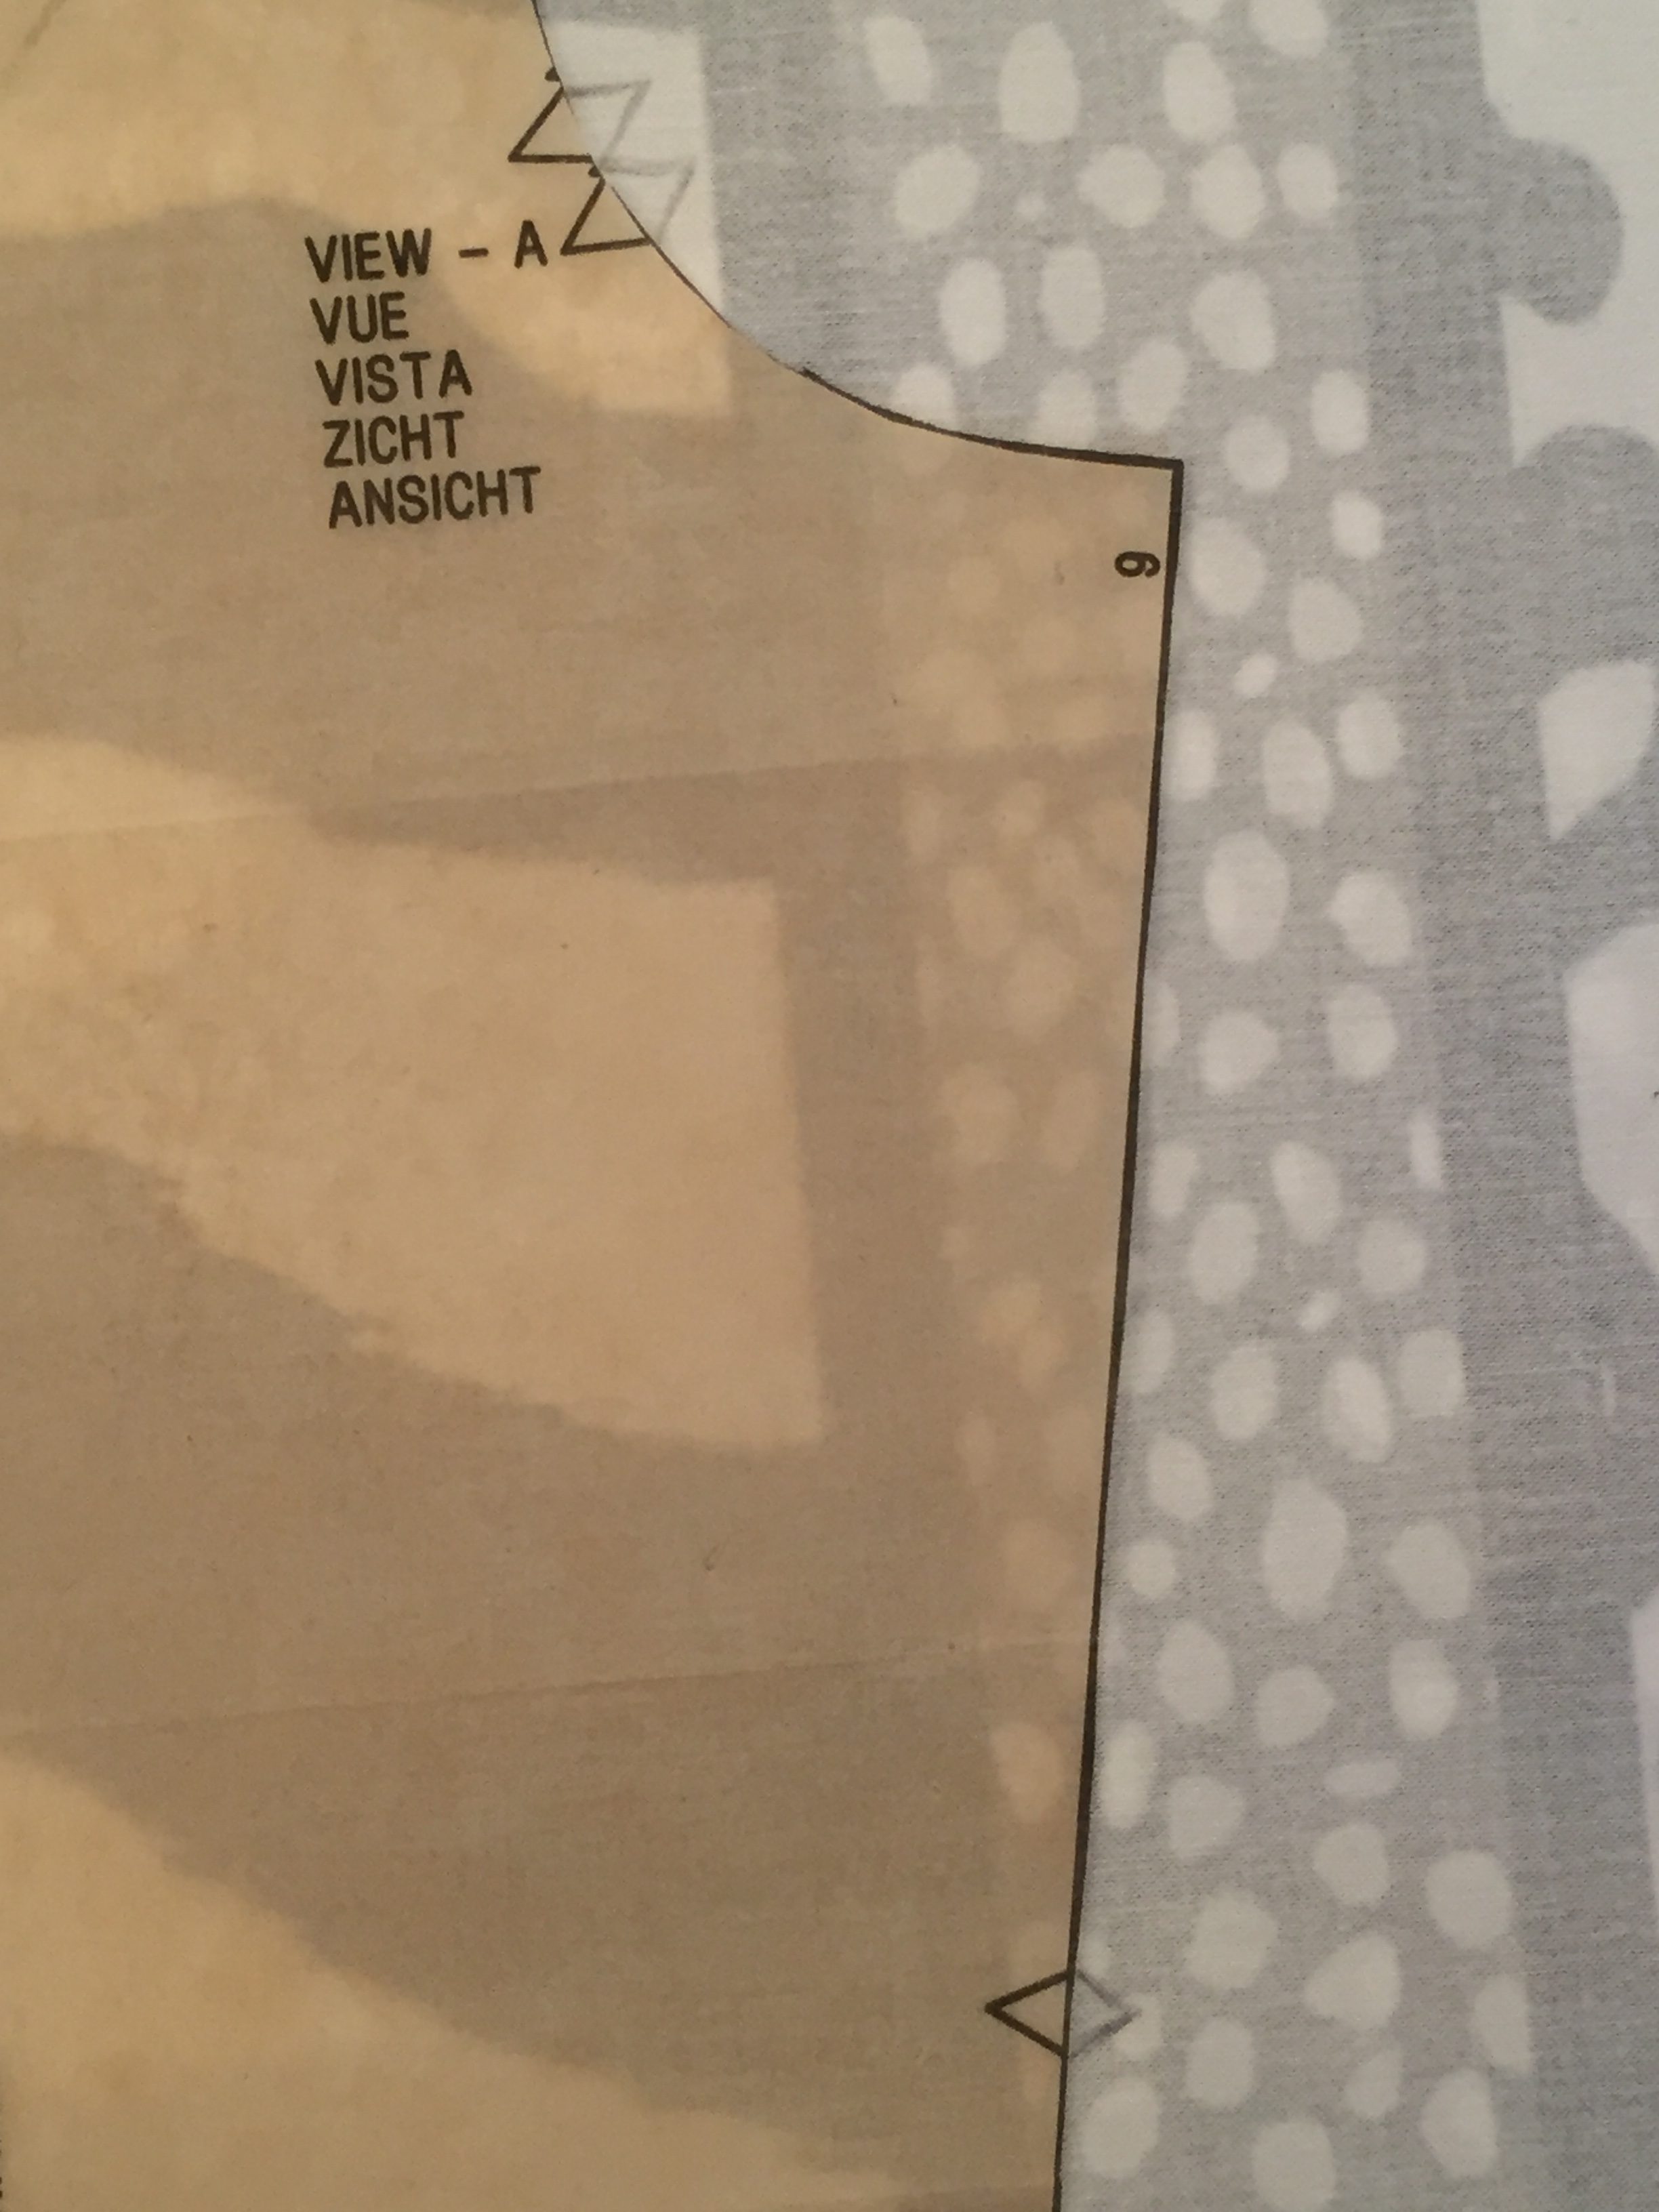
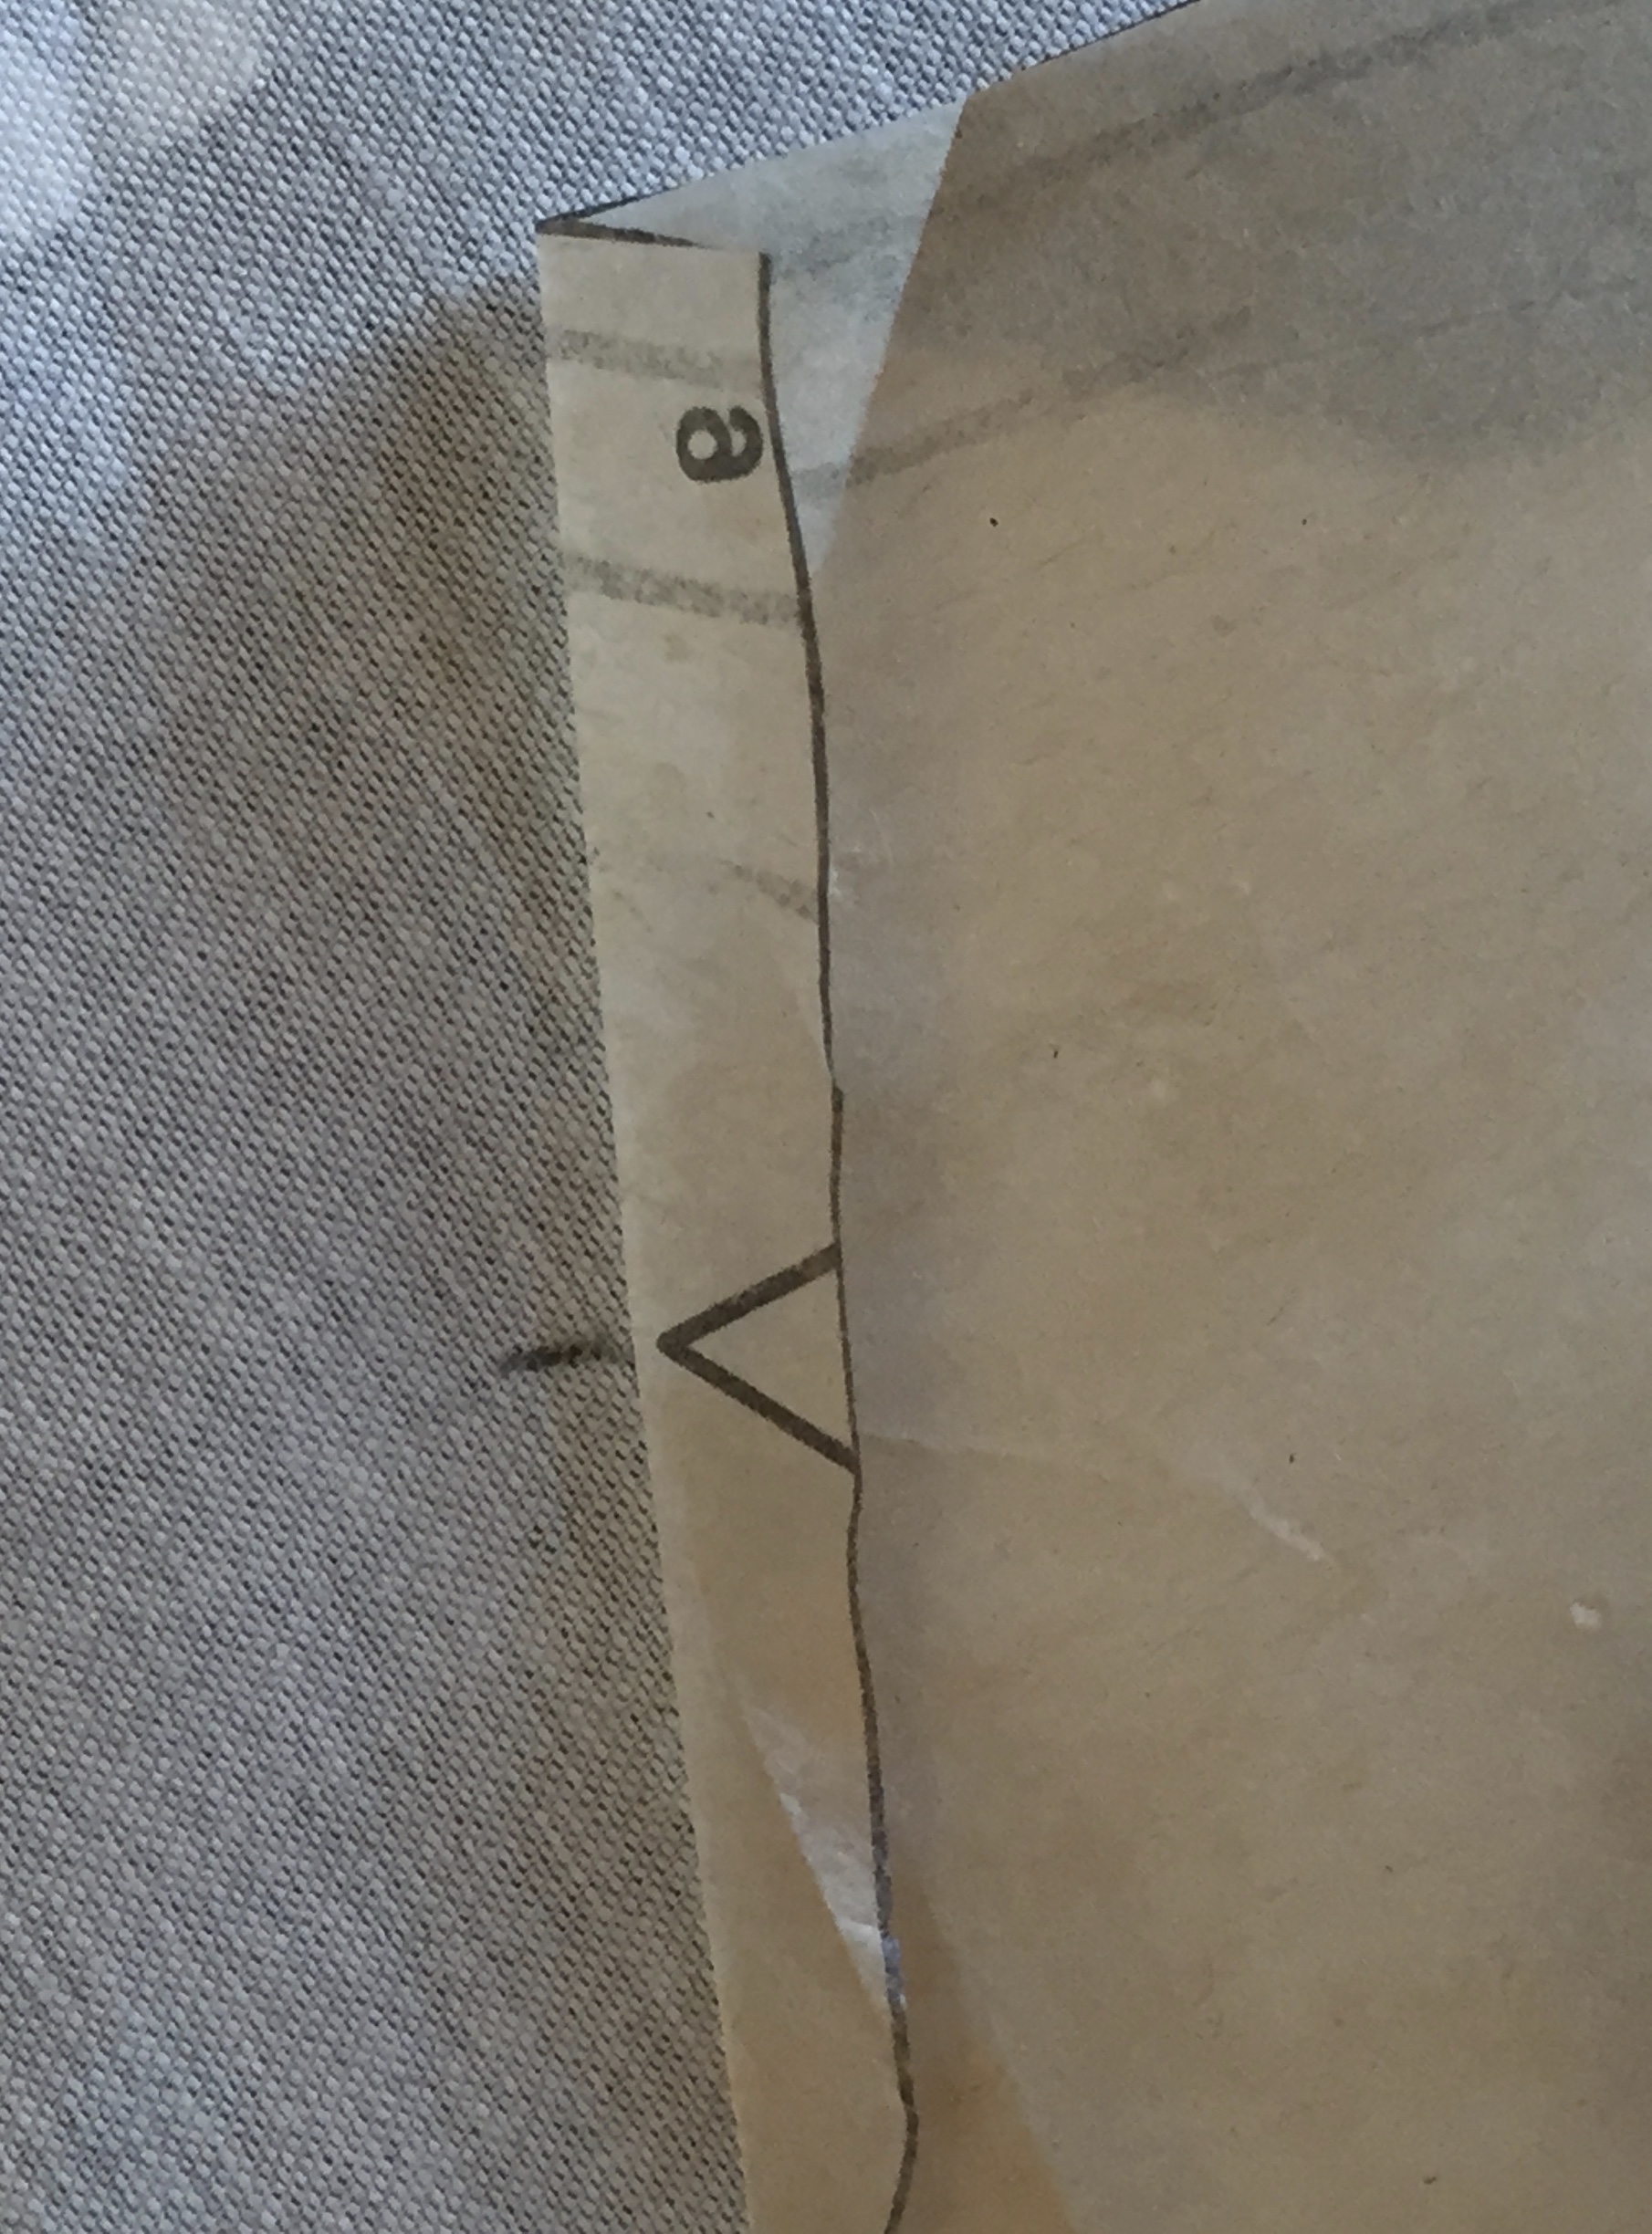
- All patterns have notches/balance marks on them. These marks match up on pattern pieces to be joined together so it’s difficult to sew the wrong pieces together or put in a sleeve back to front! You can cut triangles opposite the notches or mark the notch position underneath the pattern. I would never cut into the seam allowance.
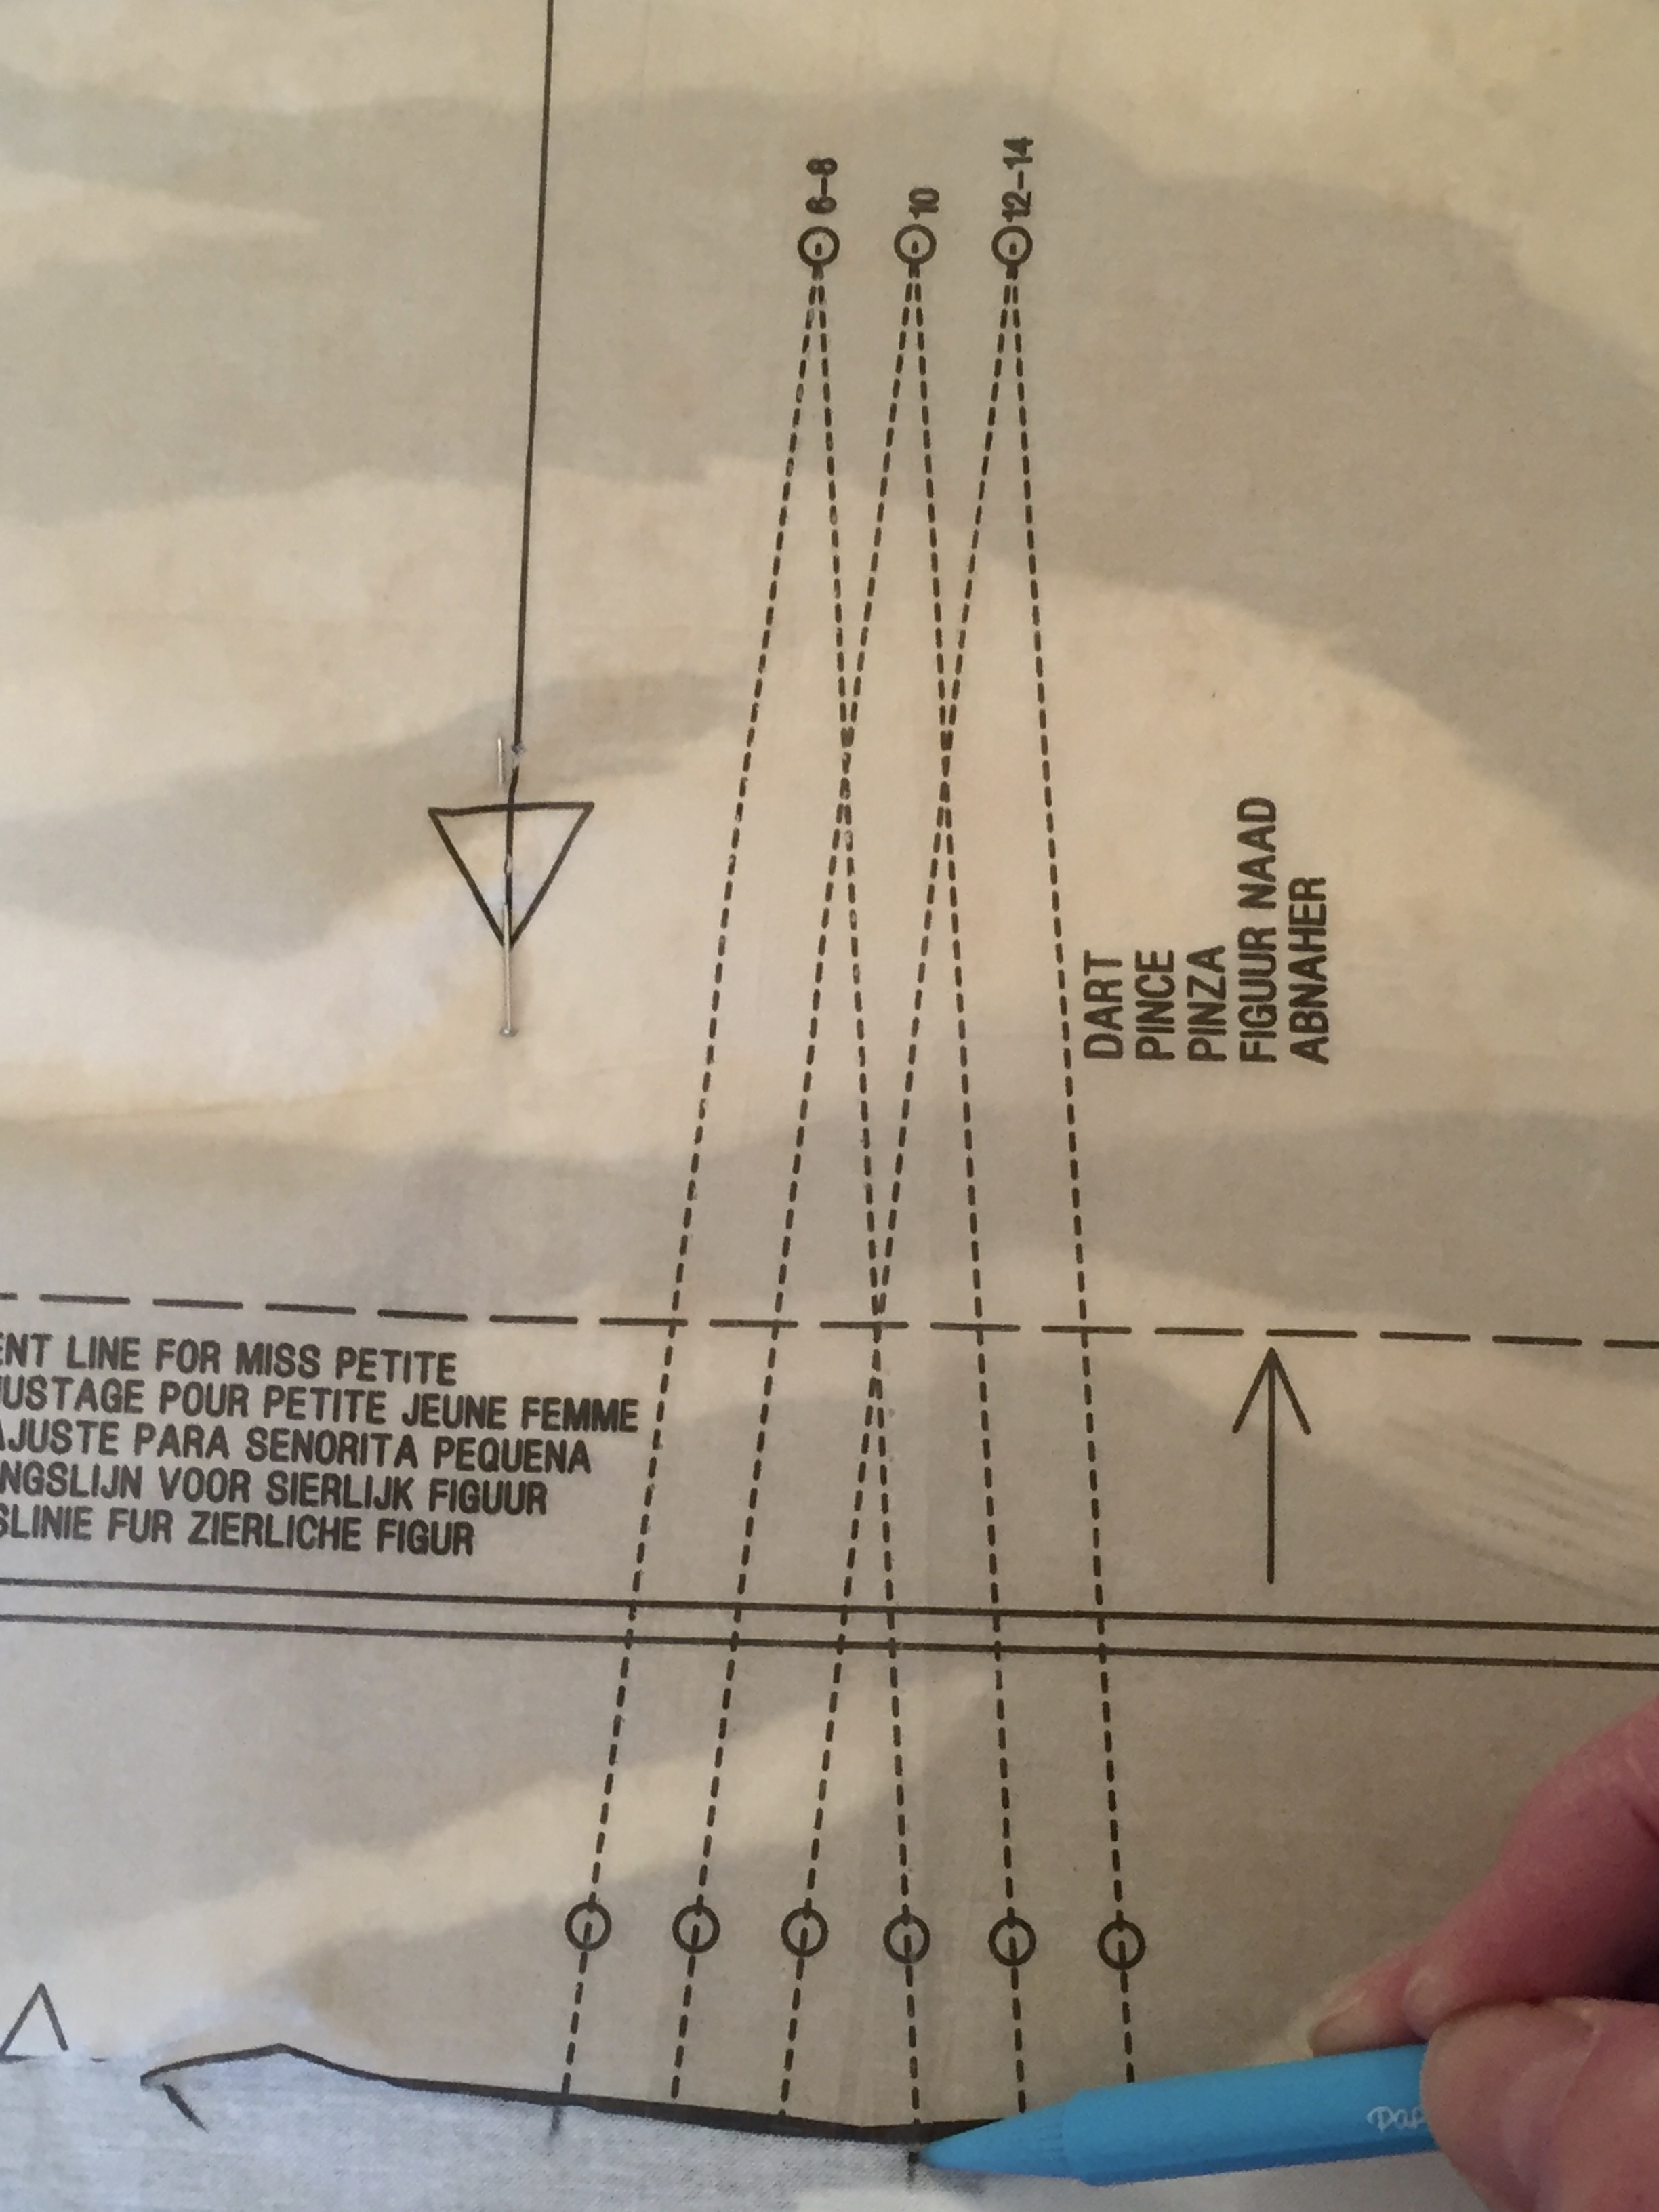
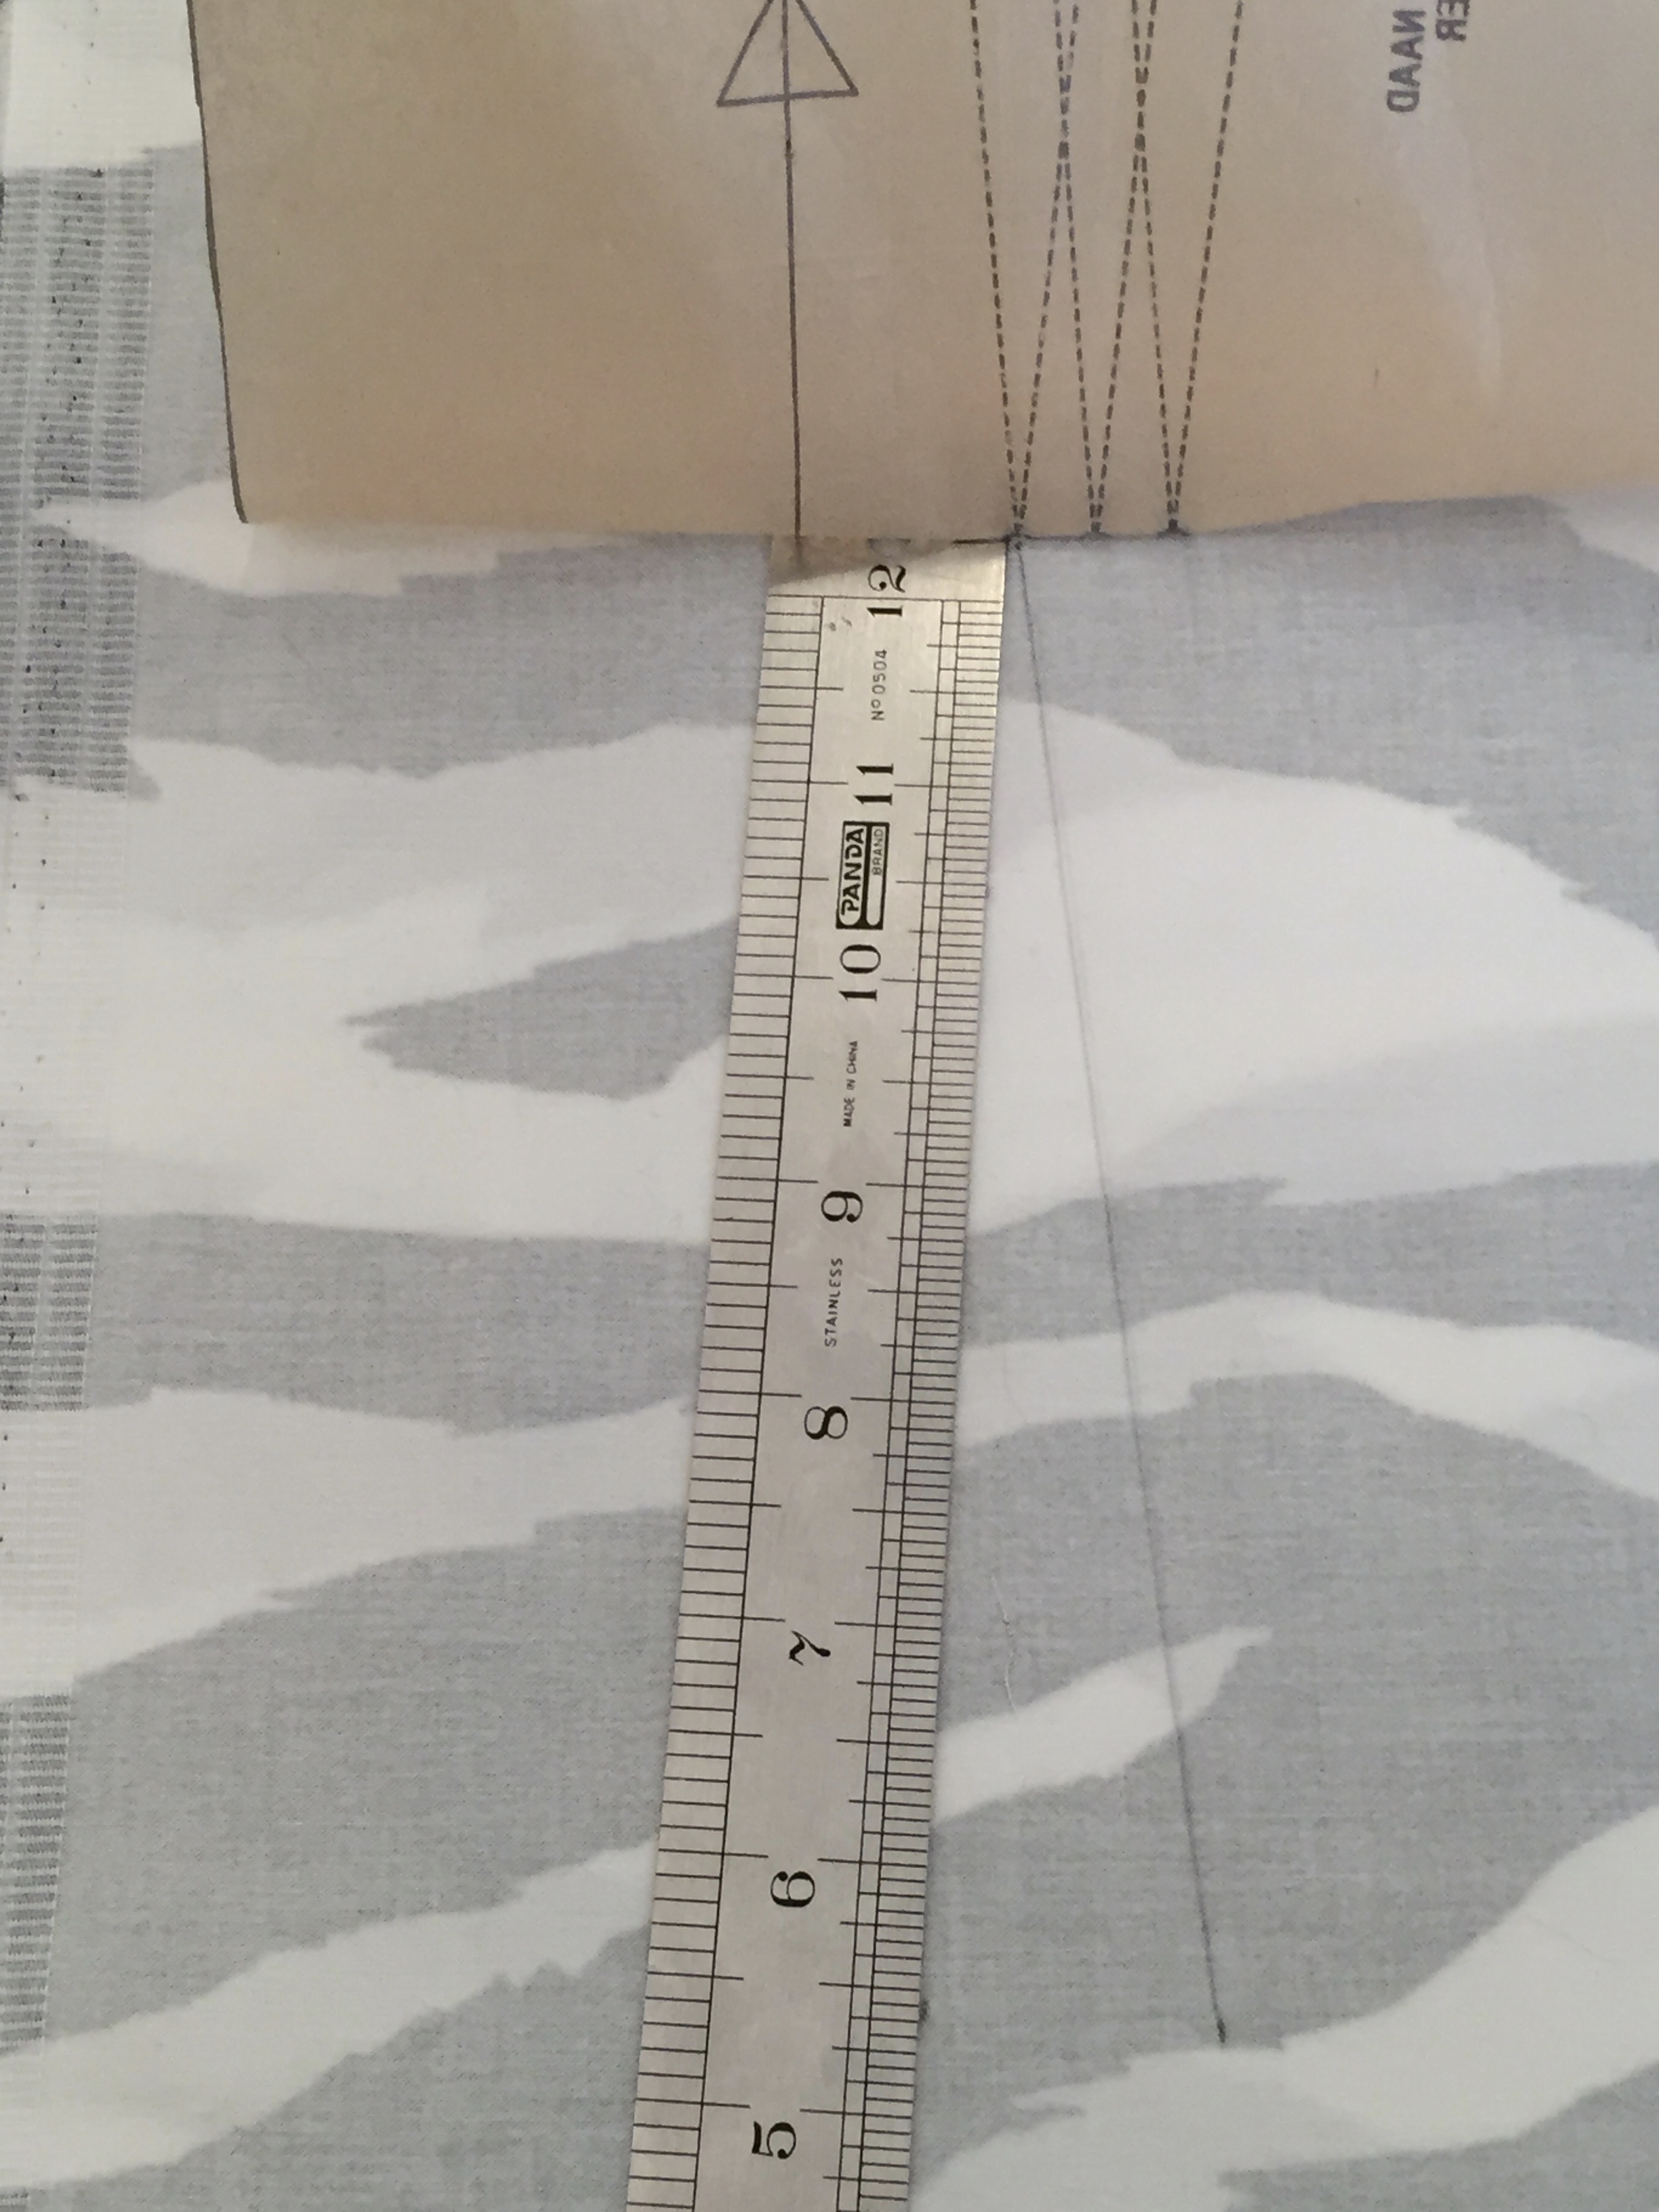
- A lot of patterns have markings that will need to be transferred onto the fabric. These markings could be darts, pleats, pocket placement, zip or button holes etc. Depending on which side you’ll be sewing, some need to be marked on the wrong side of the fabric (darts/zip) and some need to go on the right side of the fabric (pleats/pocket placement/button holes) You can transfer these markings with a pencil, tailors chalk, thread or a special dressmaking transfer/tracing paper. Using a pencil or chalk is the quickest way as long as there aren’t too many marks! Chalk and thread come out if you are marking on the right side of the fabric.
Cutting Tips…
- When cutting out the fabric pieces, if you are right handed, cut with the pattern on your right so you can hold what are cutting off with your left hand. If you are left-handed do the opposite. Keep a bit of tension on the fabric you are holding but be careful not to pull it away from the pattern. Look at the ends of your scissors when you cut and try to keep the blade upright. To avoid jagged edges, stay in contact with the fabric as you open the scissors for the next cut by pushing them forward as you open.
- Keep the pattern pieces pinned to the fabric until you need them so you don’t forget what they are!
5. Sewing the garment together
- Find the step-by-step instructions on how to put your garment together. They are mostly found as folded paper sheets. They will be numbered and accompanied by diagrams.
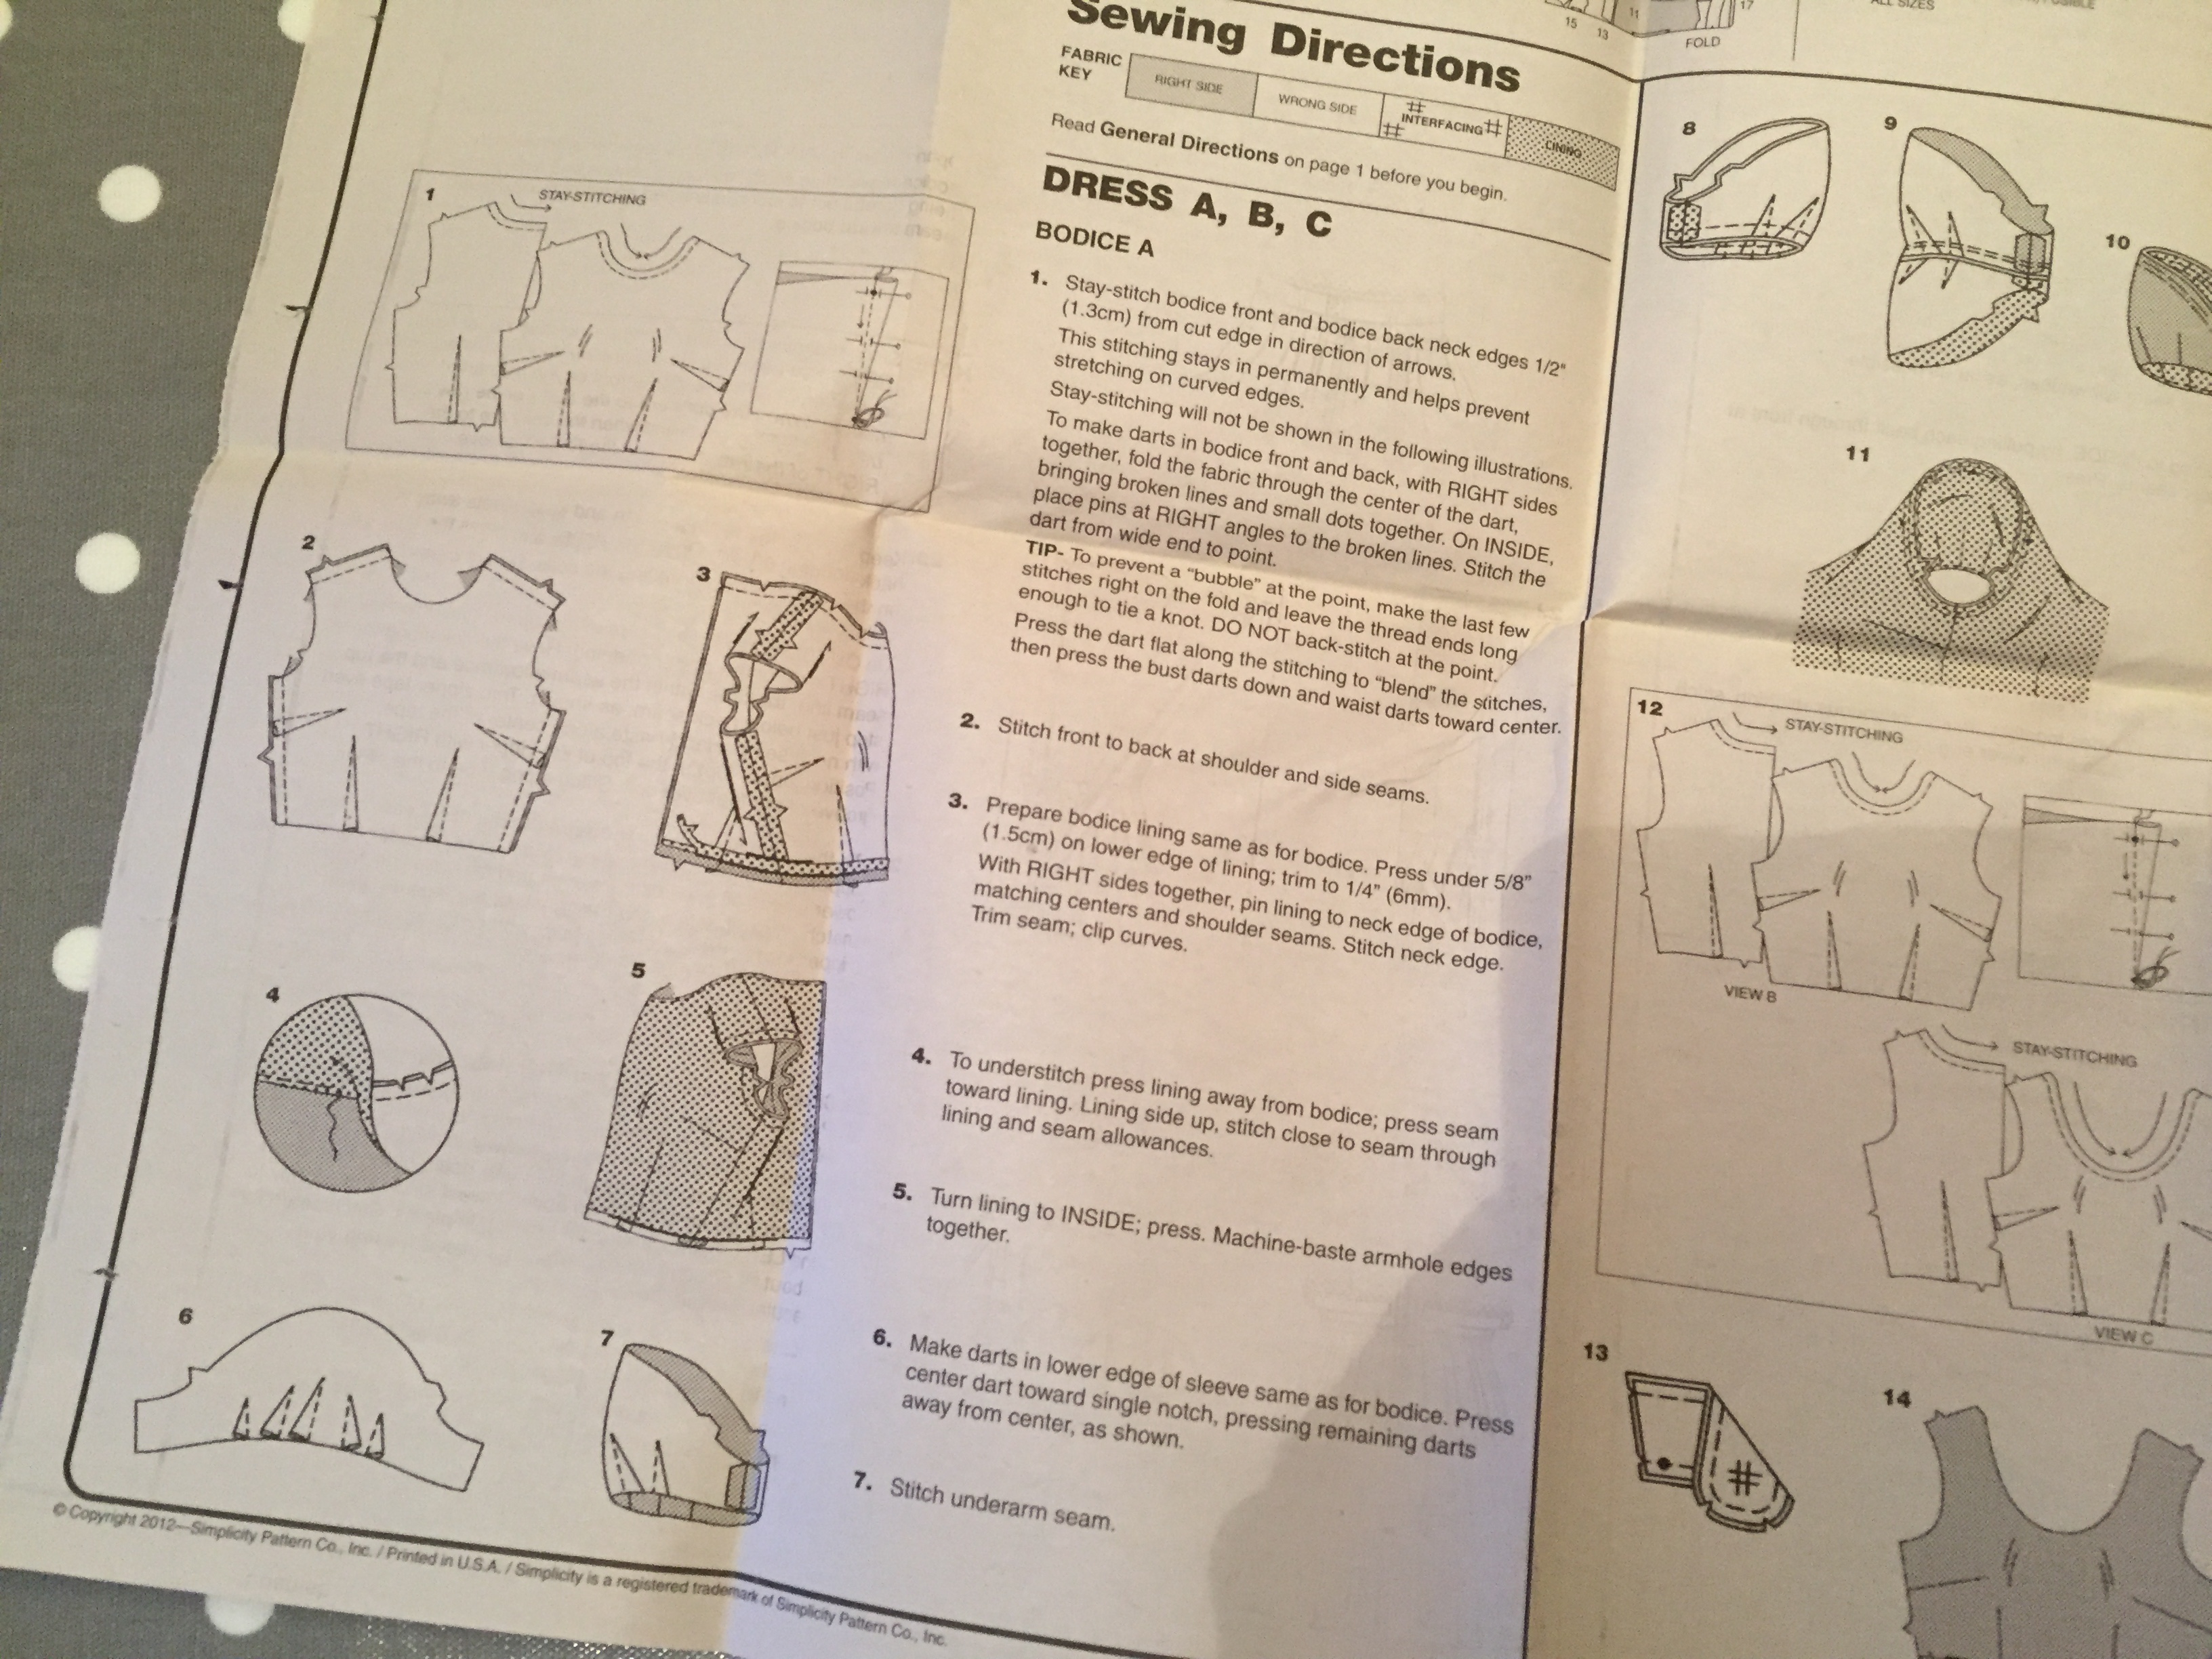
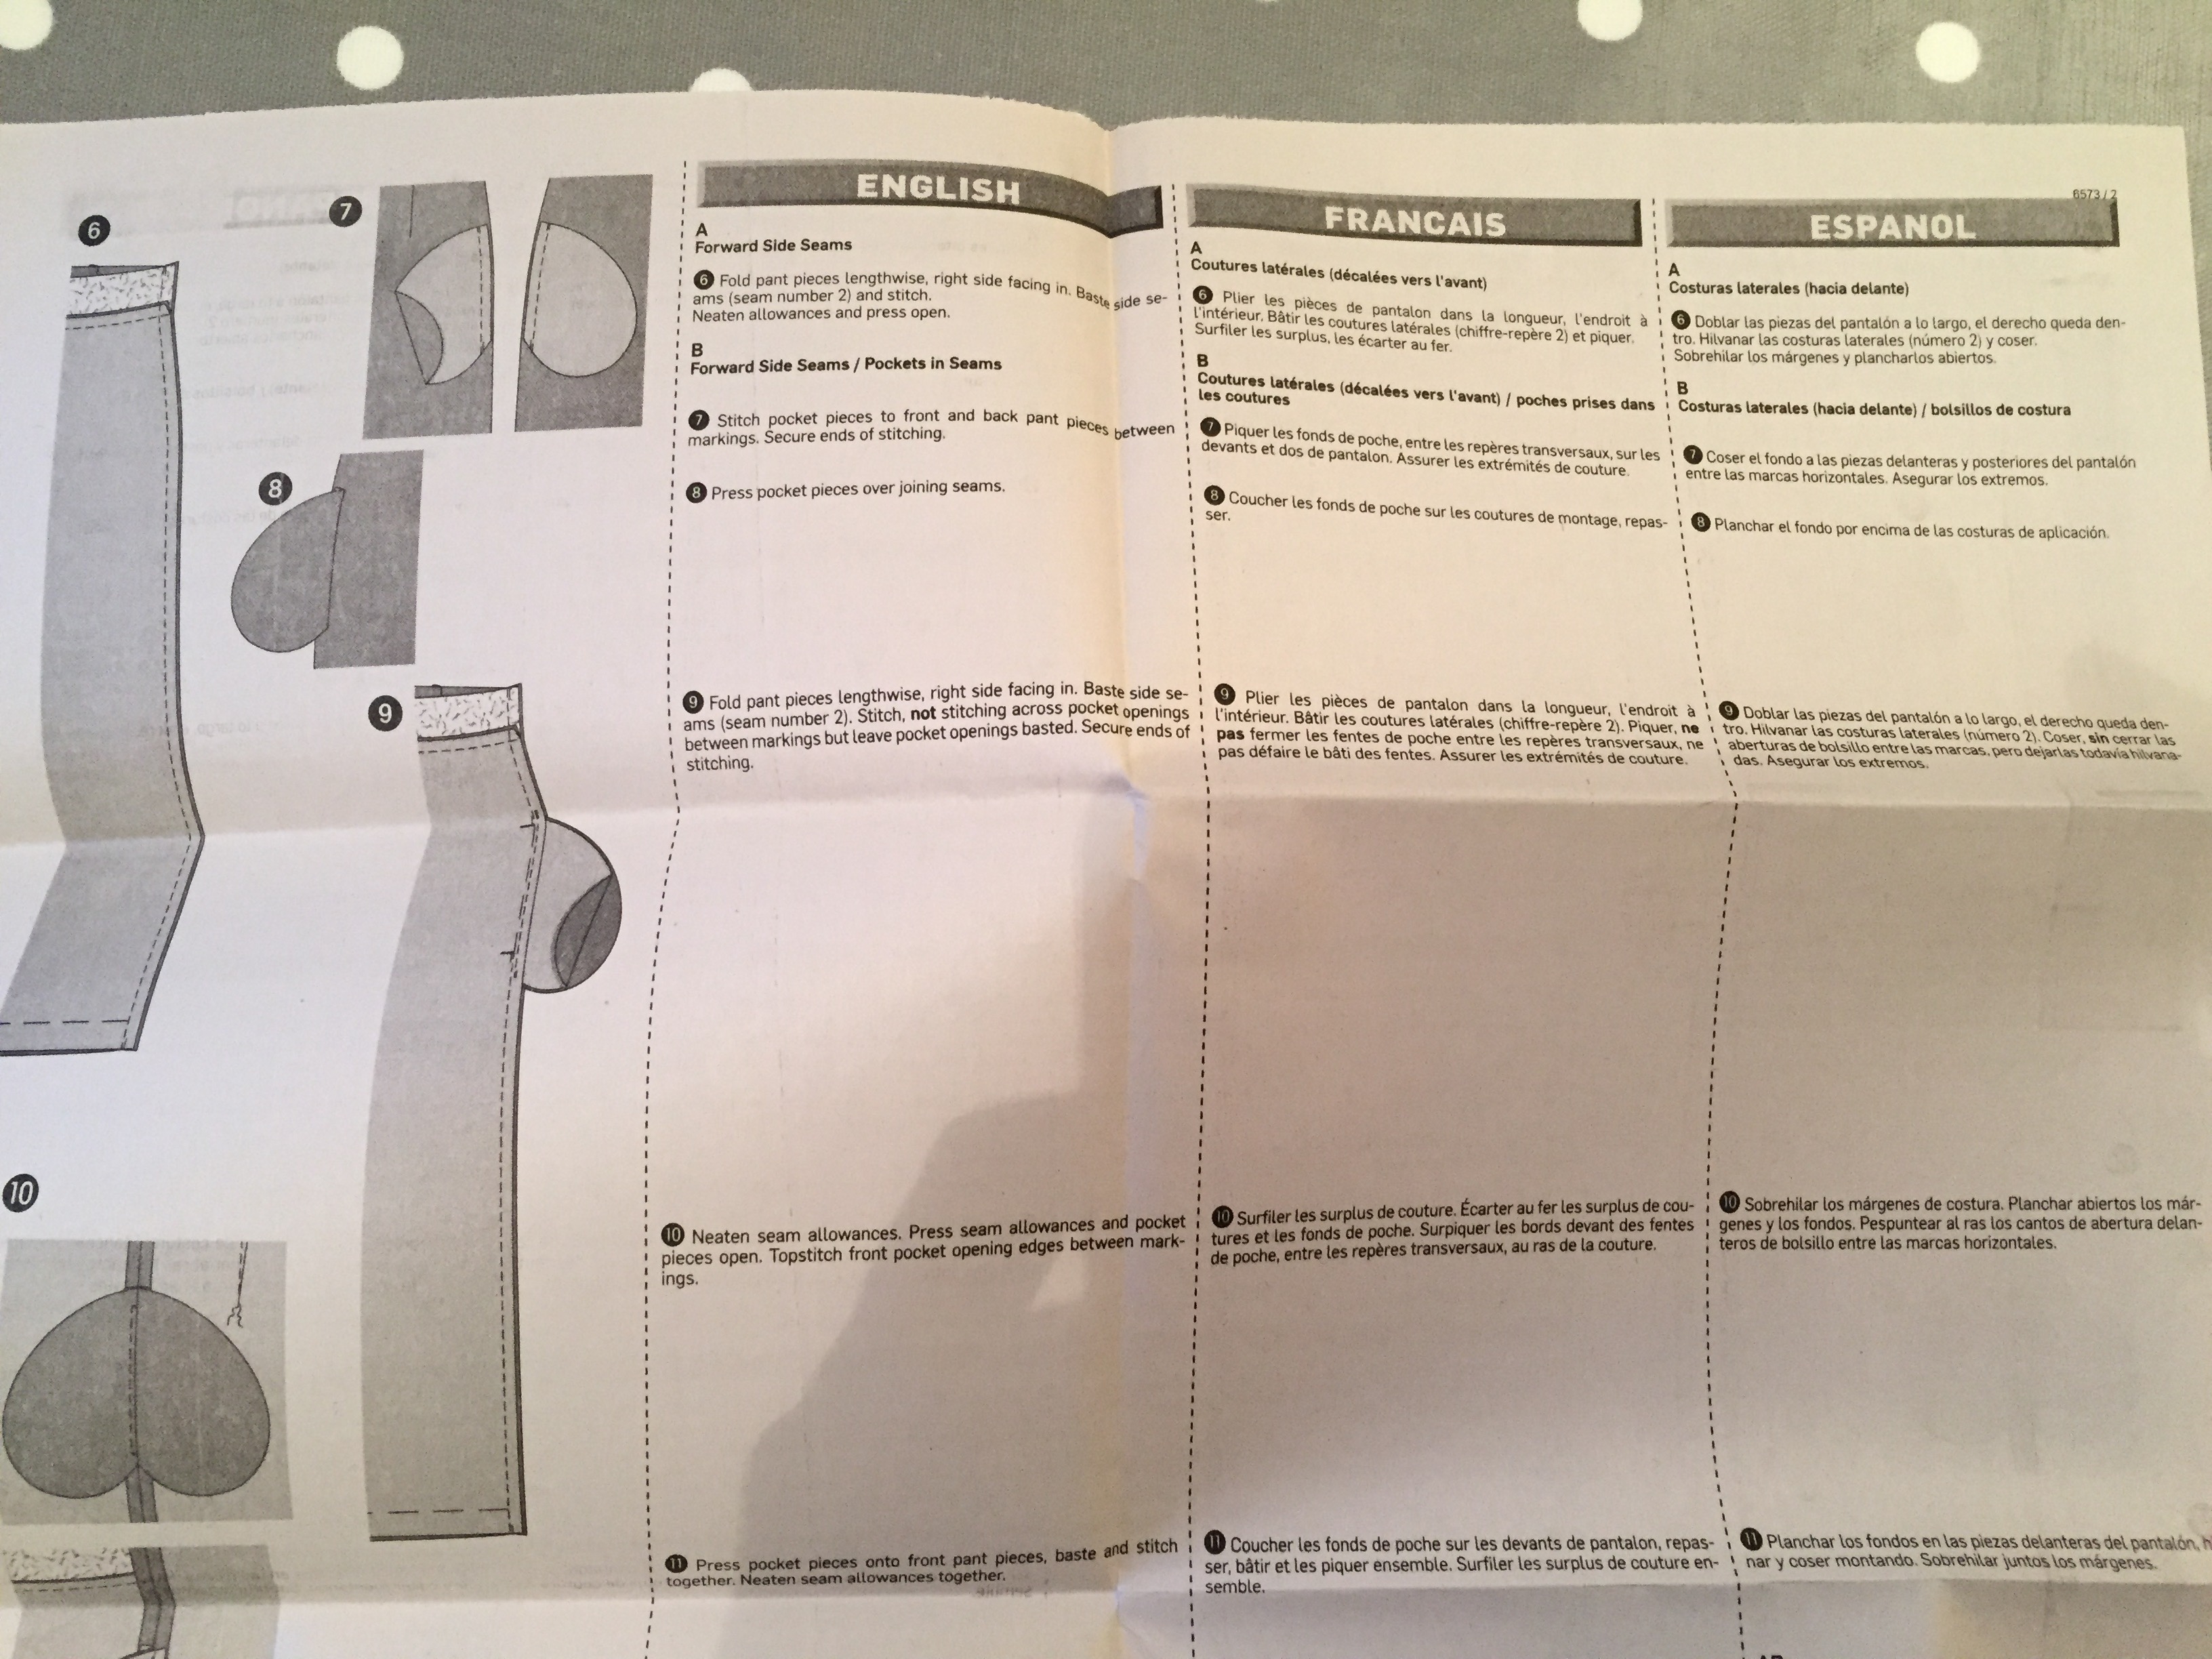
Simplicity Burda
- These instructions may jump from one style to another, which can be a bit confusing. I find it helps to somehow highlight all the information relating to your style. You will be relieved to find that many of the instructions are not relevant to you.
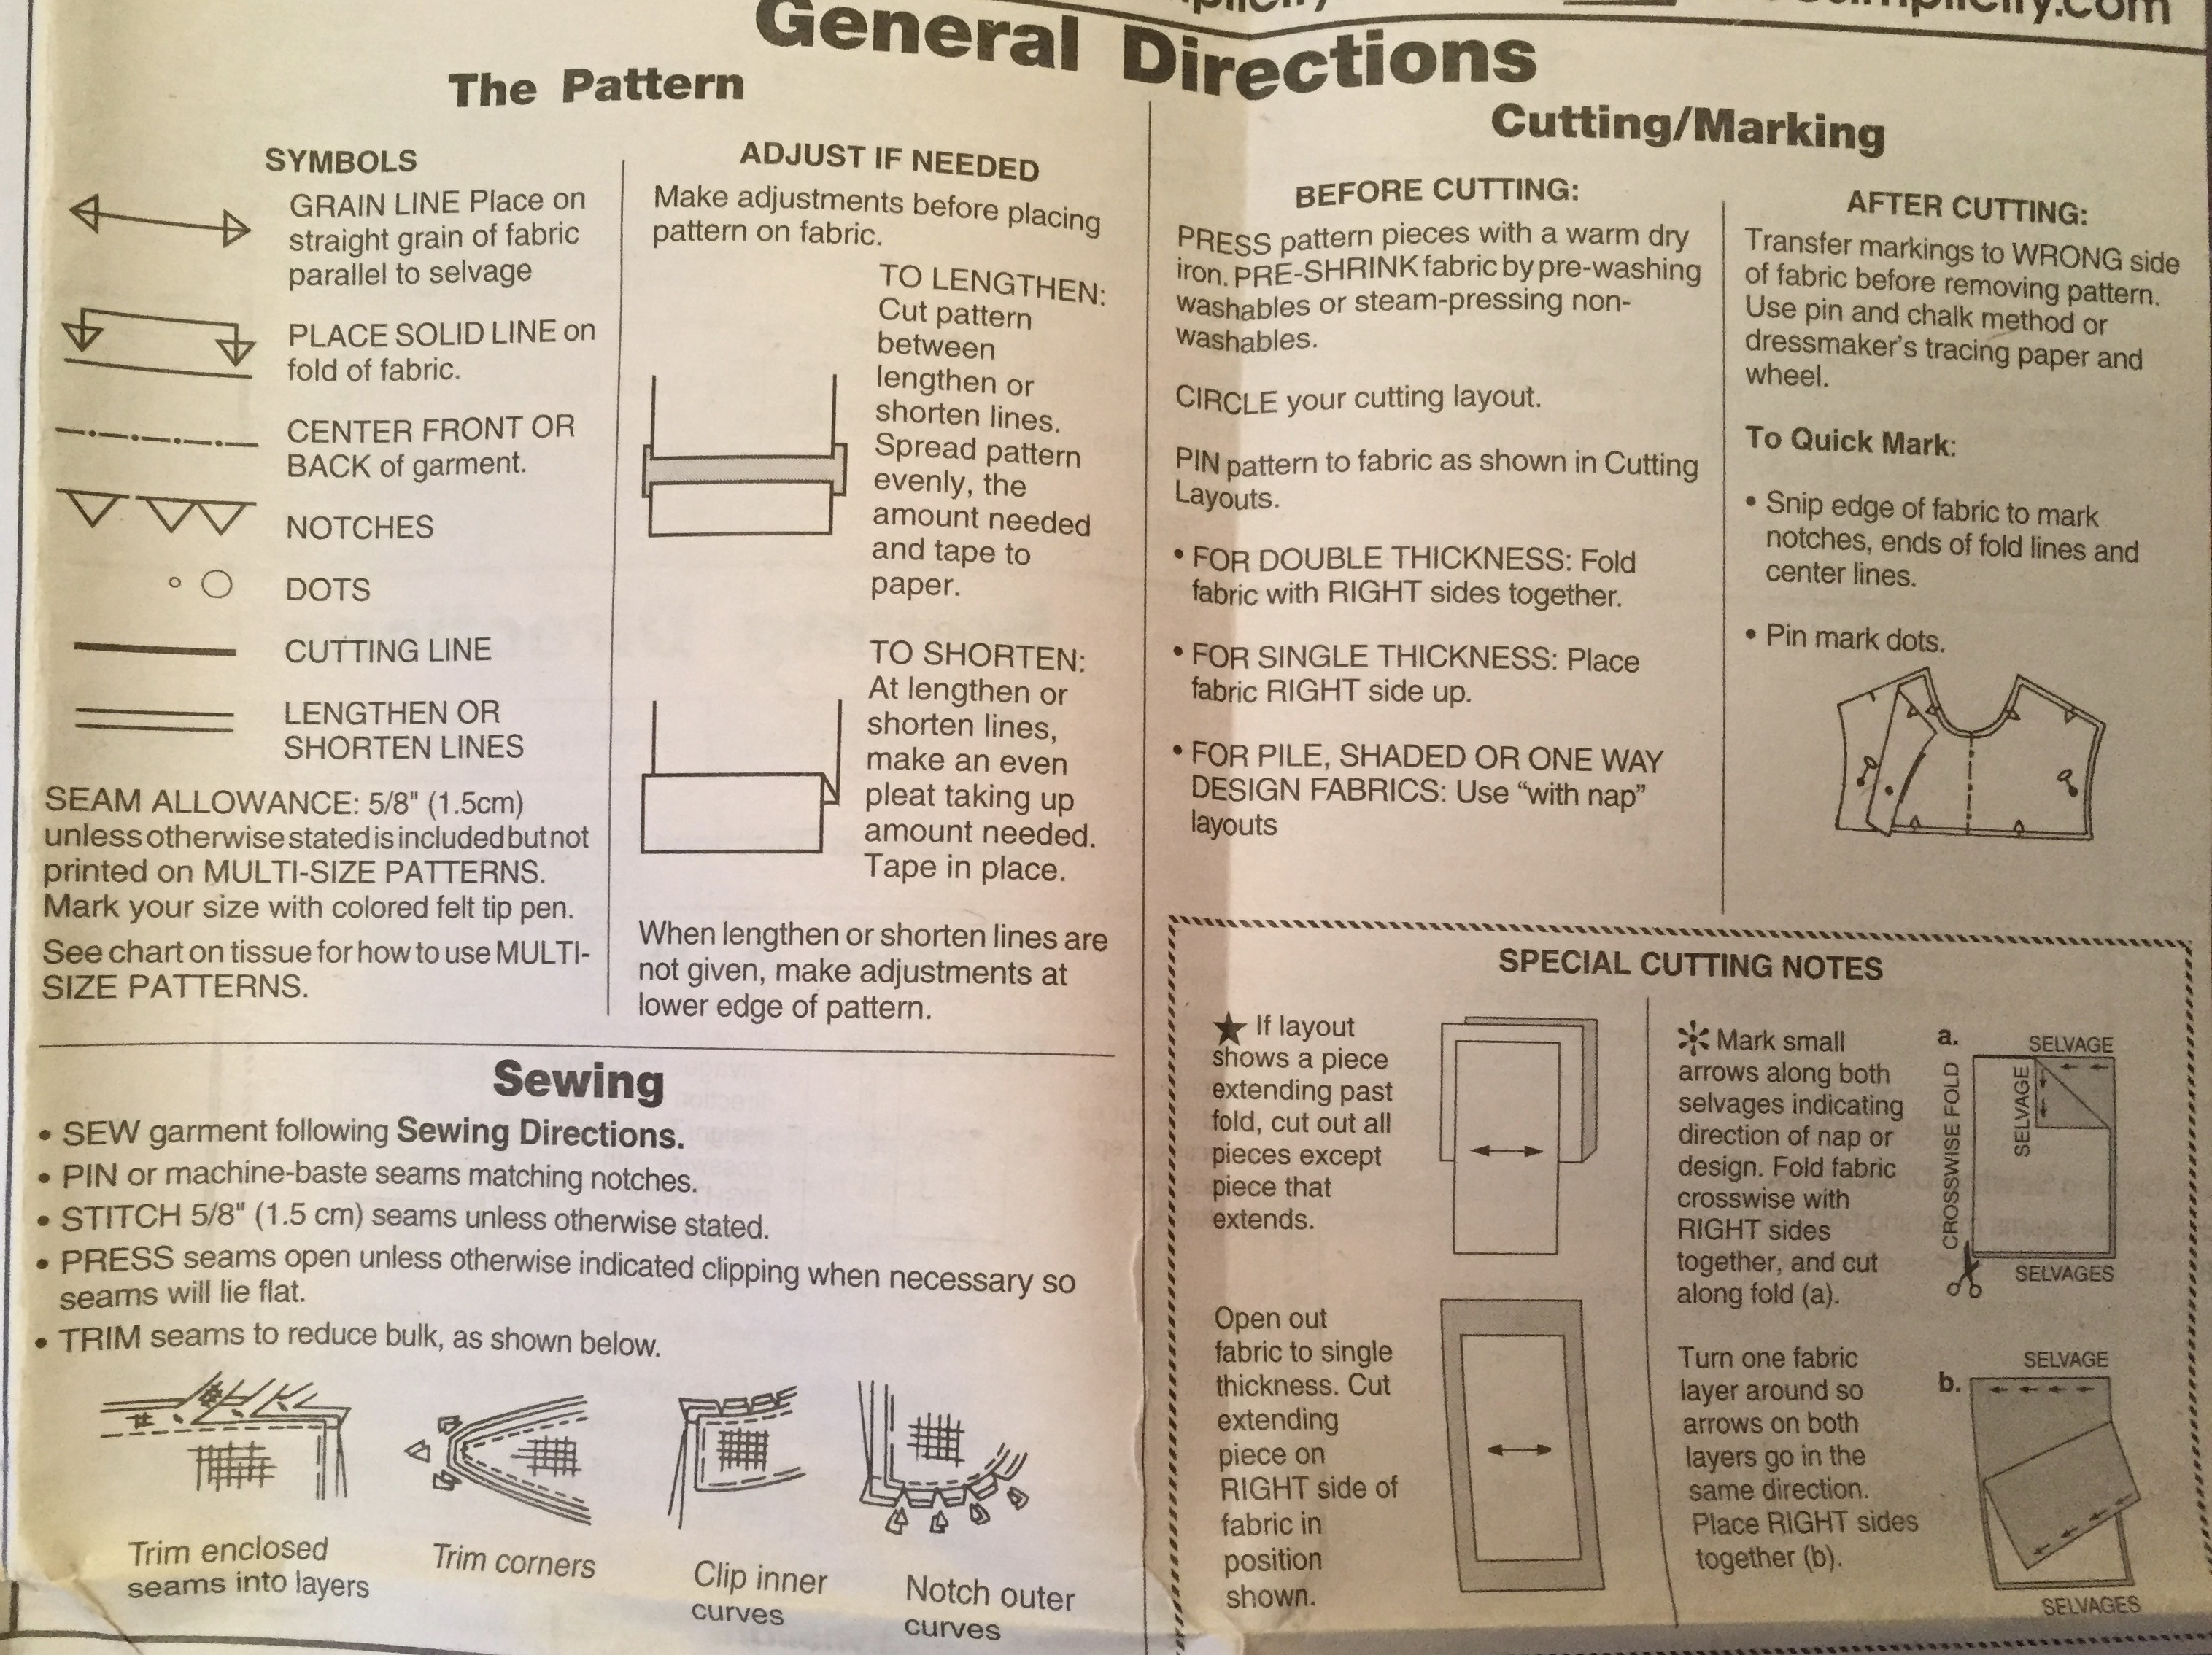
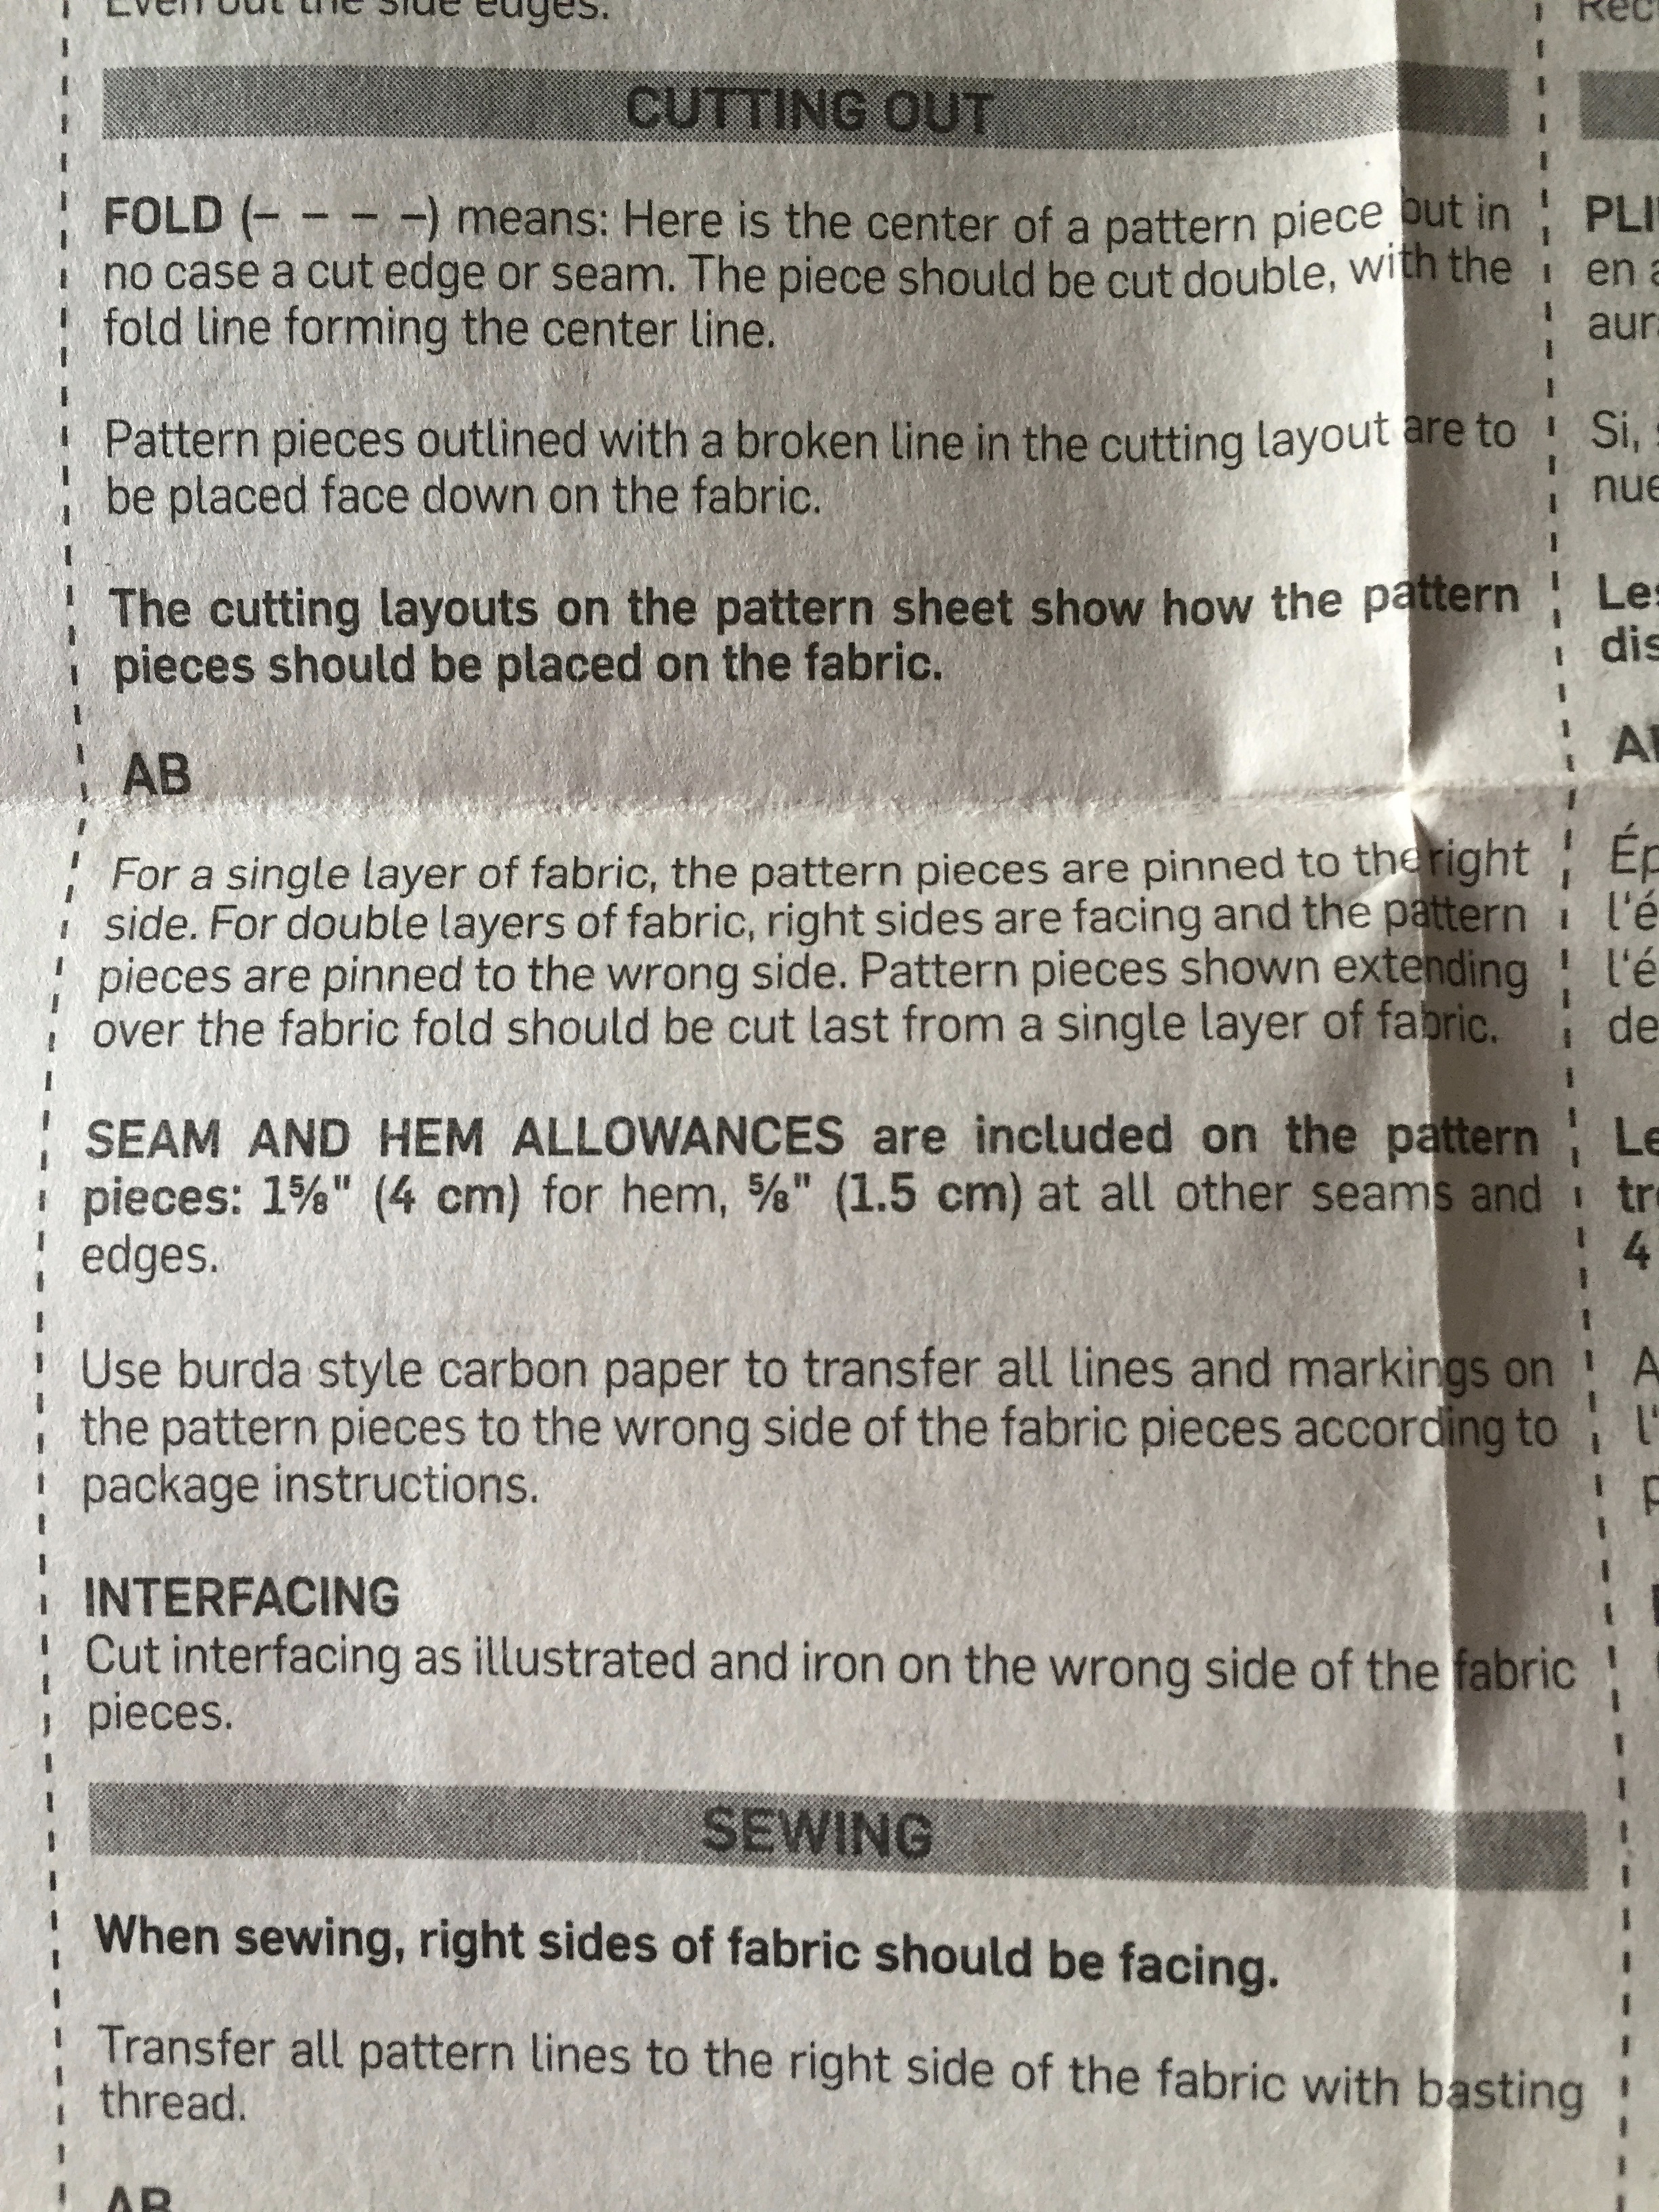
- Before you start just check your seam allowance. A 1.5cm seam allowance is normally included in the pattern but just double check this in the General Directions. These are usually found on the first page of the instructions.
Simplicity Burda
- Unless what you’re making is fully lined, you will need to decide on how you are going to finish off the seam allowance. You must do this as you go along because it’s impossible to do to it all at the end. I have listed the most common ways below…
Zigzag over the edge. It’s the quickest way on a regular sewing machine.
A French seam looks really neat if your fabric isn’t too thick.
Using an Overlocker is really quick and neat if you’re lucky enough to have one.
- Now it is time to follow the step-by-step instructions. If you get confused whist following these at home it will help to google the task in hand… whether it be understitching, setting in the sleeves, attaching a waist band or facing, binding the arm holes, etc
GOOD LUCK!
If you get completely stuck, book yourself a private lesson with me! :o)