FREE FACE MASK PATTERN & INSTRUCTIONS

FACE MASK

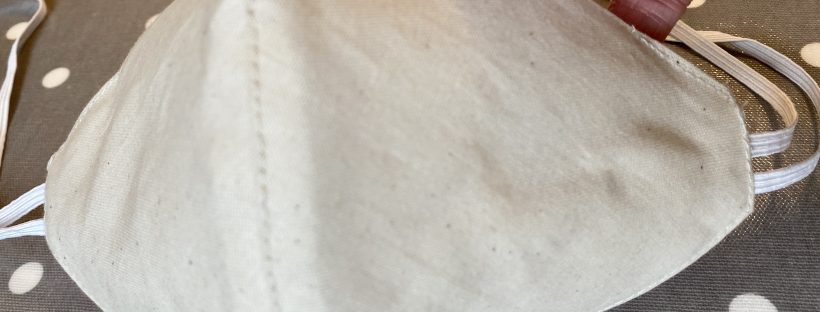
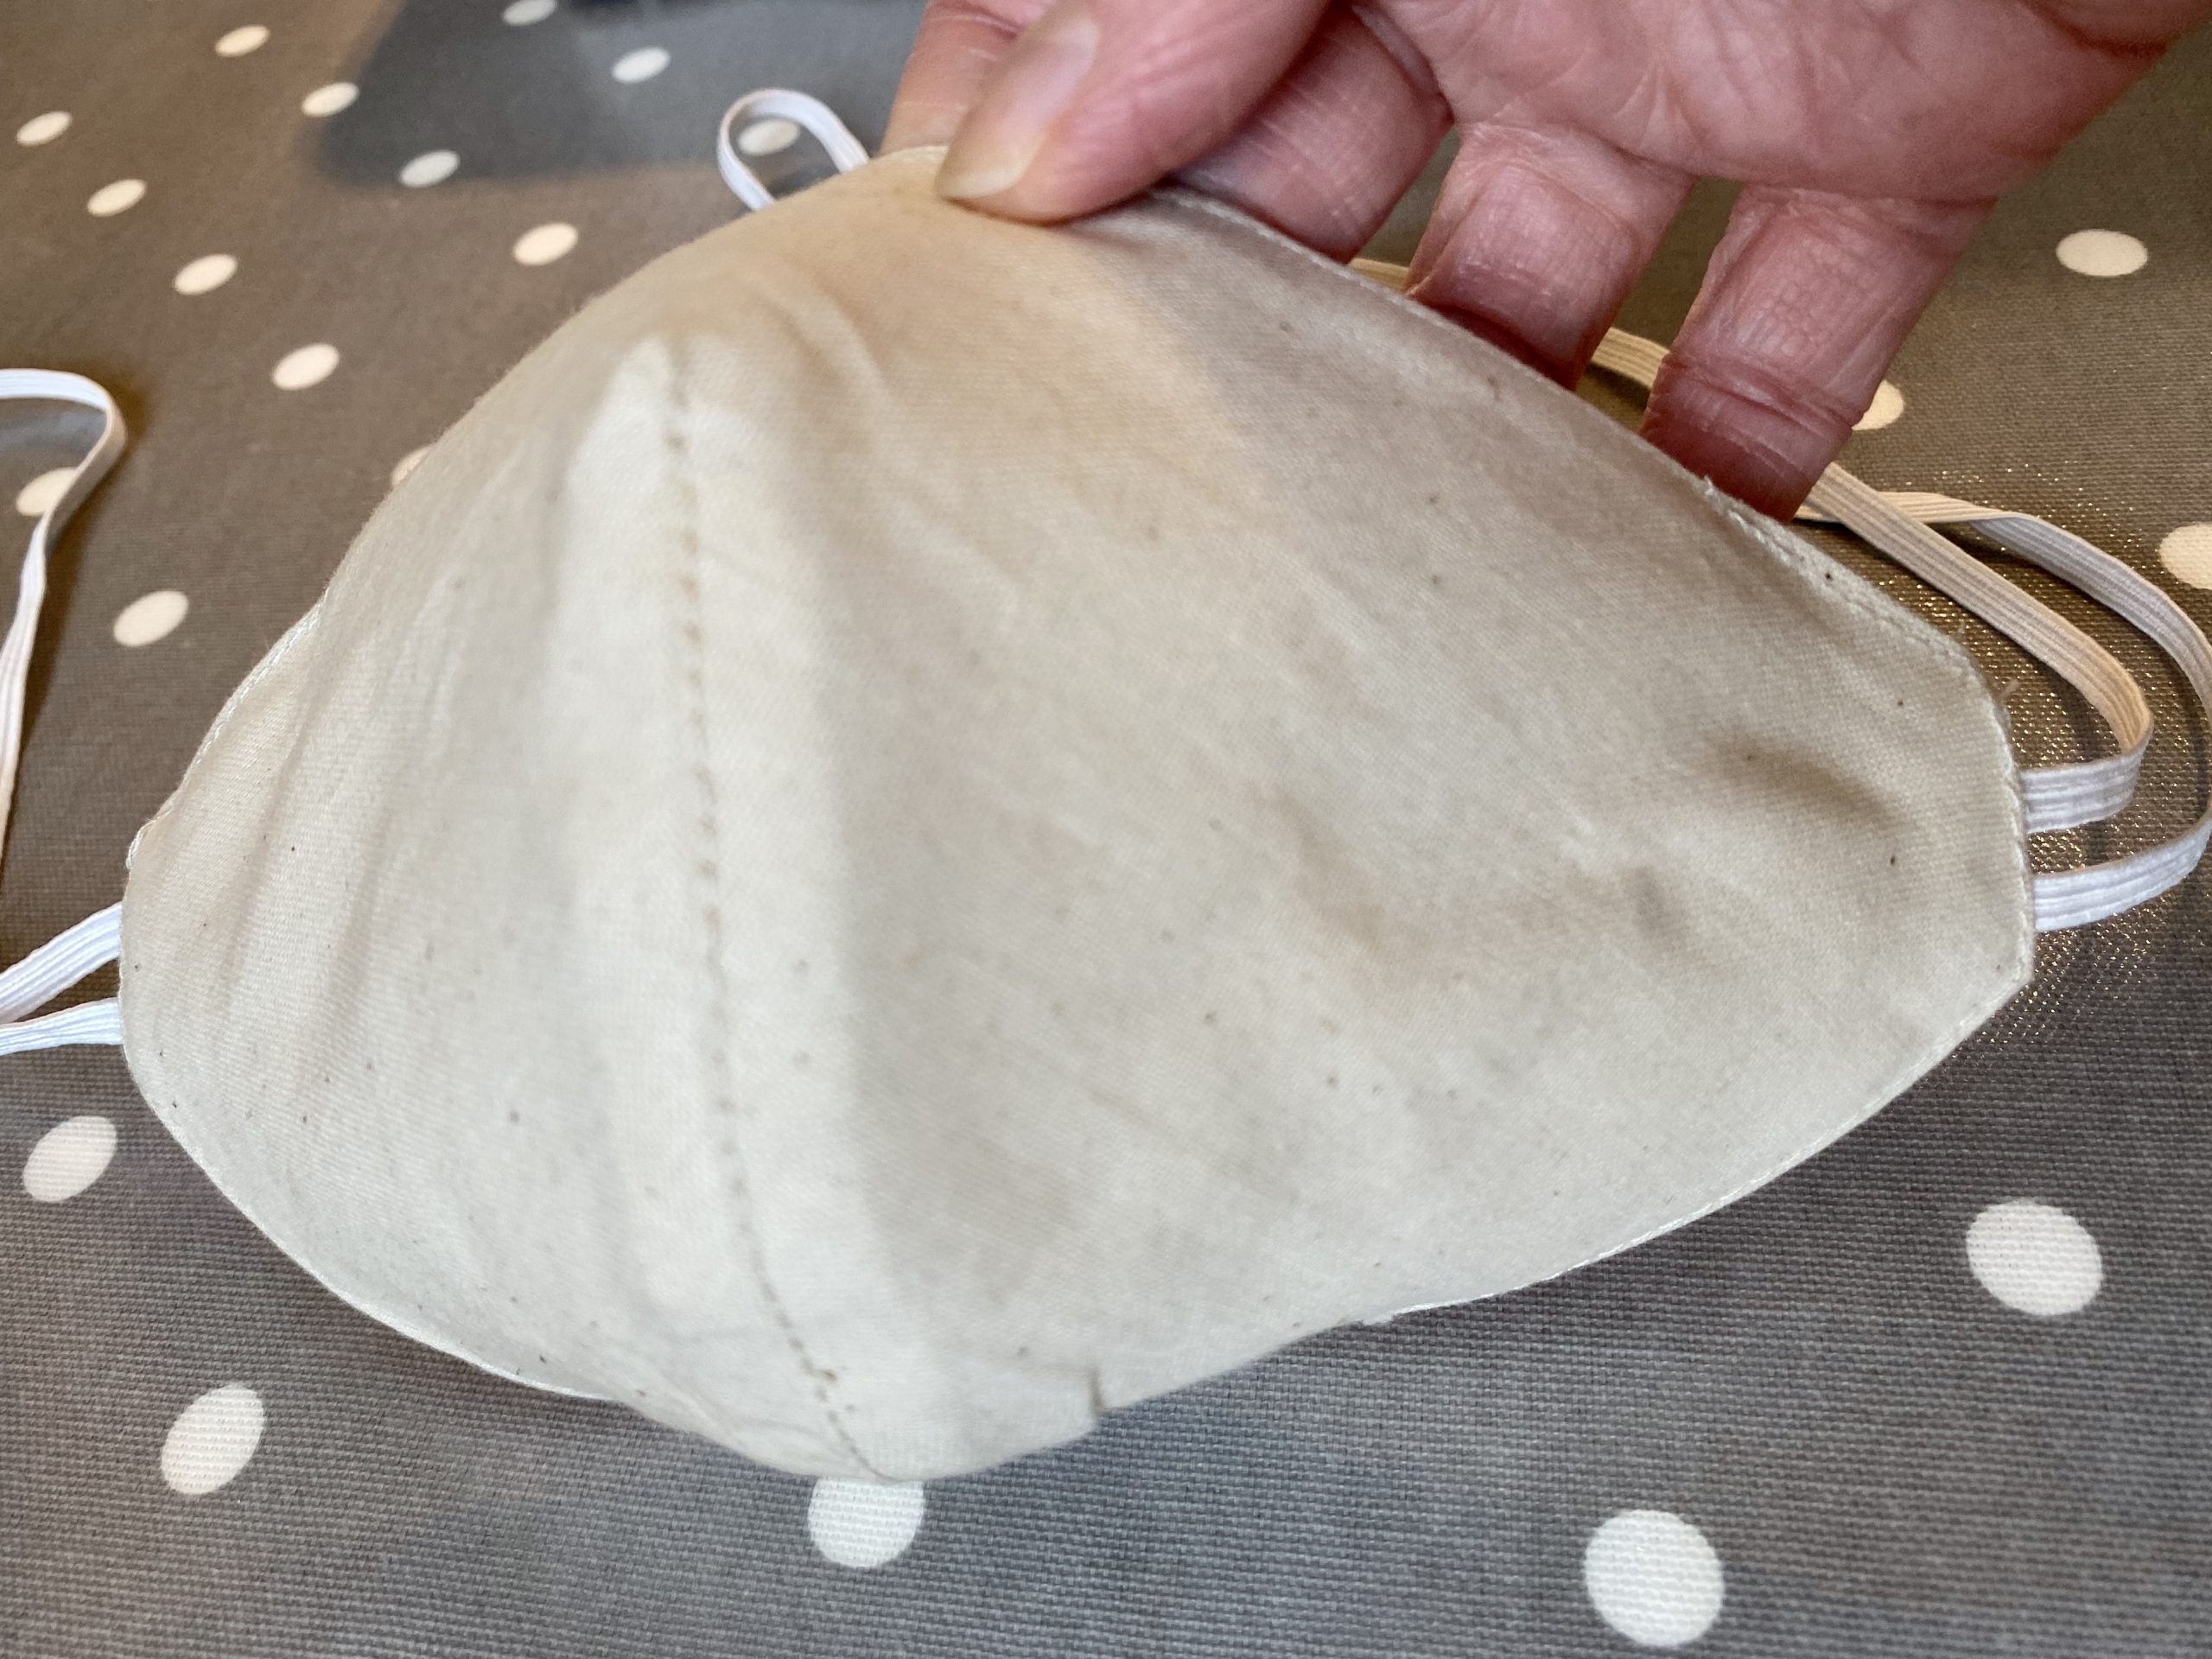
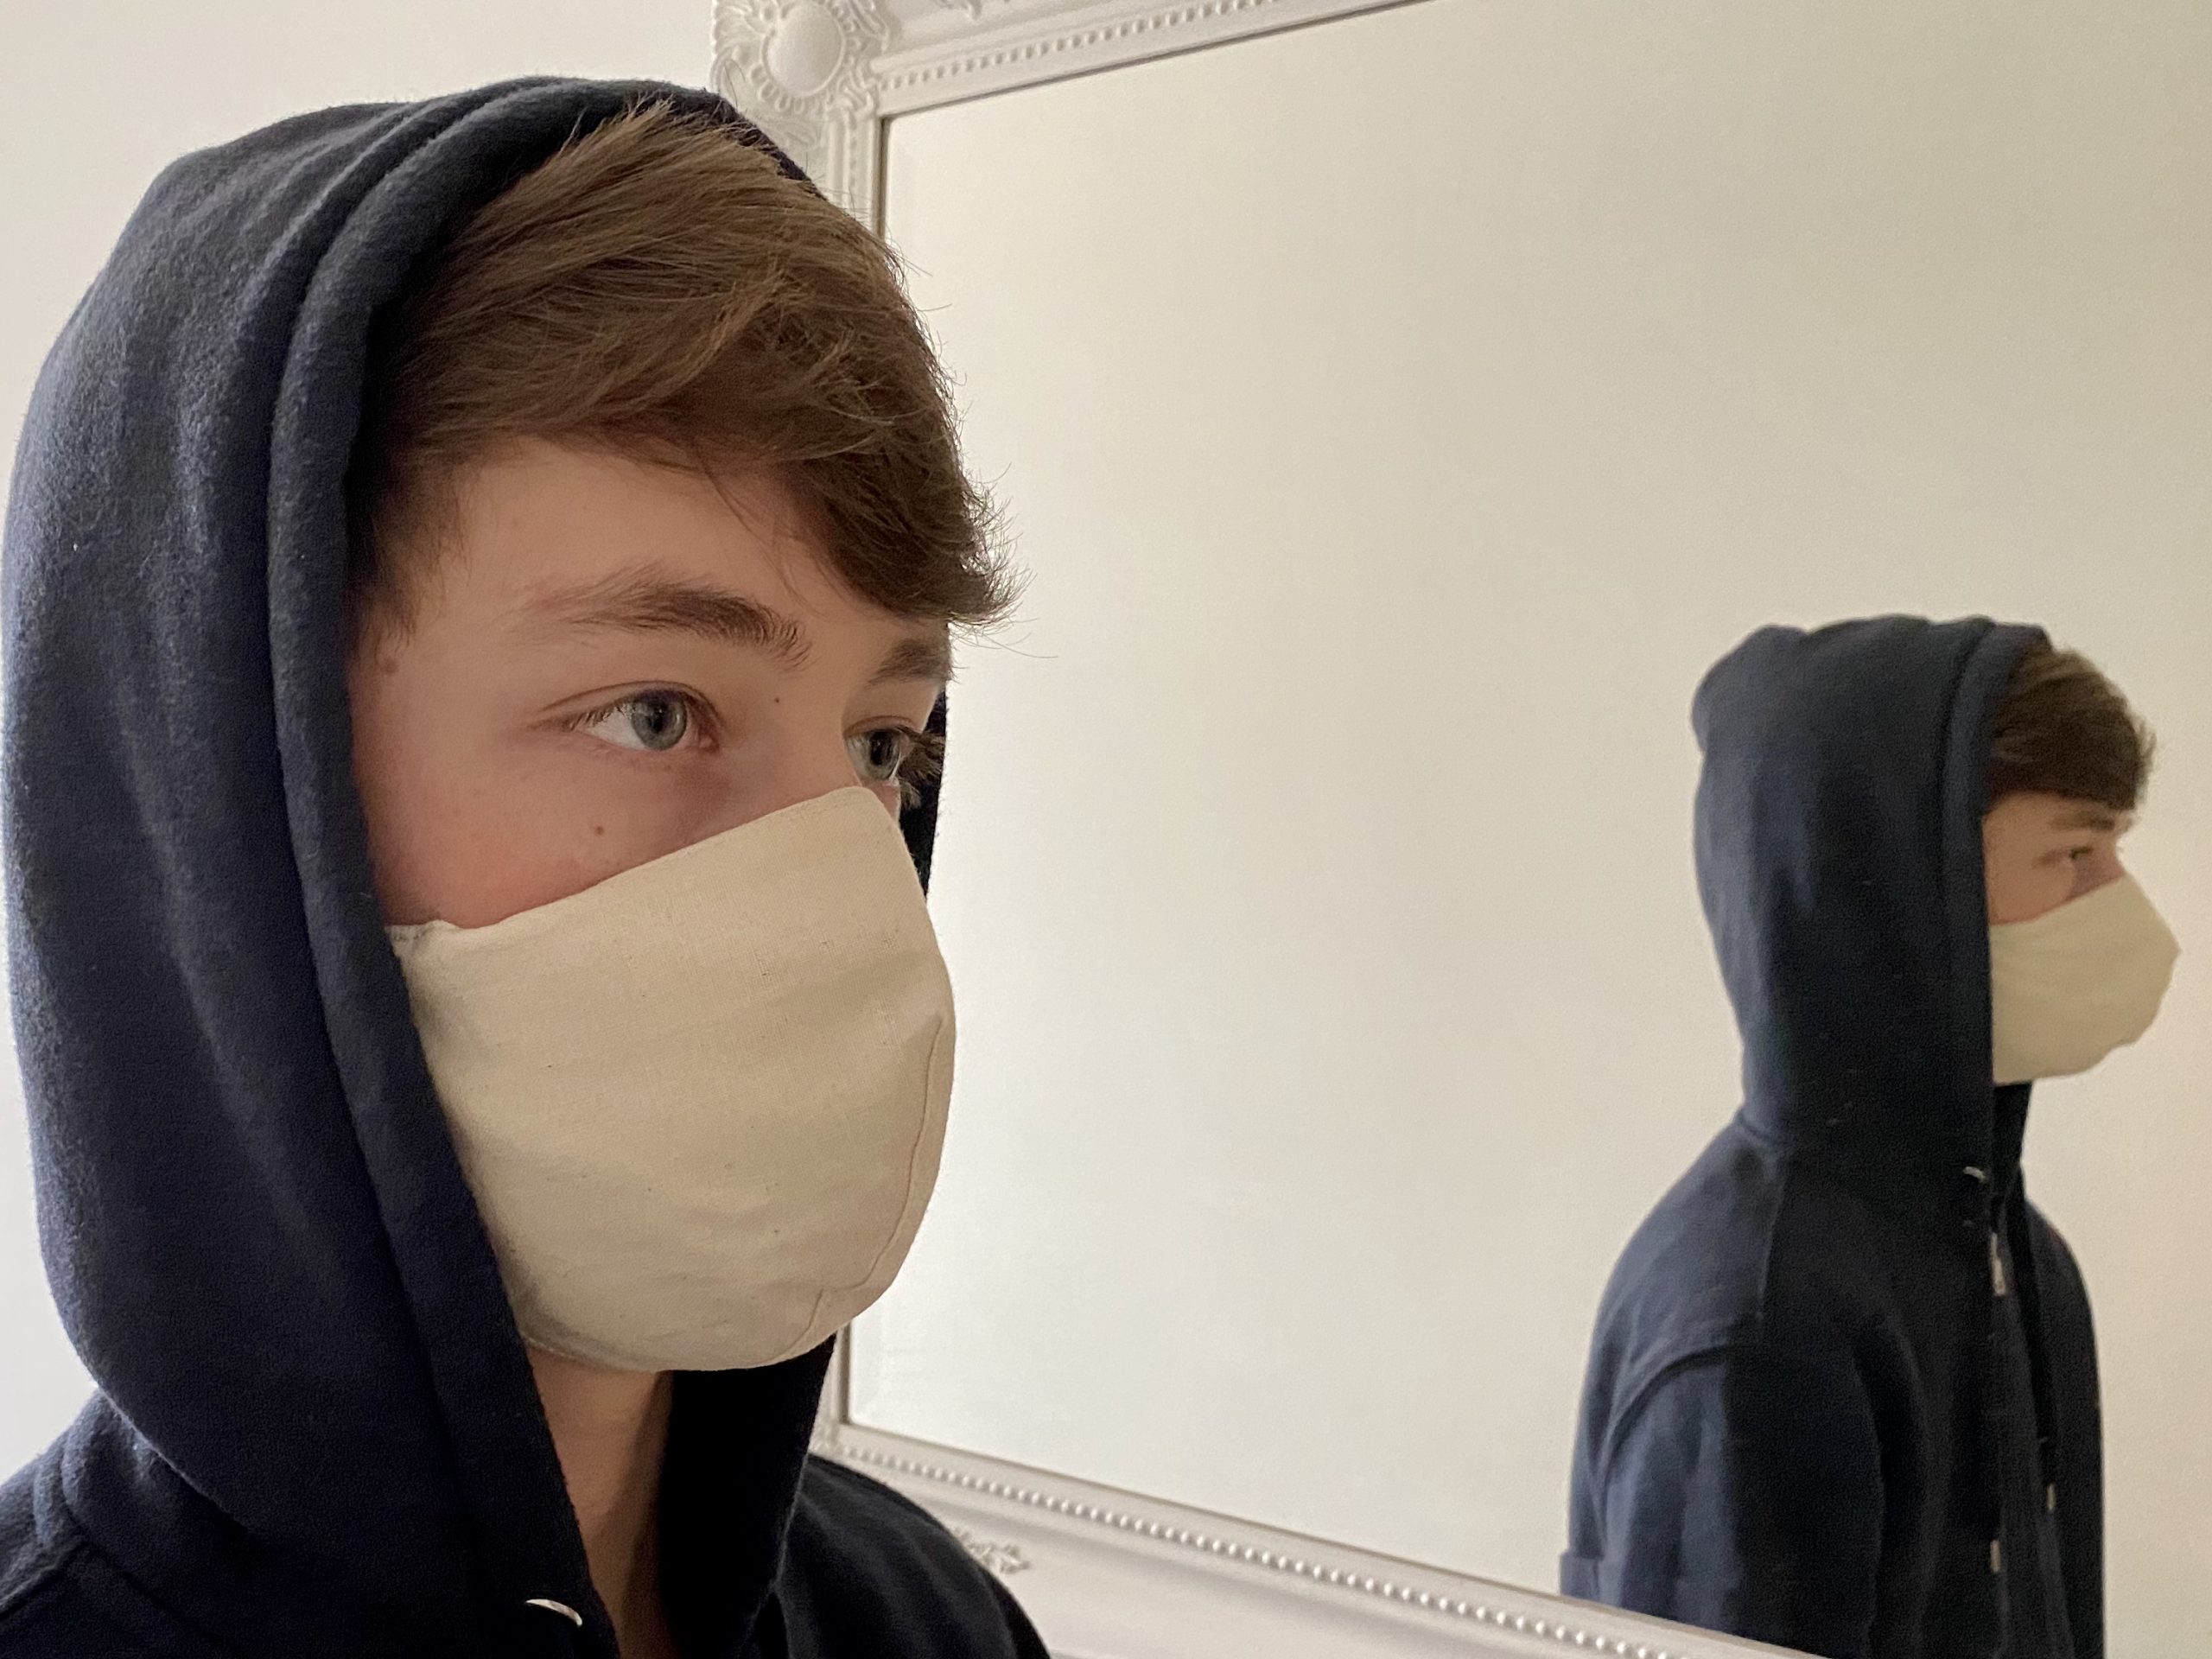
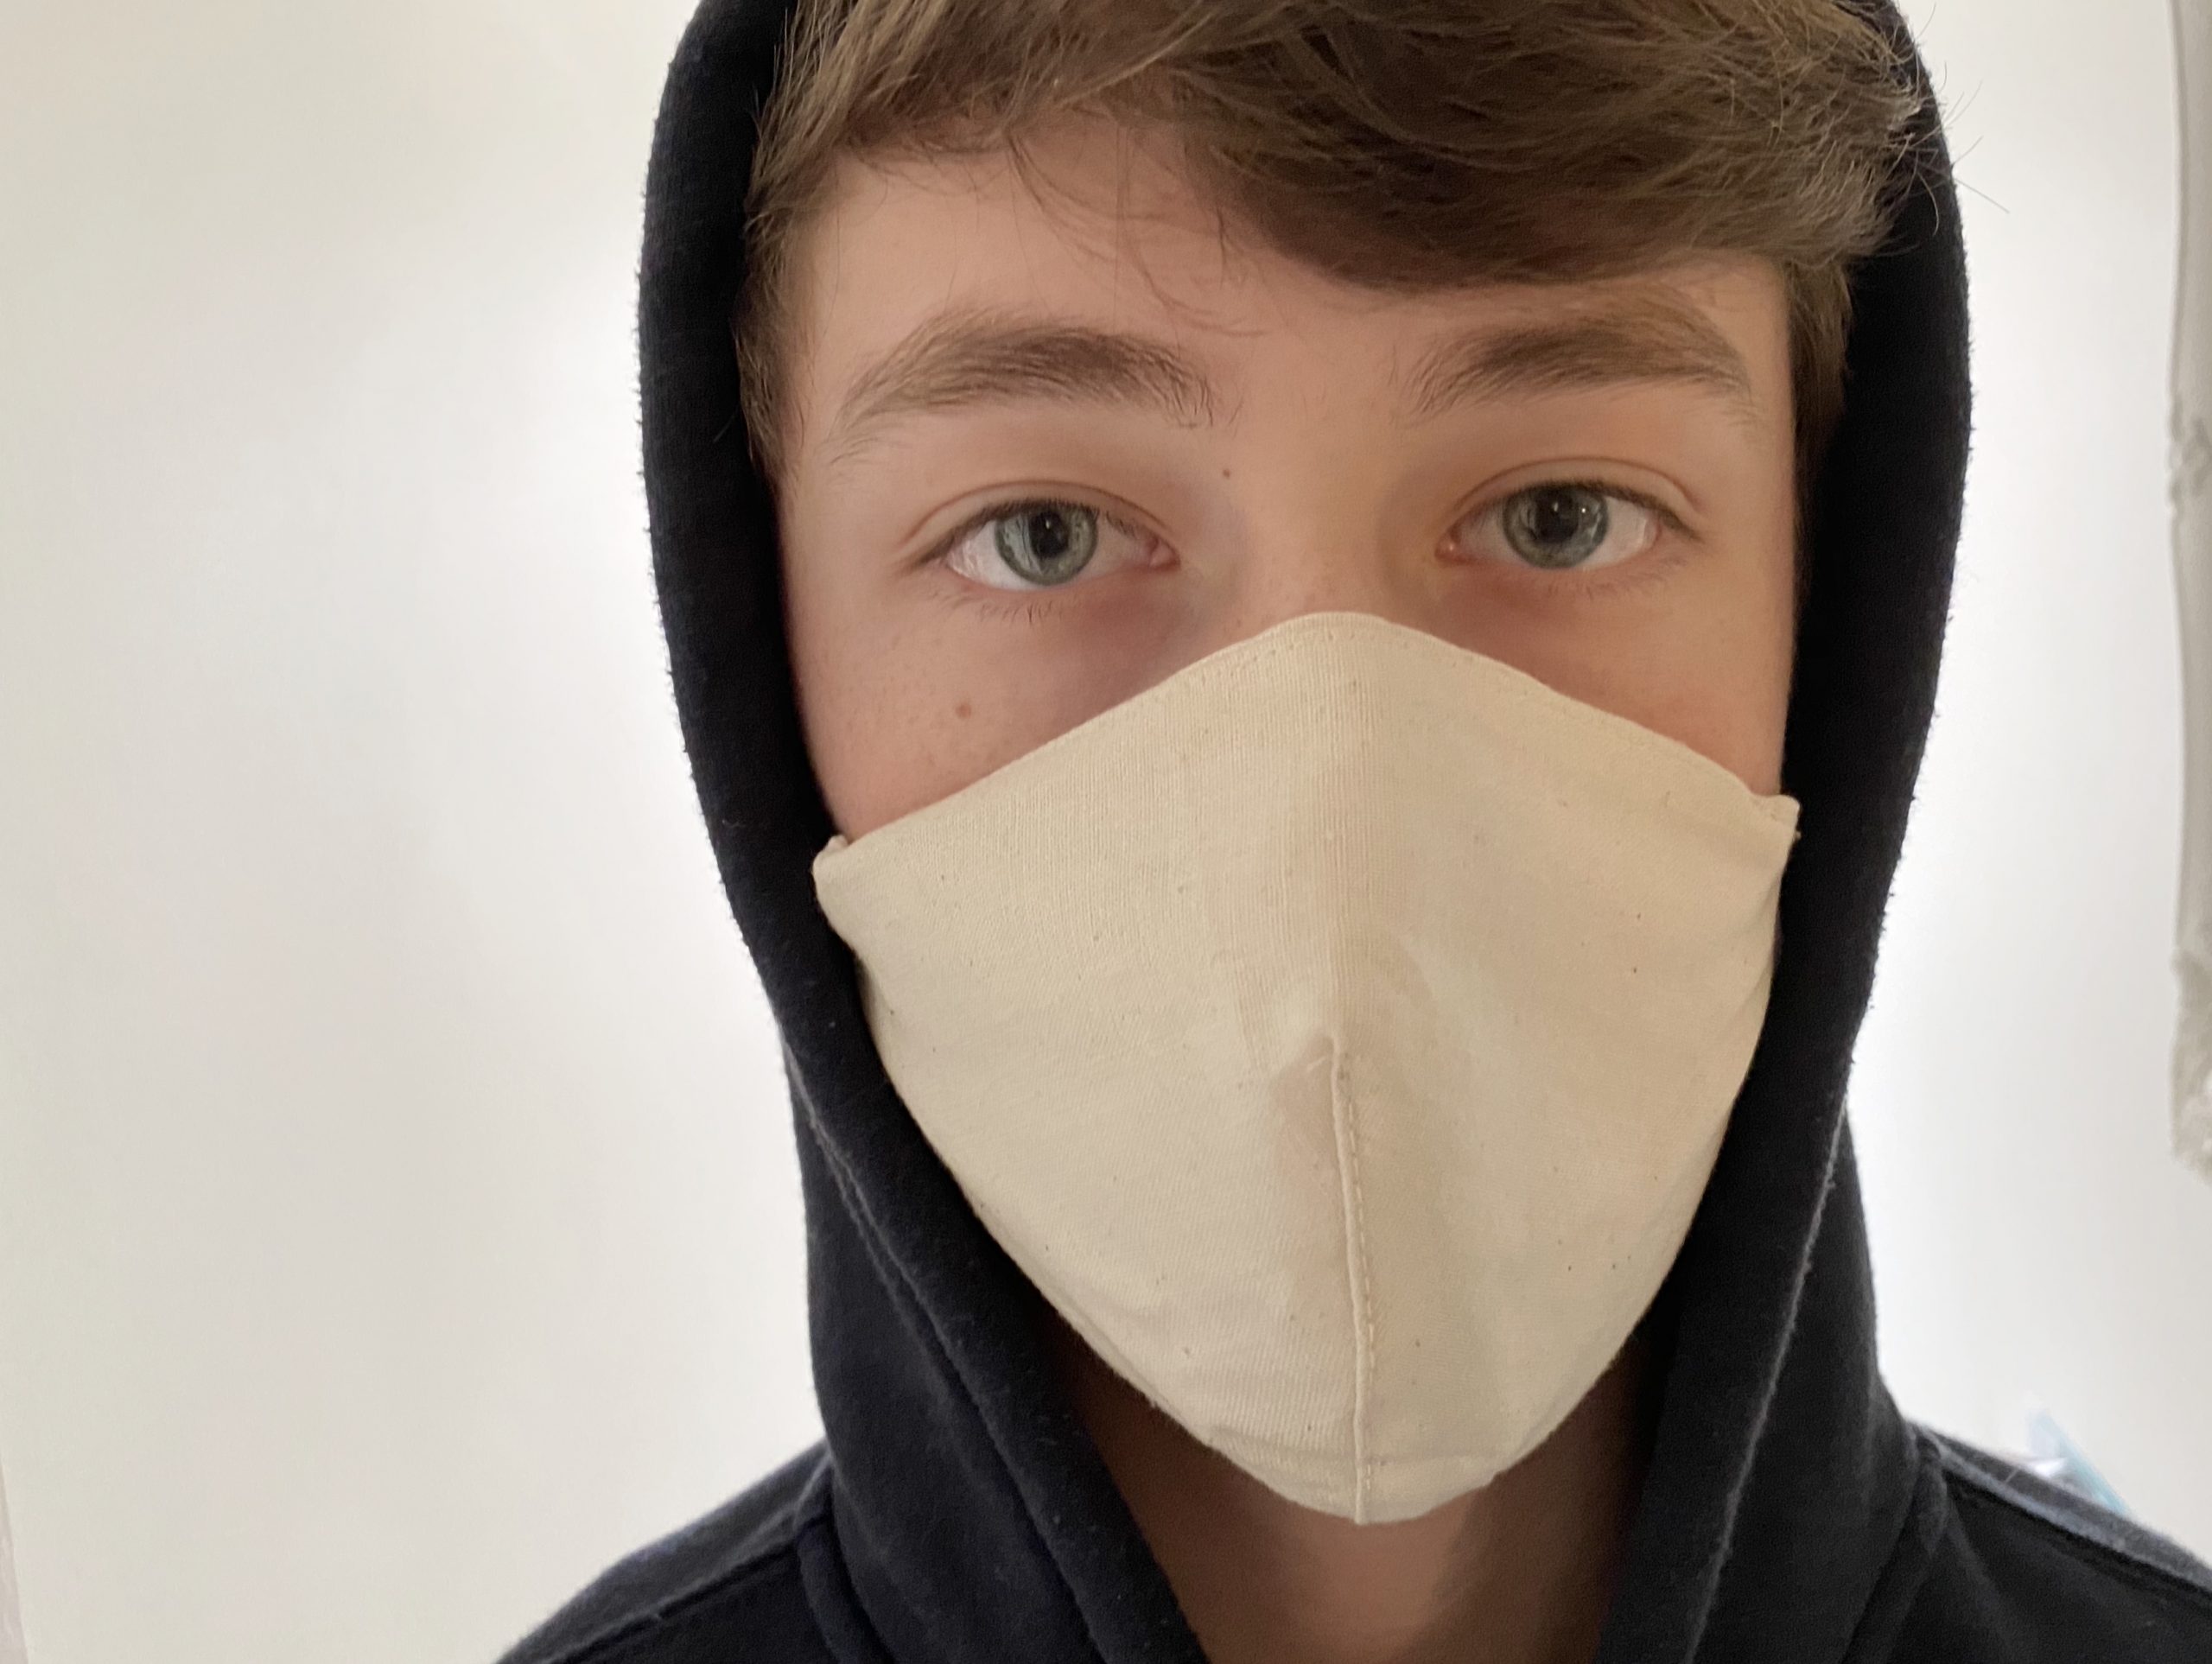
This Face Mask is 3 layers thick and has a pocket to put in a filter if desired. It’s a snug fit with wire to hold the shape over your nose.  It is a generous size, giving a great amount of face cover and is cut with room to breathe.

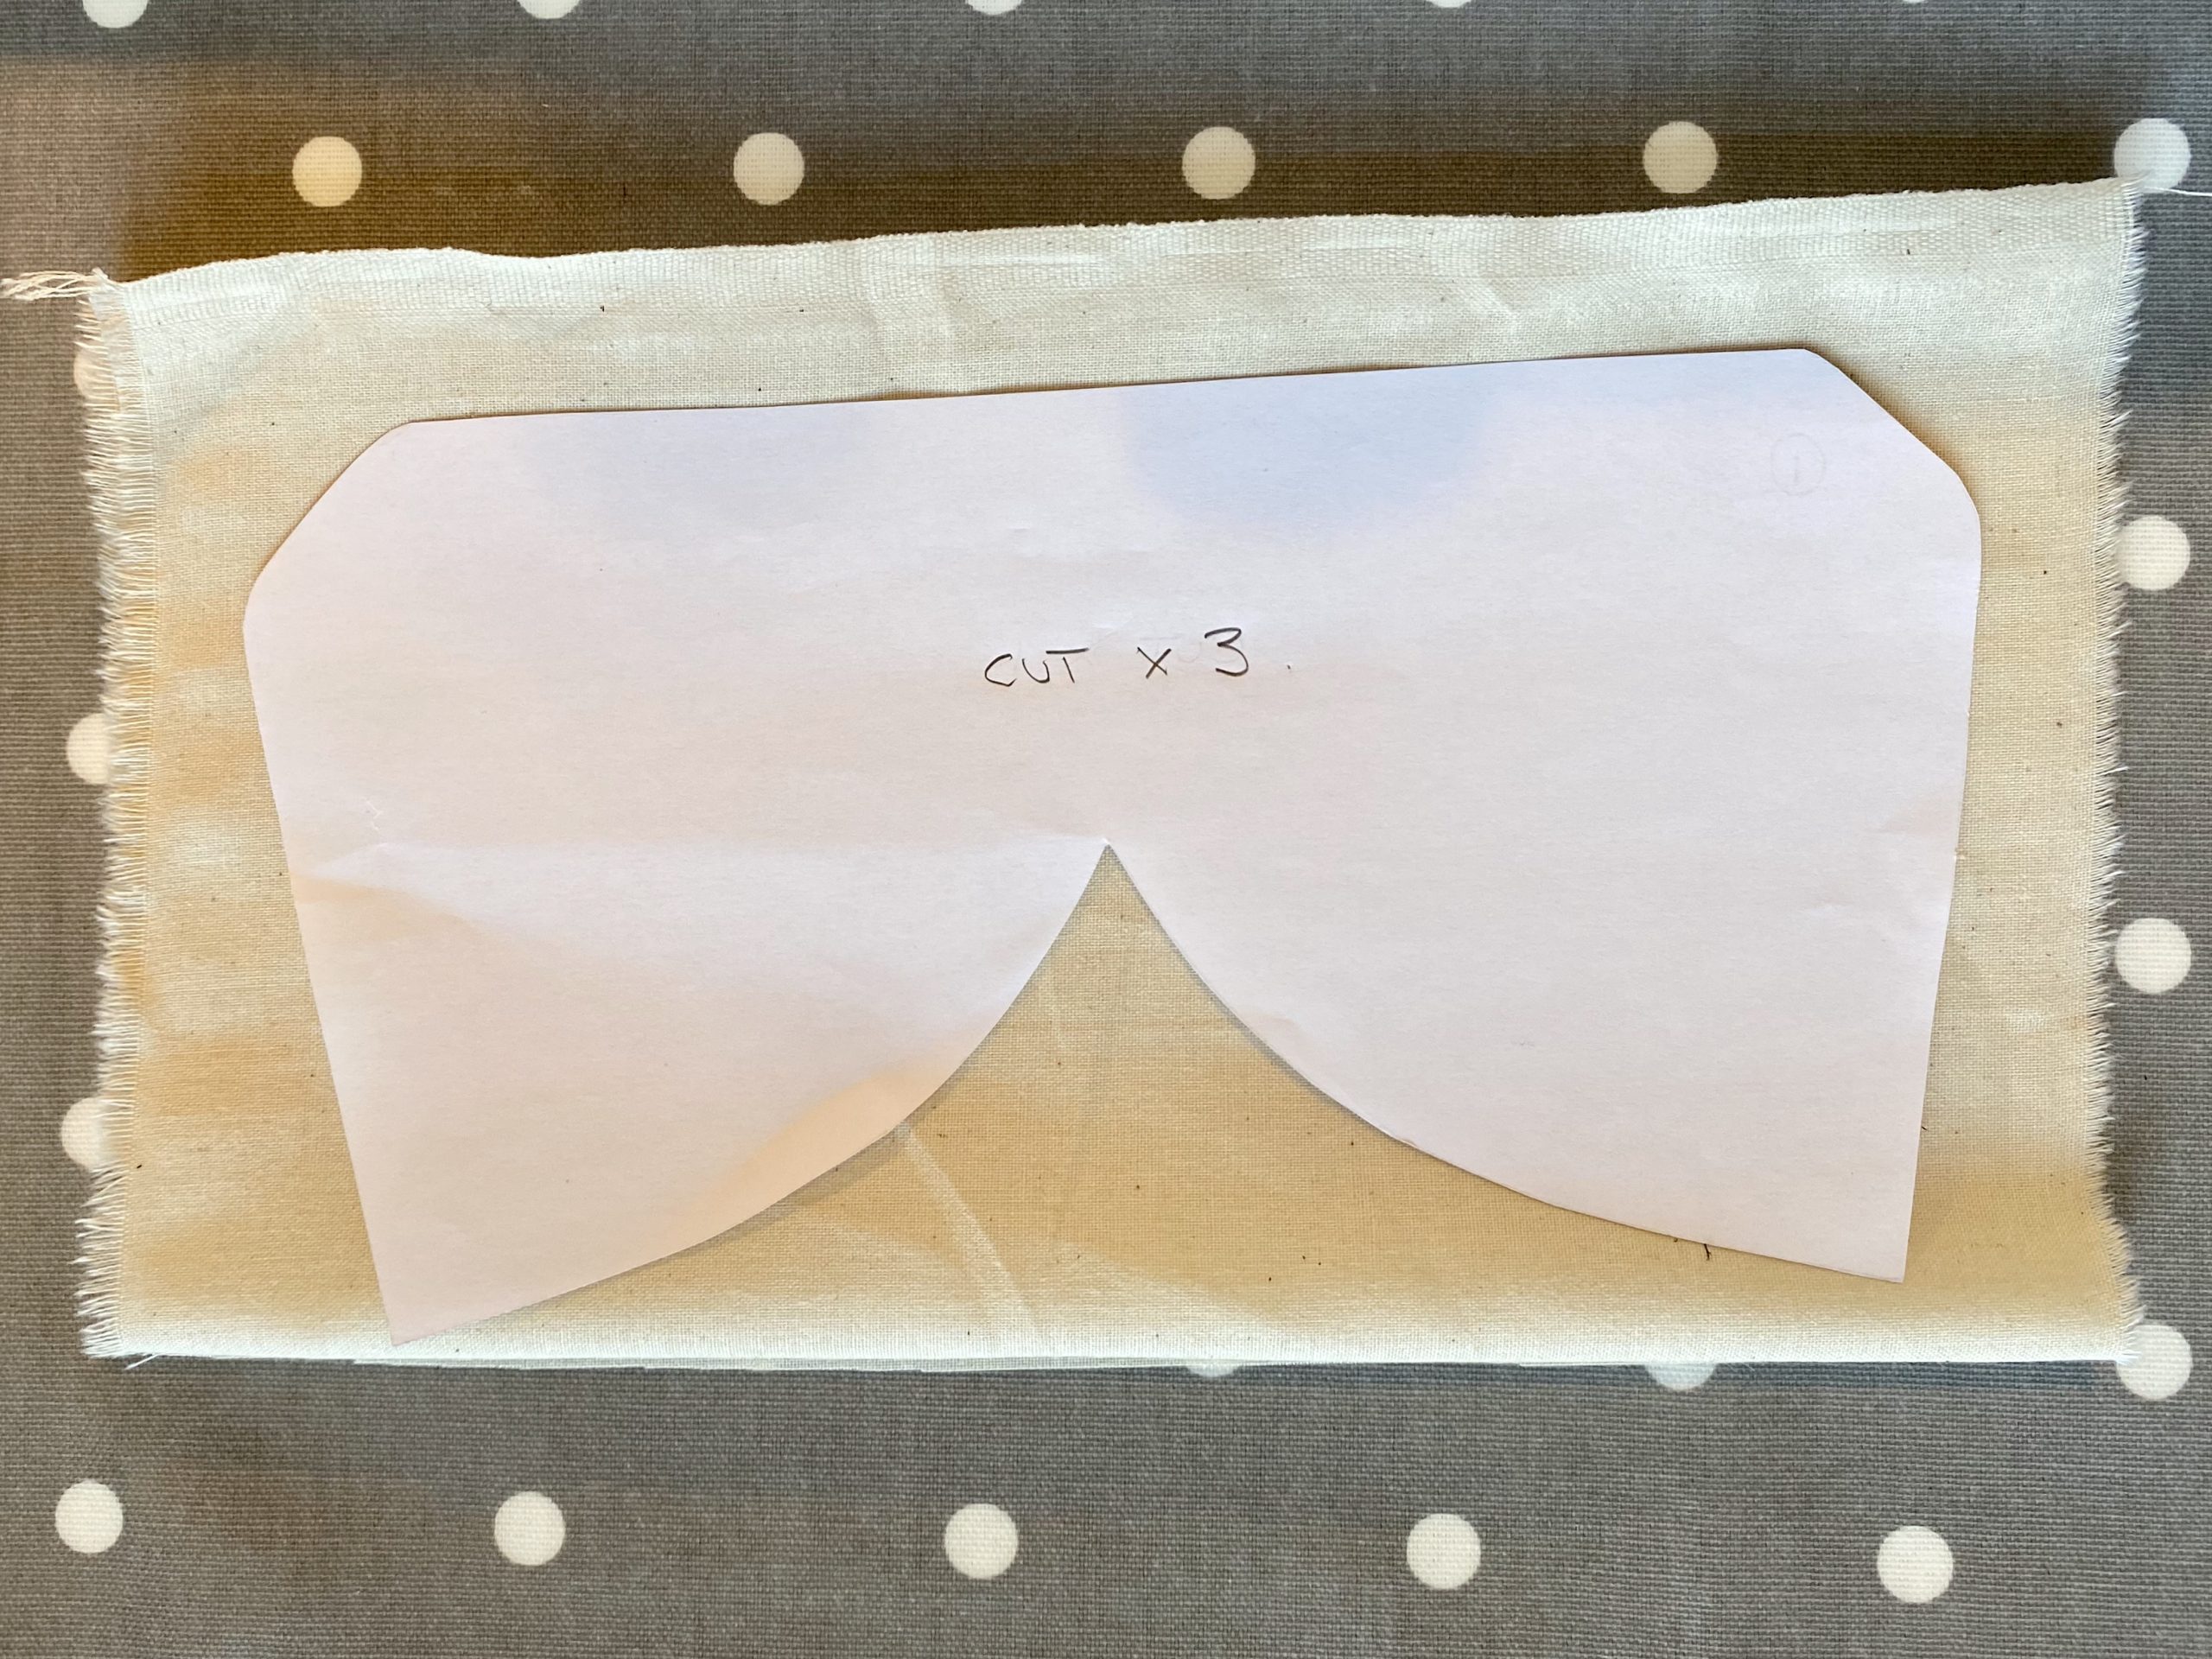
Click HERE for the PDF pattern. When printed, the measurement between the points should be 21.5cm

For a simpler version of this FACE MASK, please click HERE to view my YouTube video.


 Shopping List:

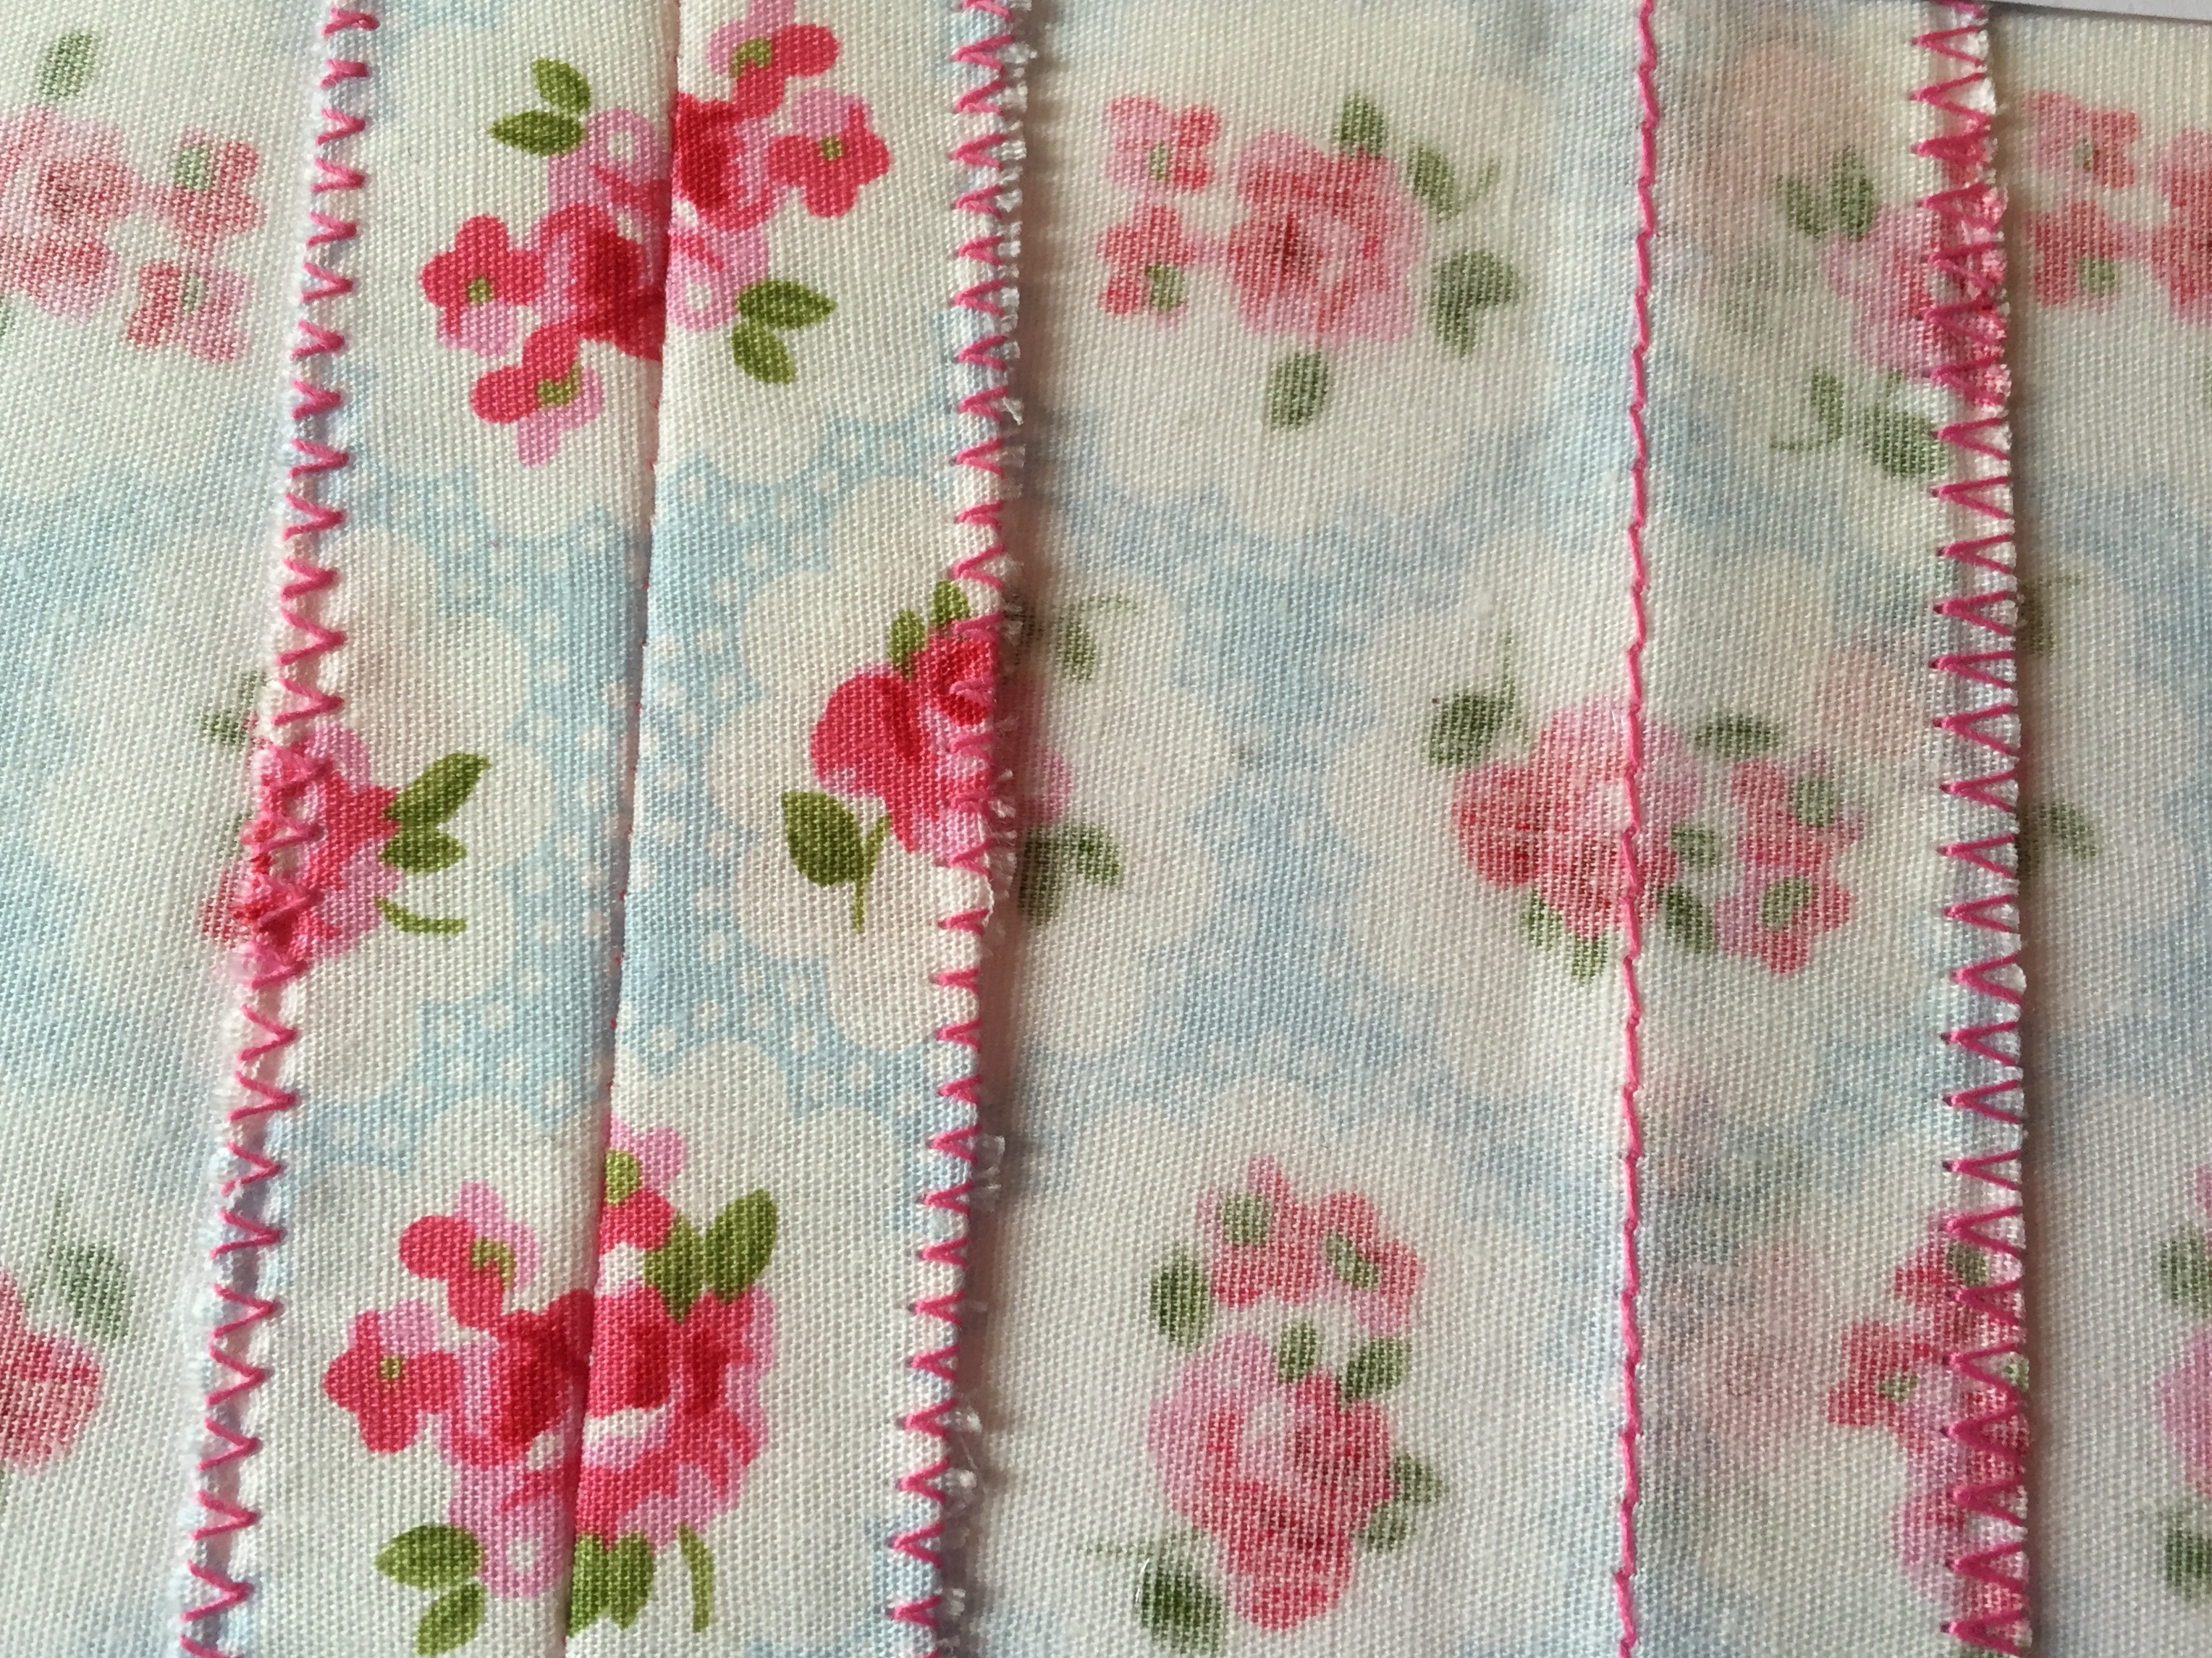
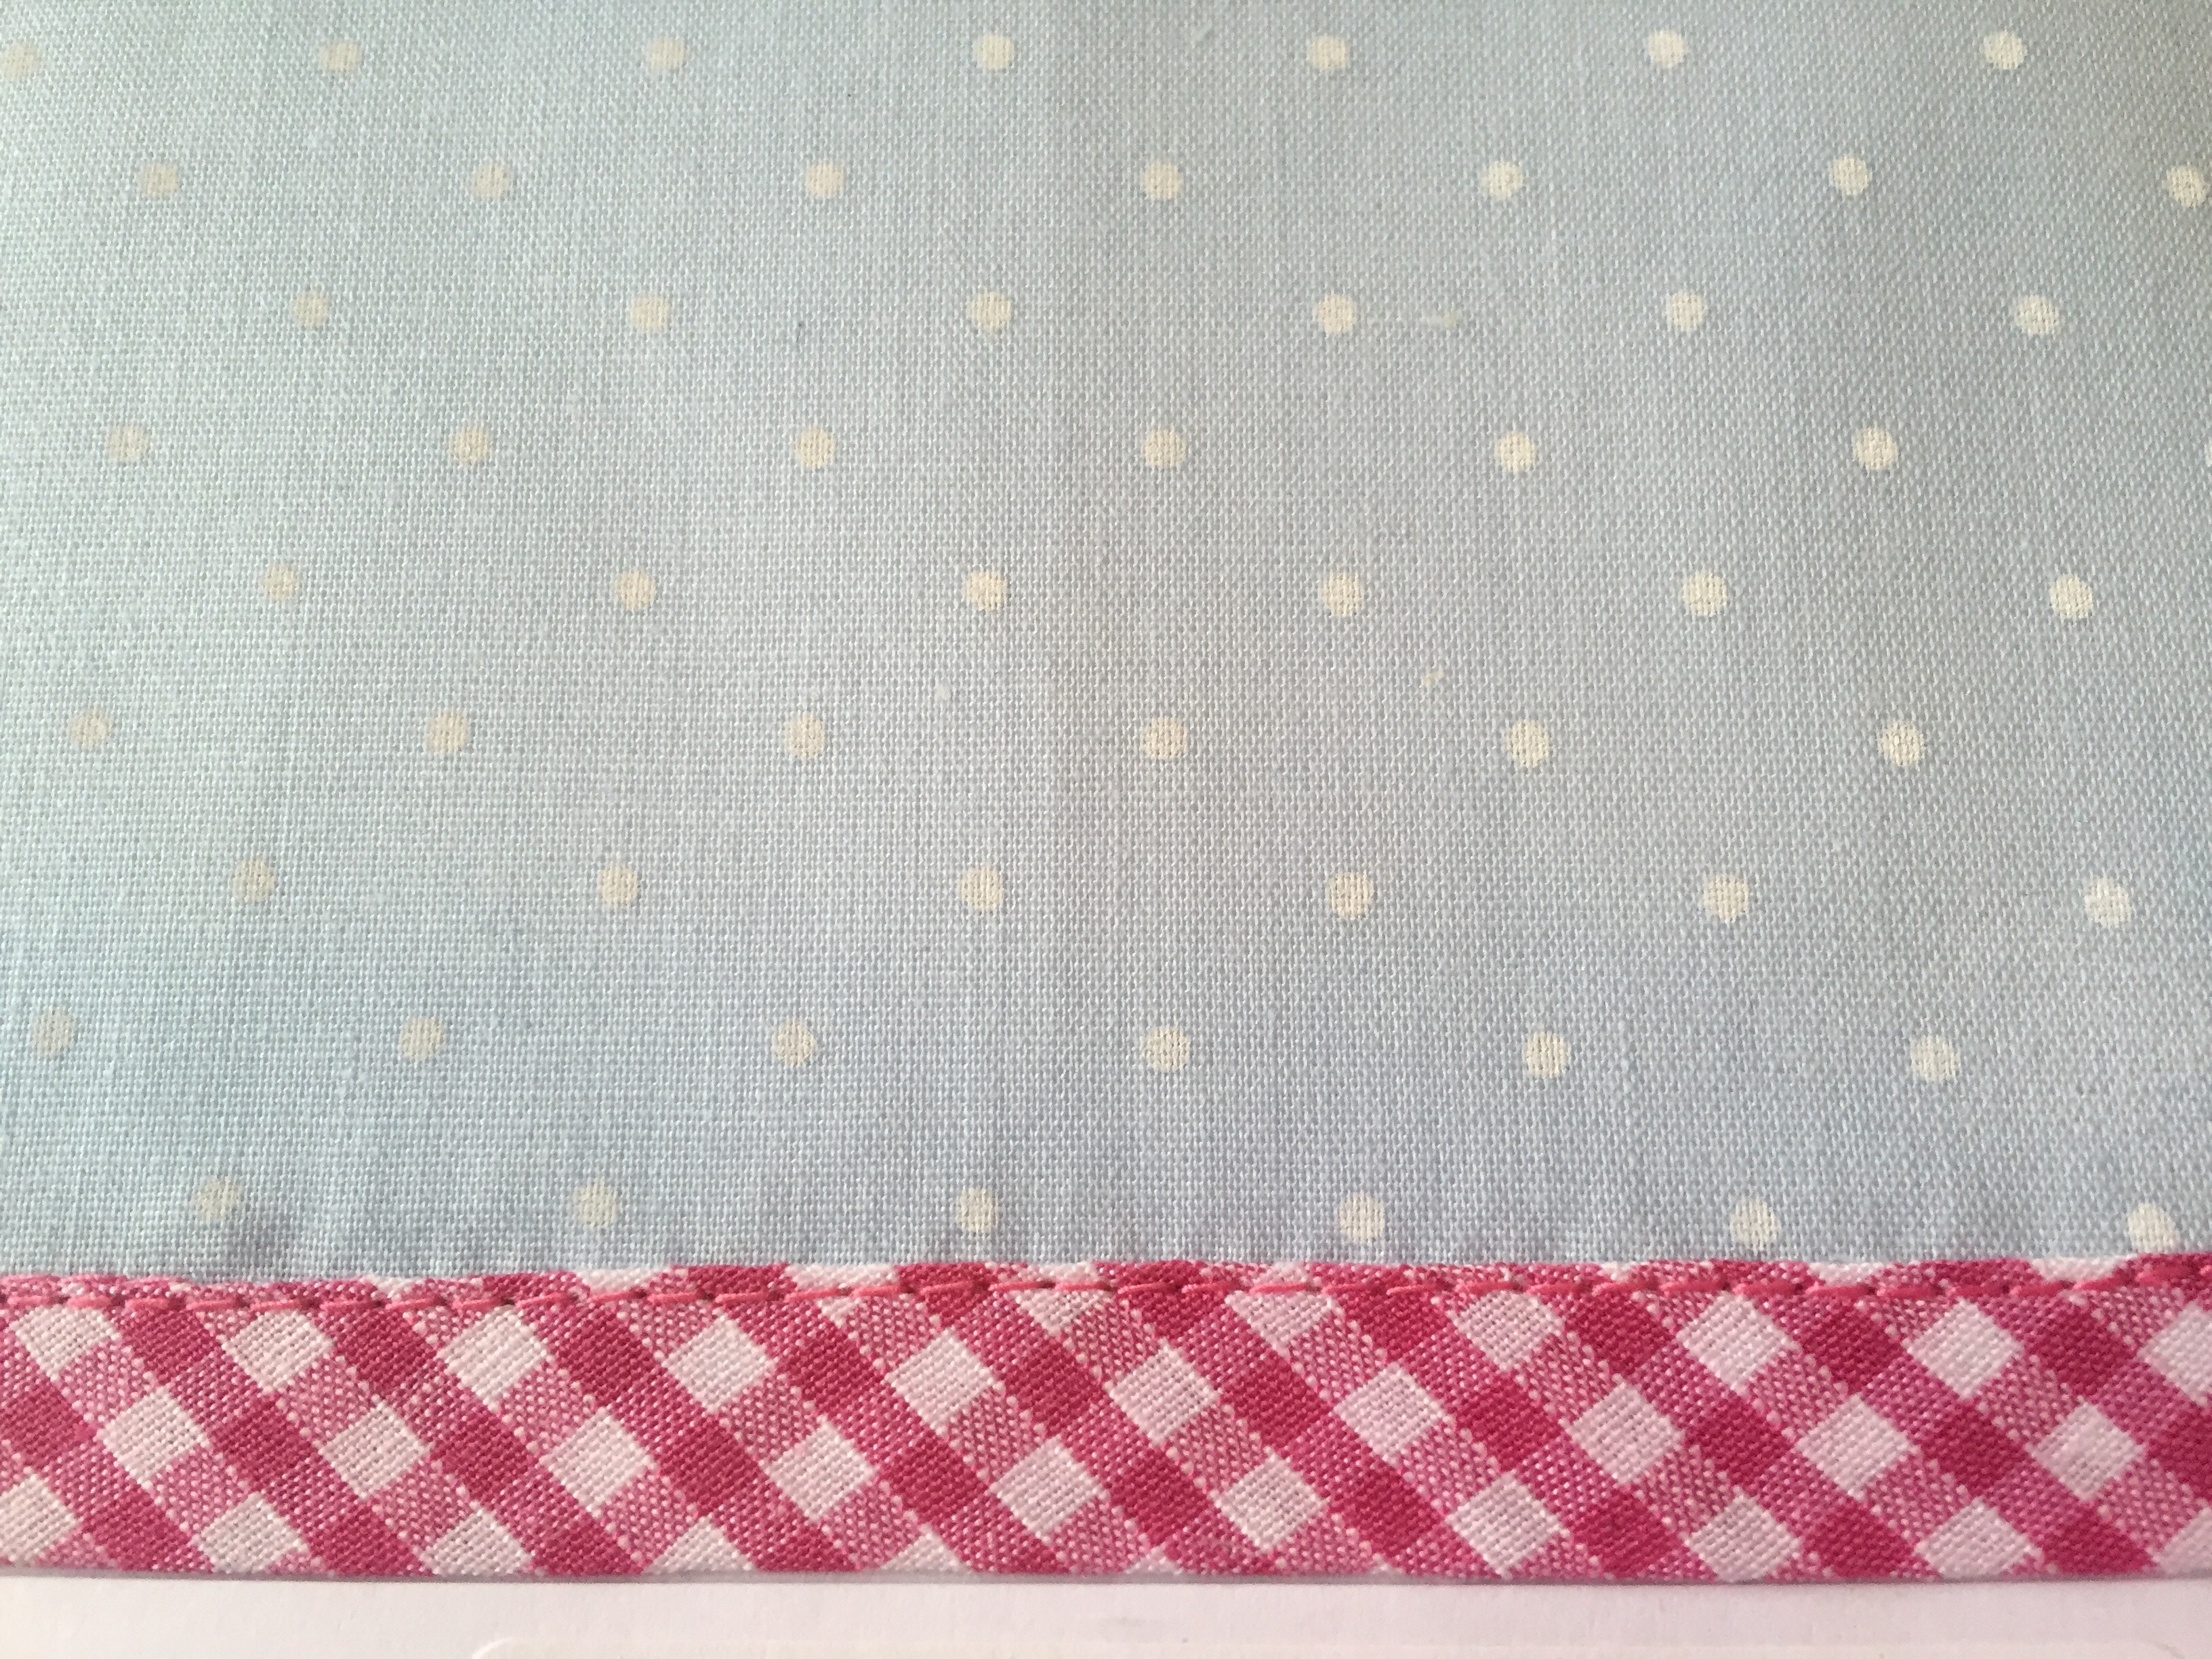
  • 1 Metre of soft cotton fabric will make at least 10 x masks
  • Approximately 0.75cm narrow elastic/cotton tape per mask
  •  10cm wire per mask – you could use a pipe cleaner, garden wire, snap metal hair clips…
  • Matching thread
  • Interfacing is a good idea for added protection

https://www.fabricland.co.uk


Making Up:

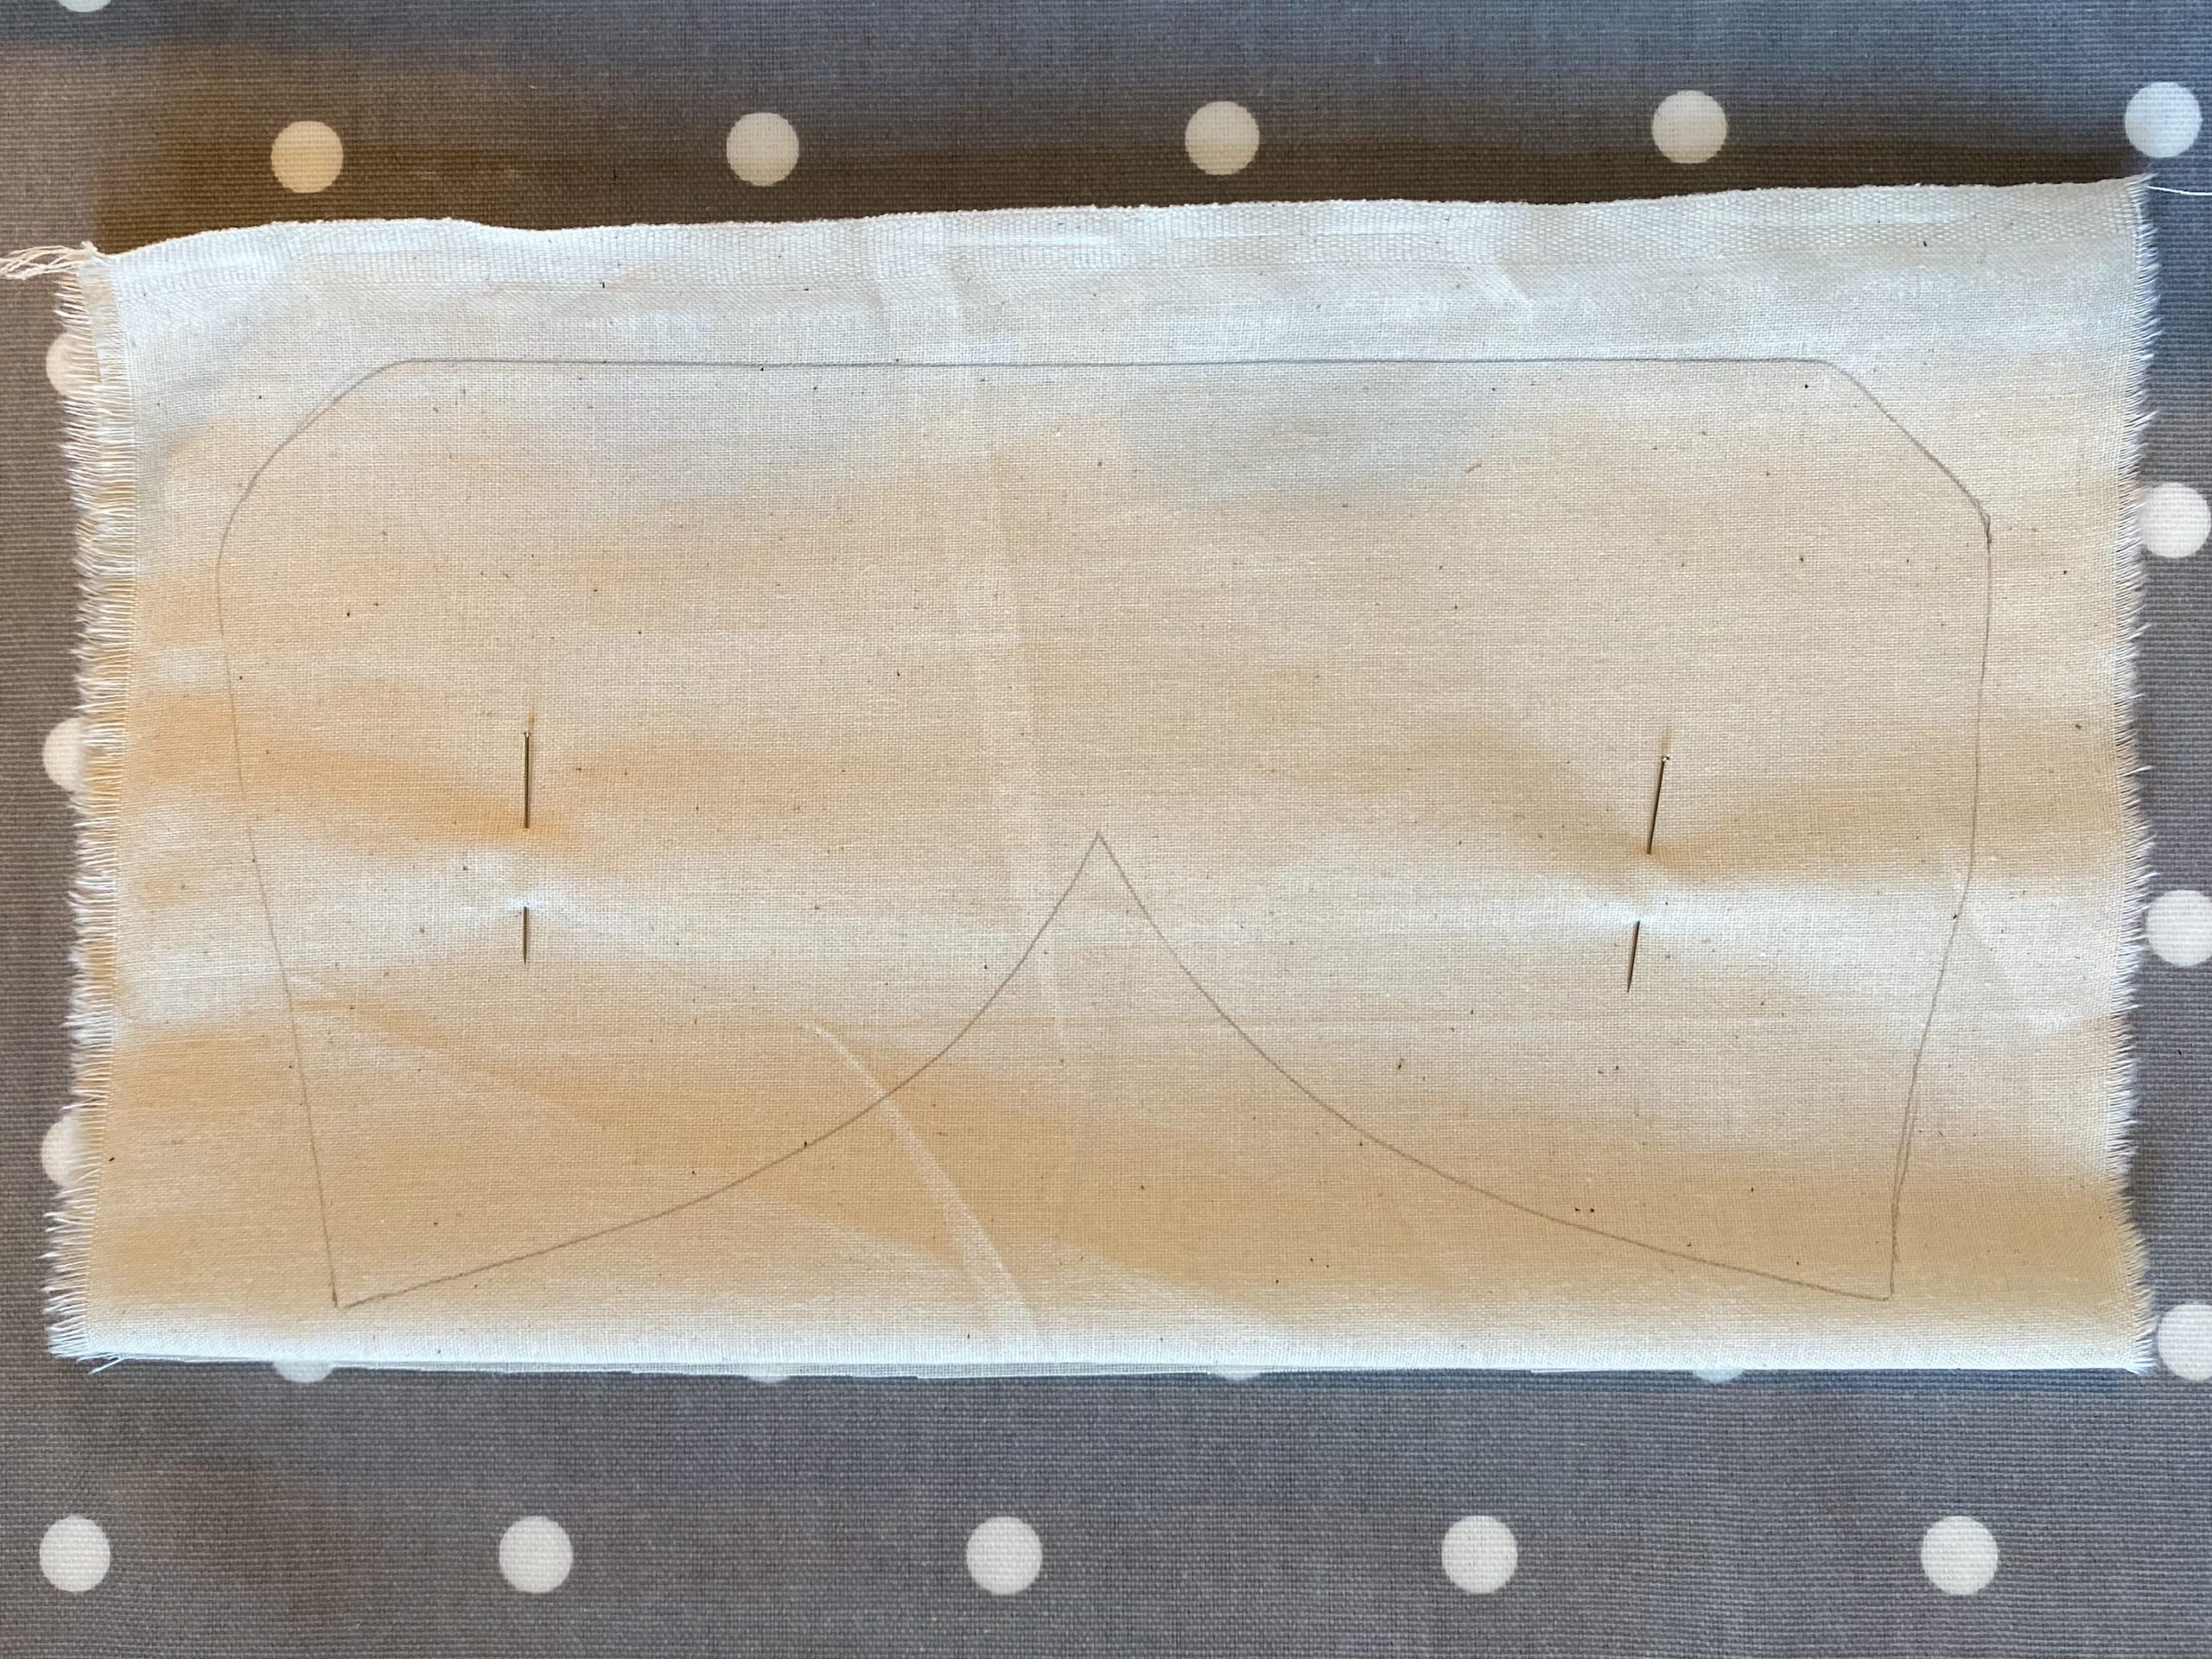
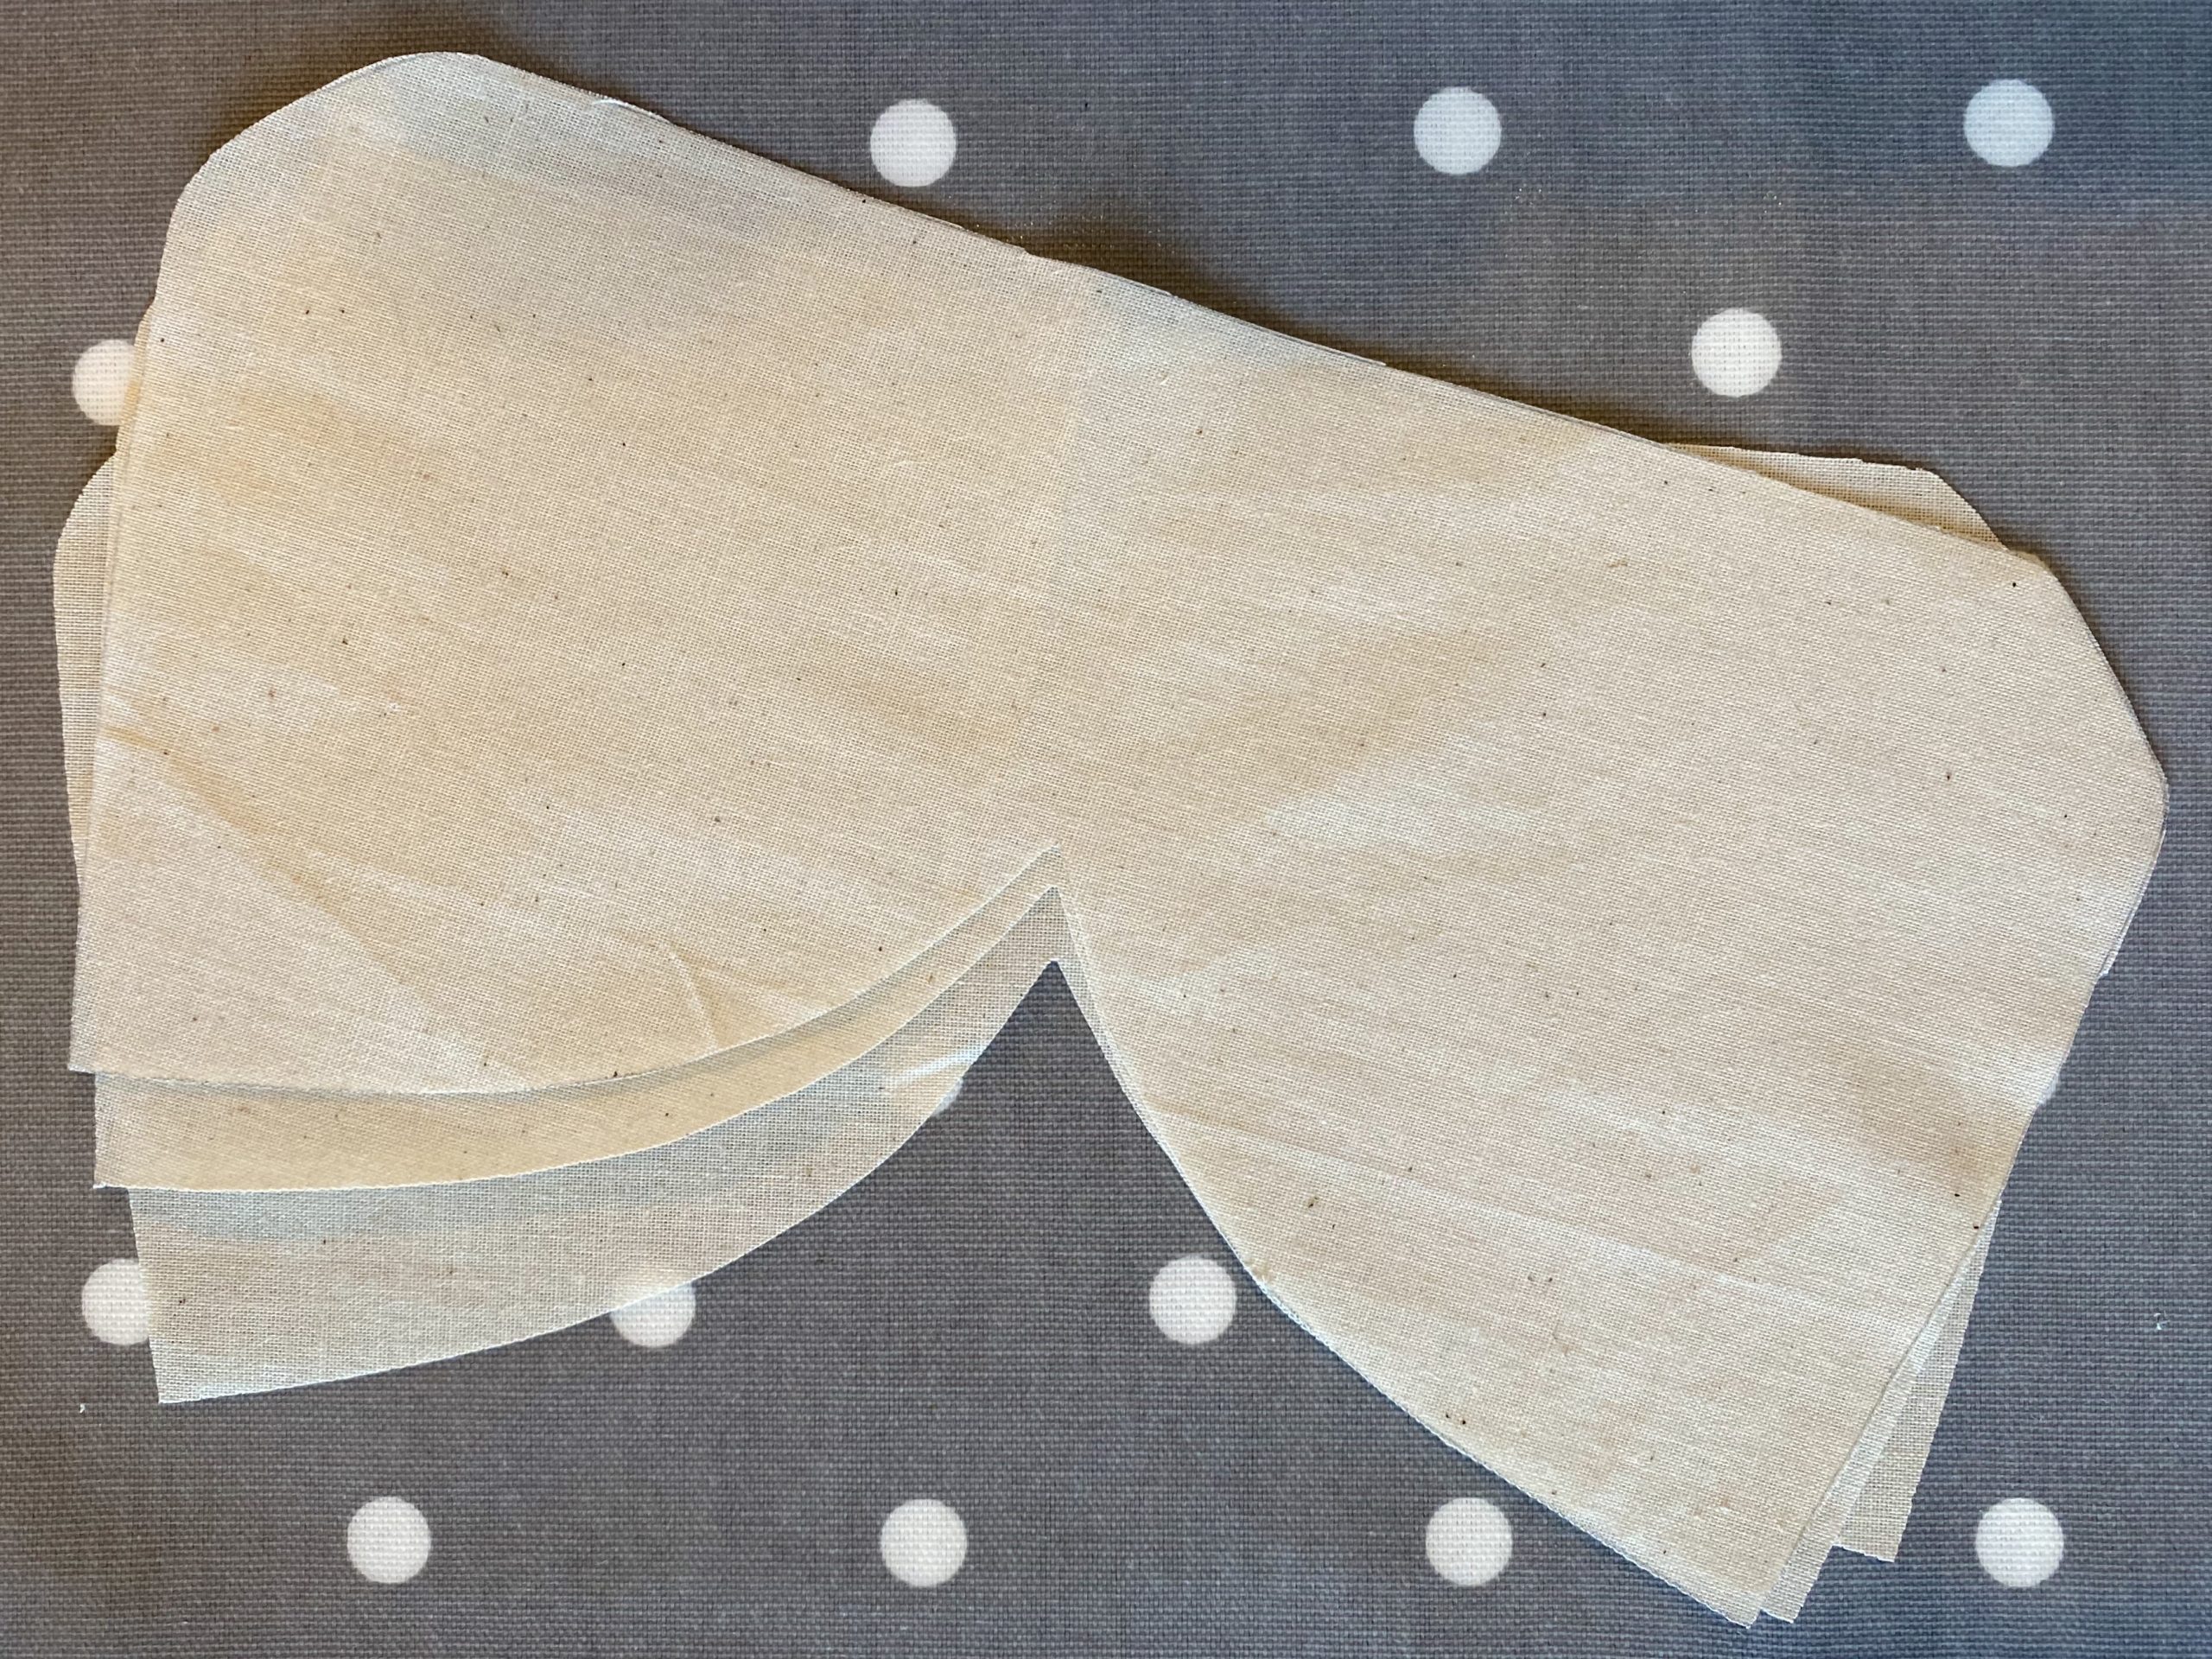
  • Cut x 3 using the Face Mask Pattern
  • For added protection or if your fabric is a bit thin, iron some interfacing onto the back of one or more fabric pieces.


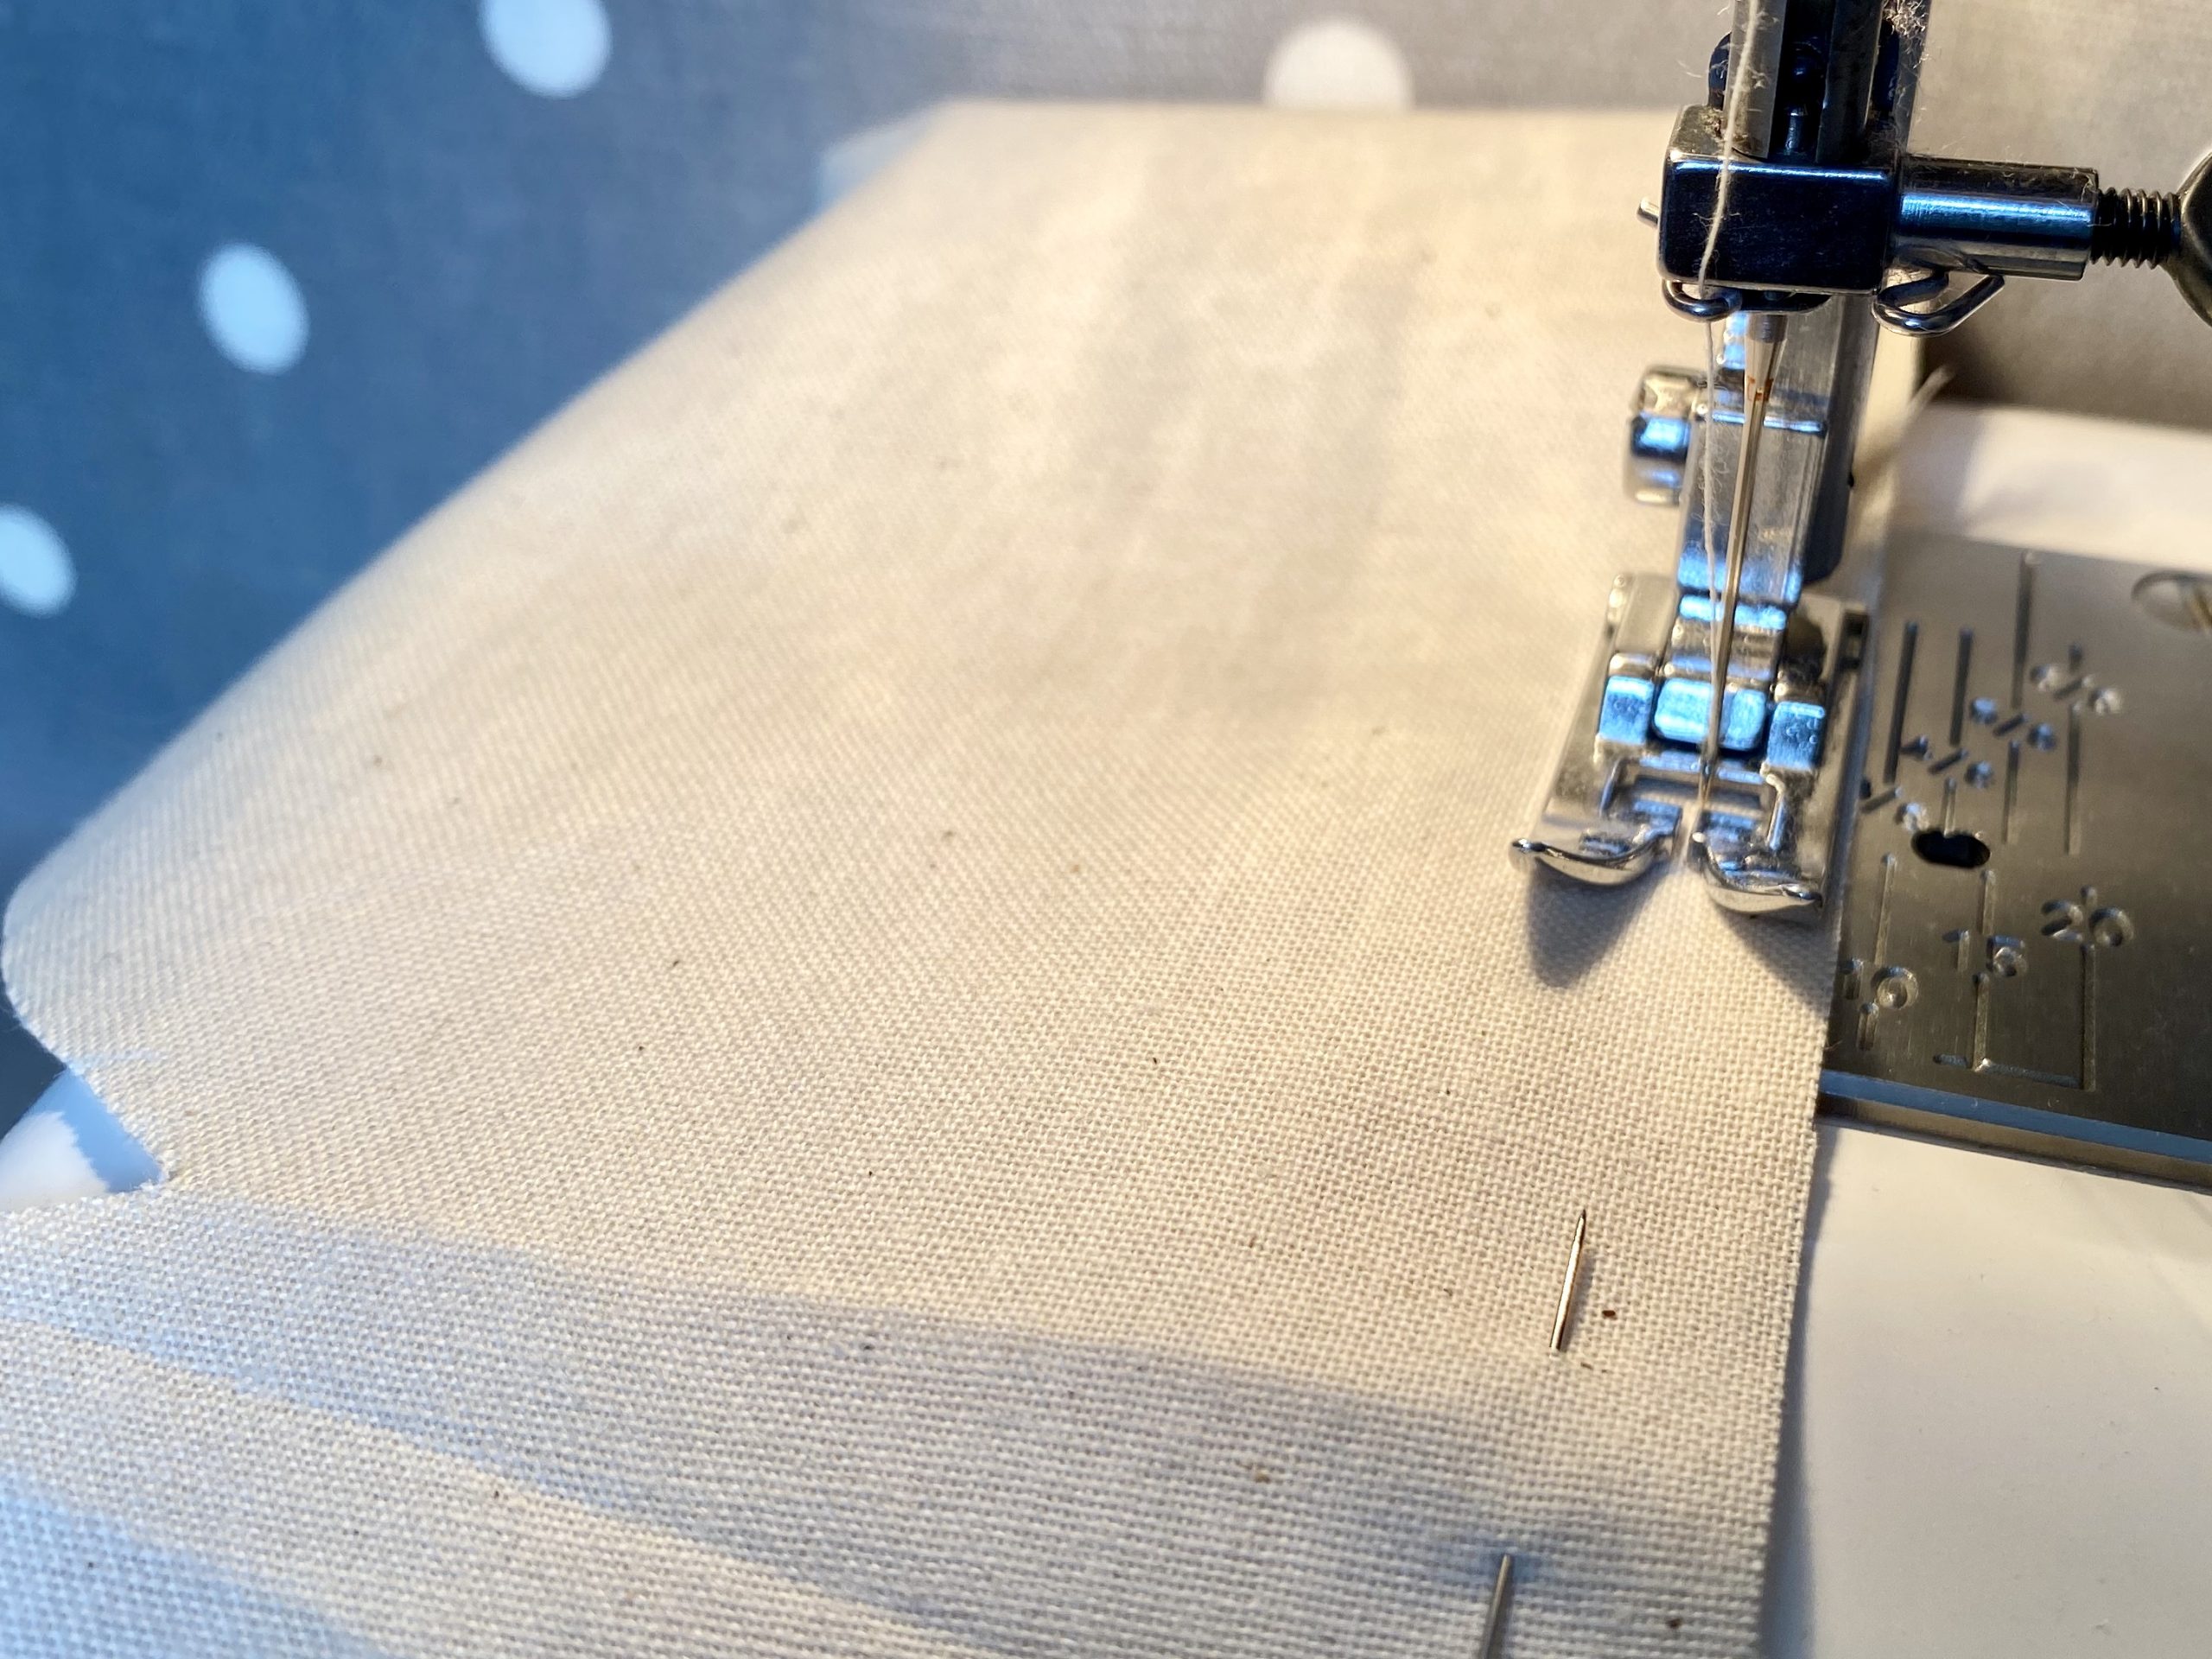
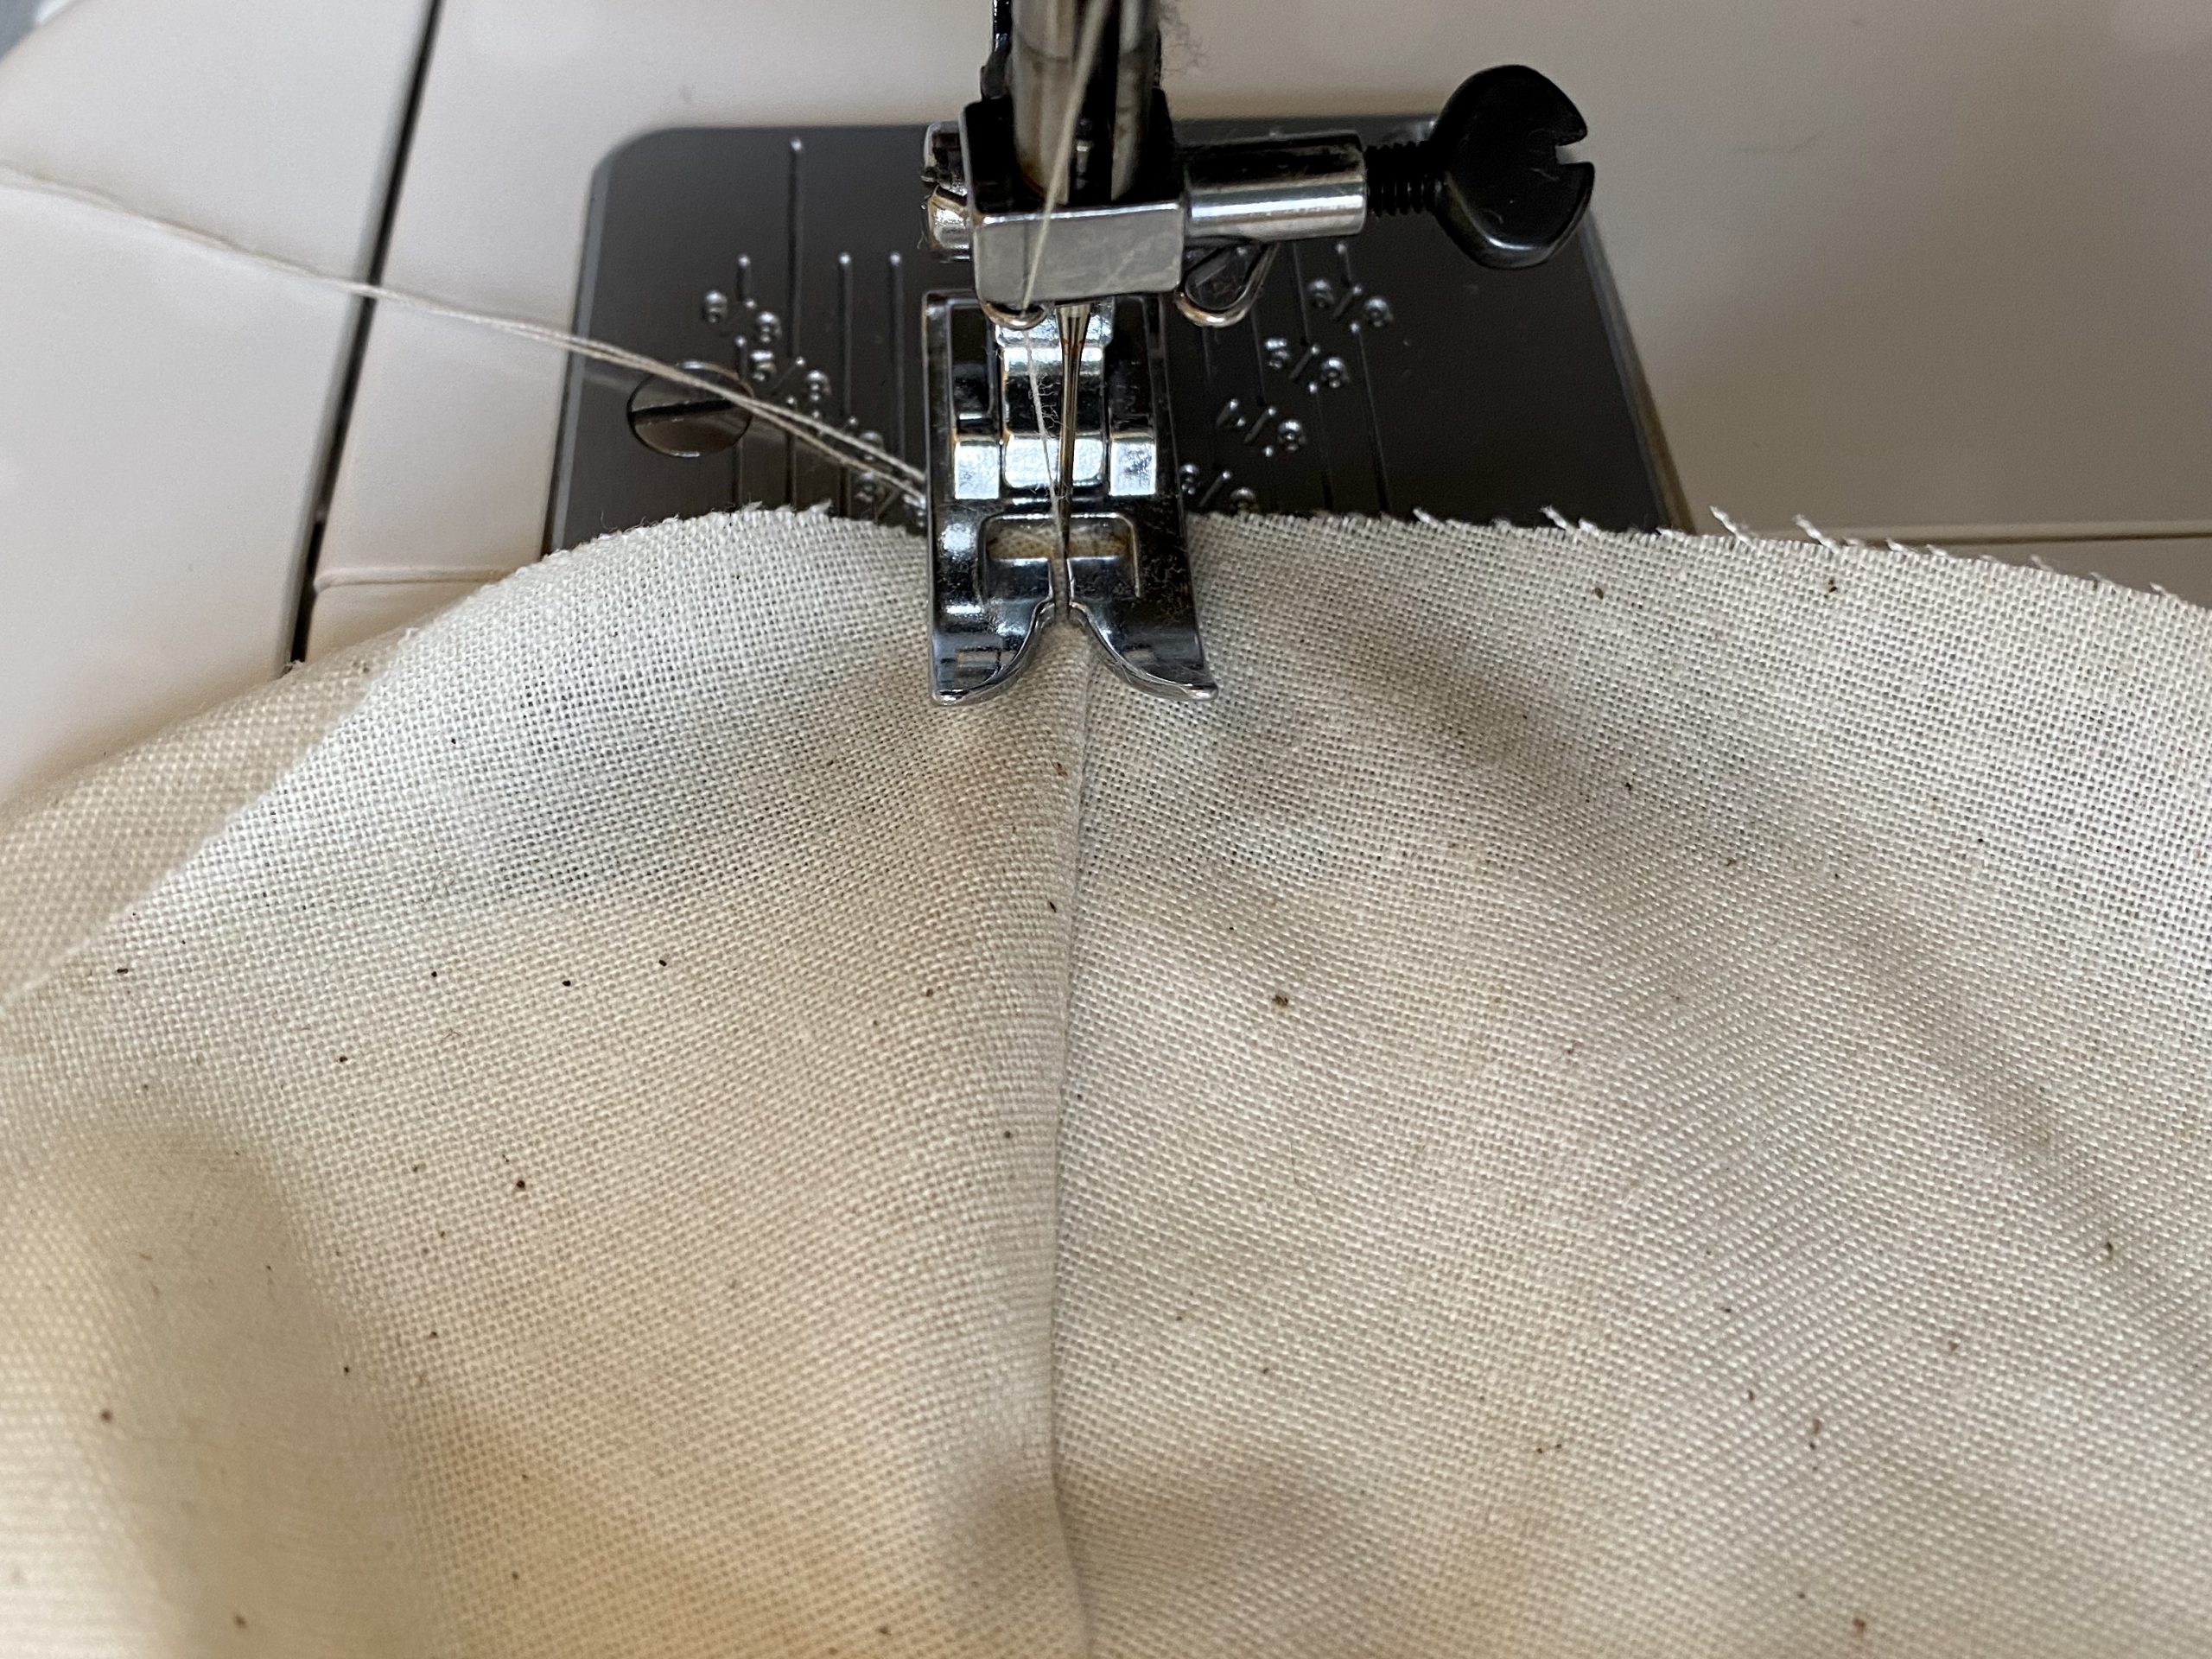
A FOOTS WIDTH SEAM ALLOWANCE


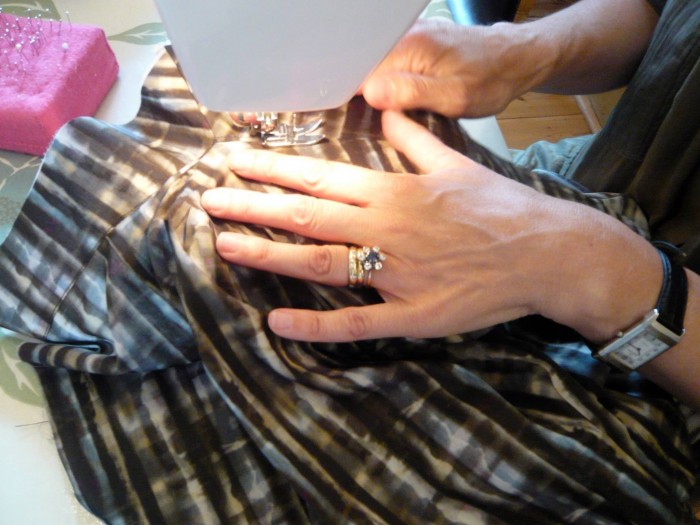
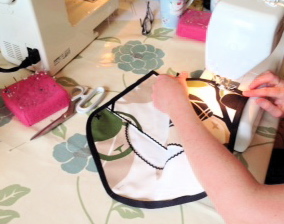
  • Seam 2 pieces together along the top with a foots width seam allowance.
  • With the other piece, fold the top edge over no more than 1cm and zig zag down.


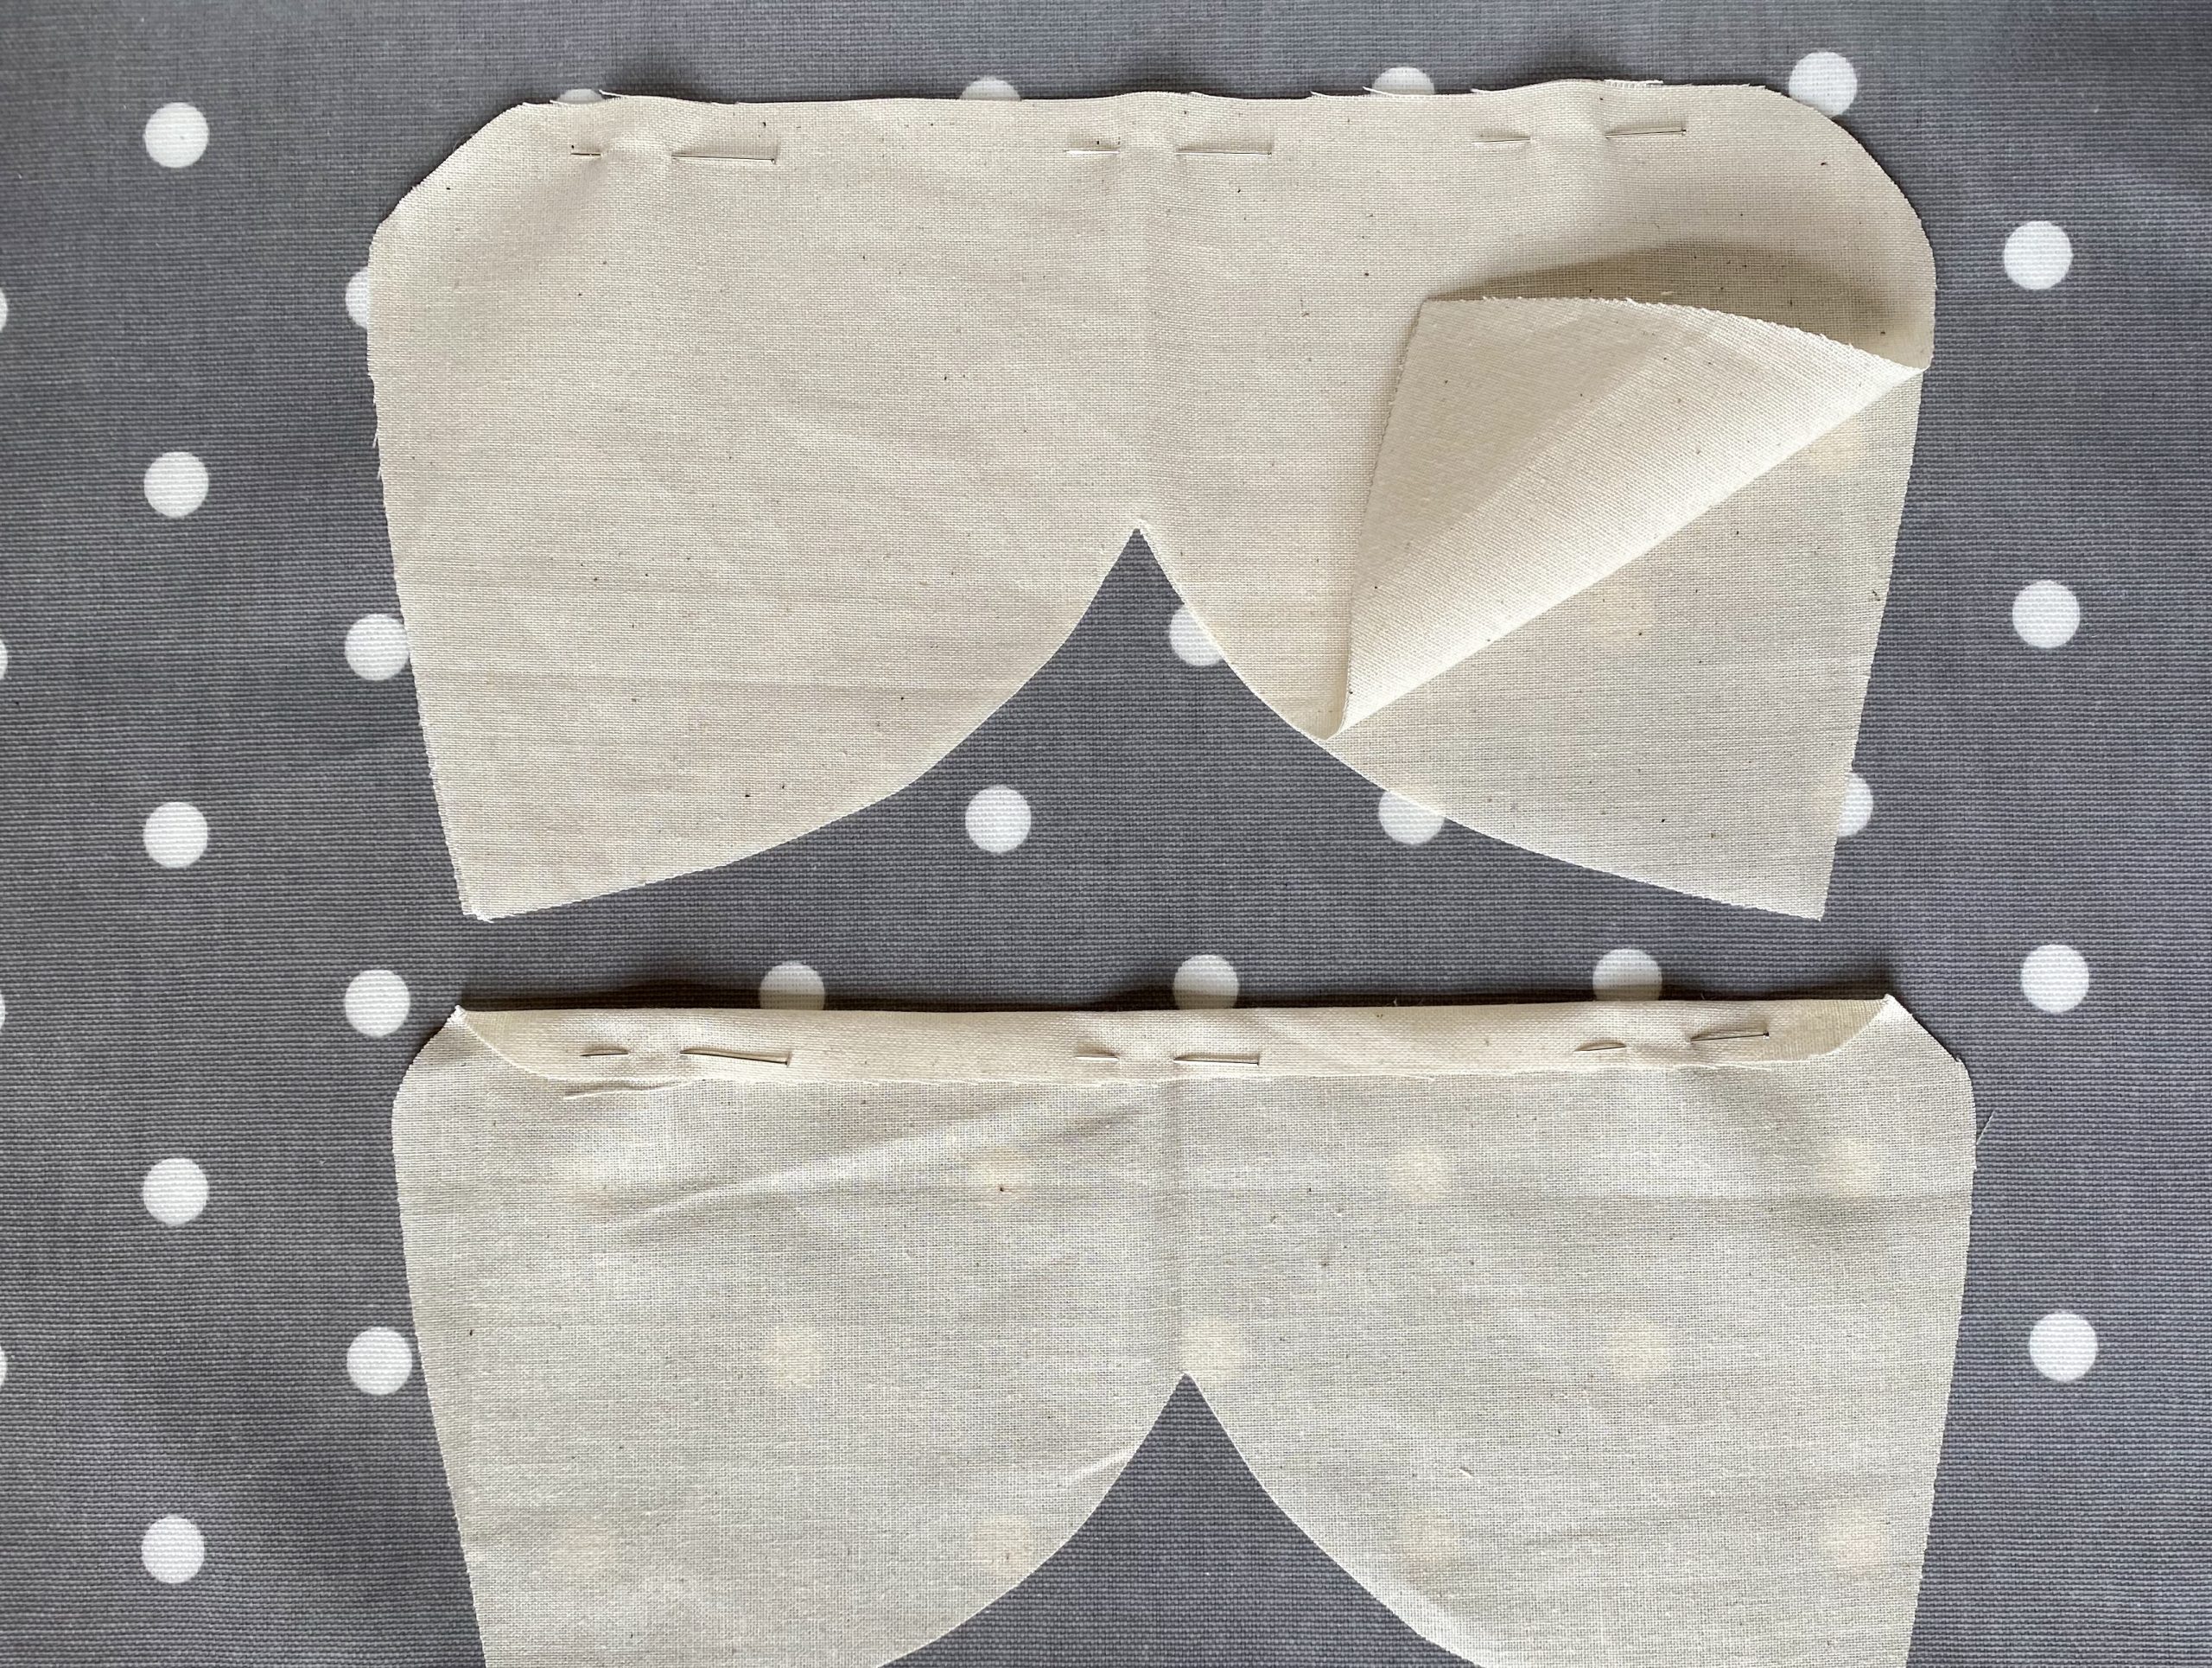
  • Open out the 2 pieces that you seamed together and fold in half the other way.
  • Pin the curved edges right sides together, ready to sew.


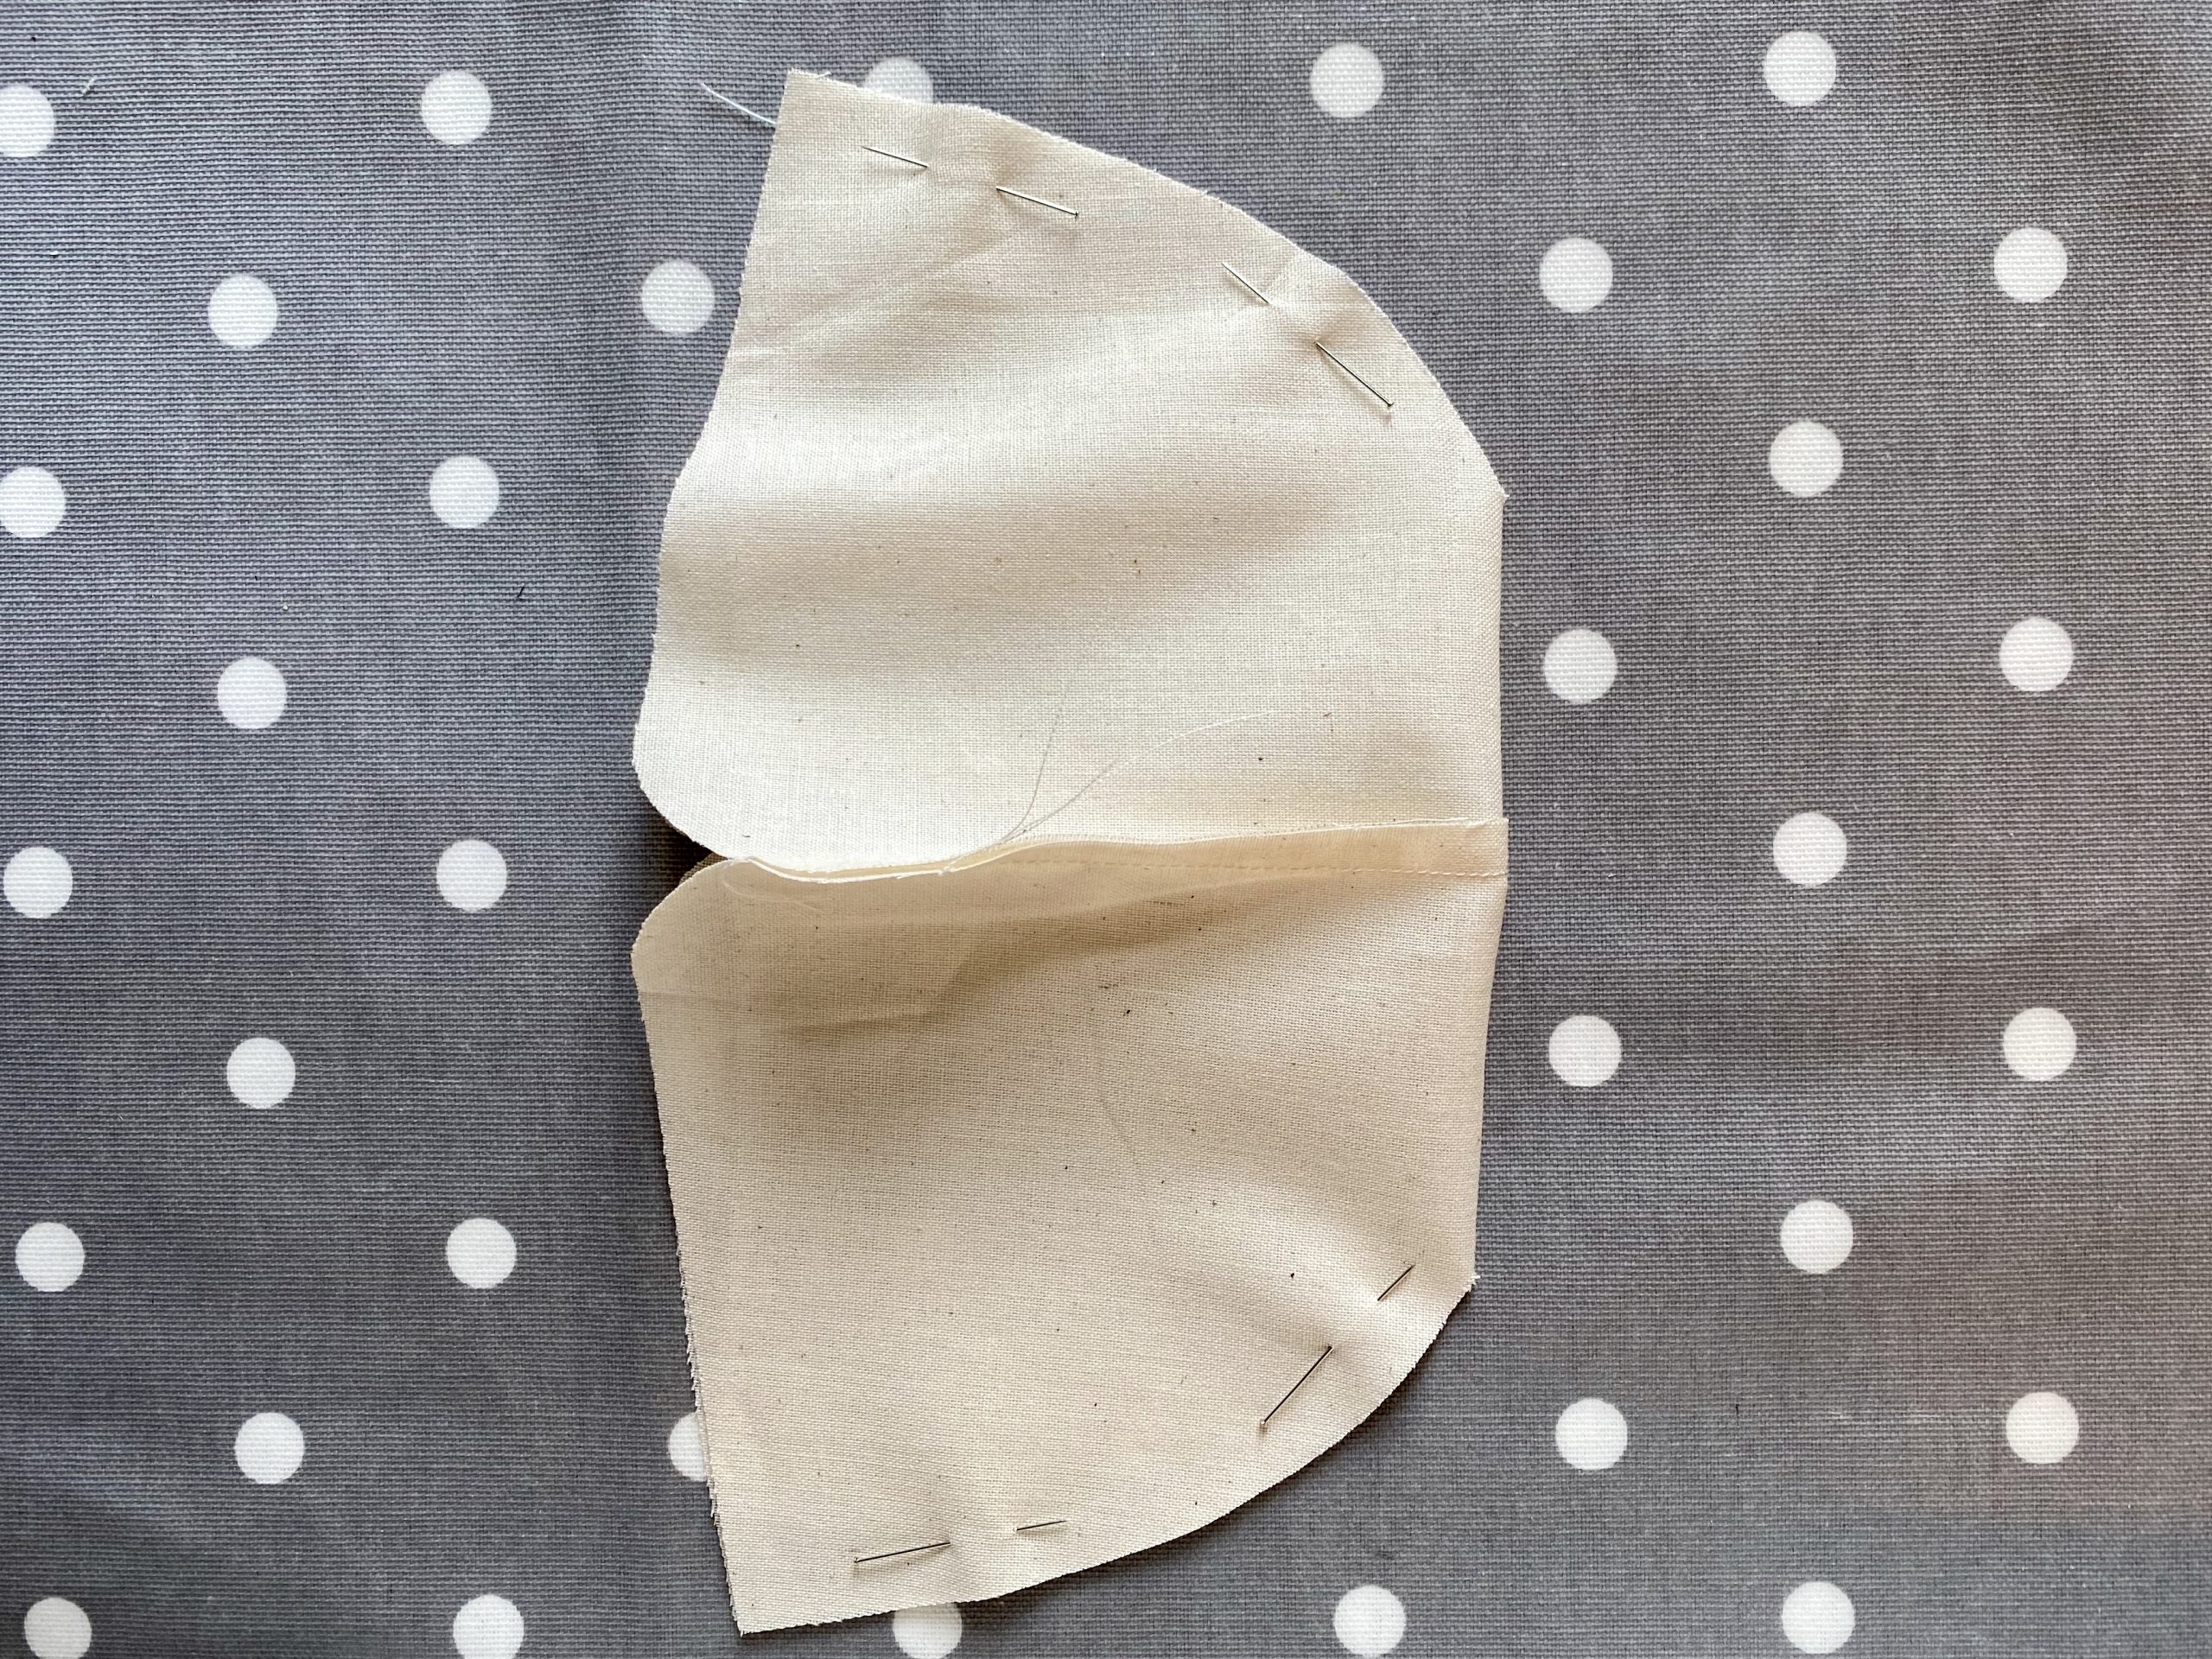
  • Do the same to the other piece.
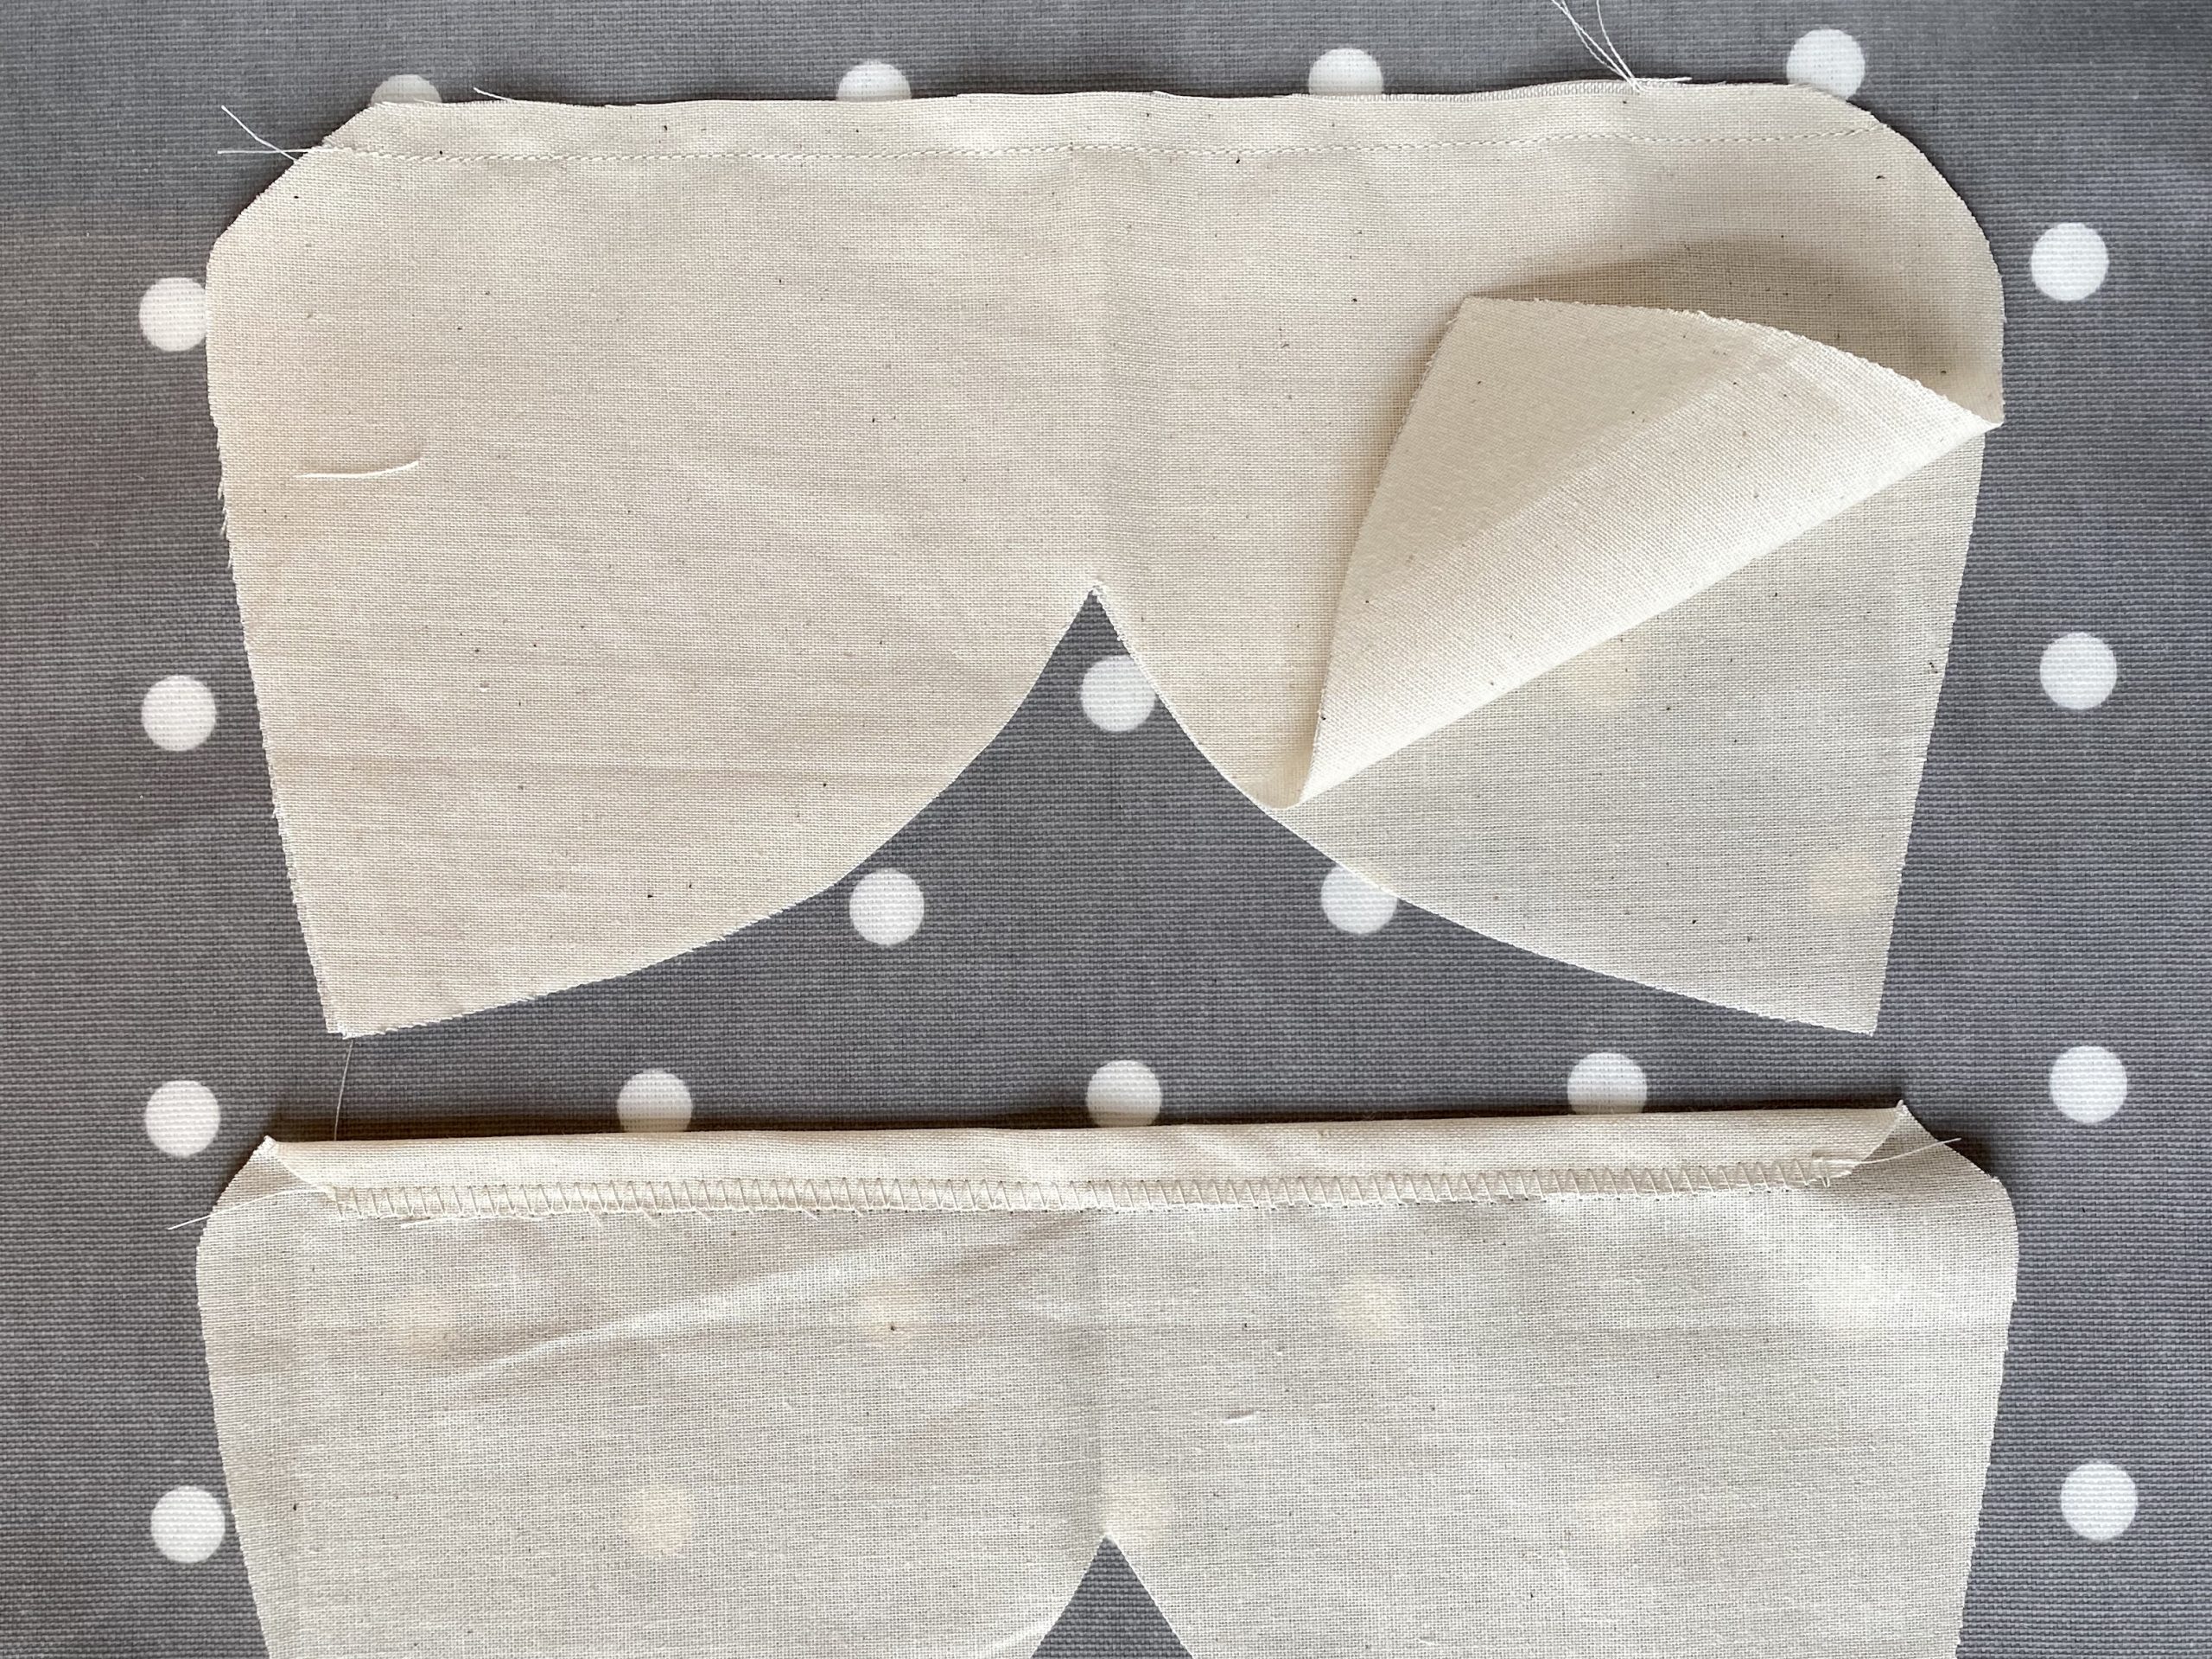
  • Stitch the curved edges with a foots width seam allowance.


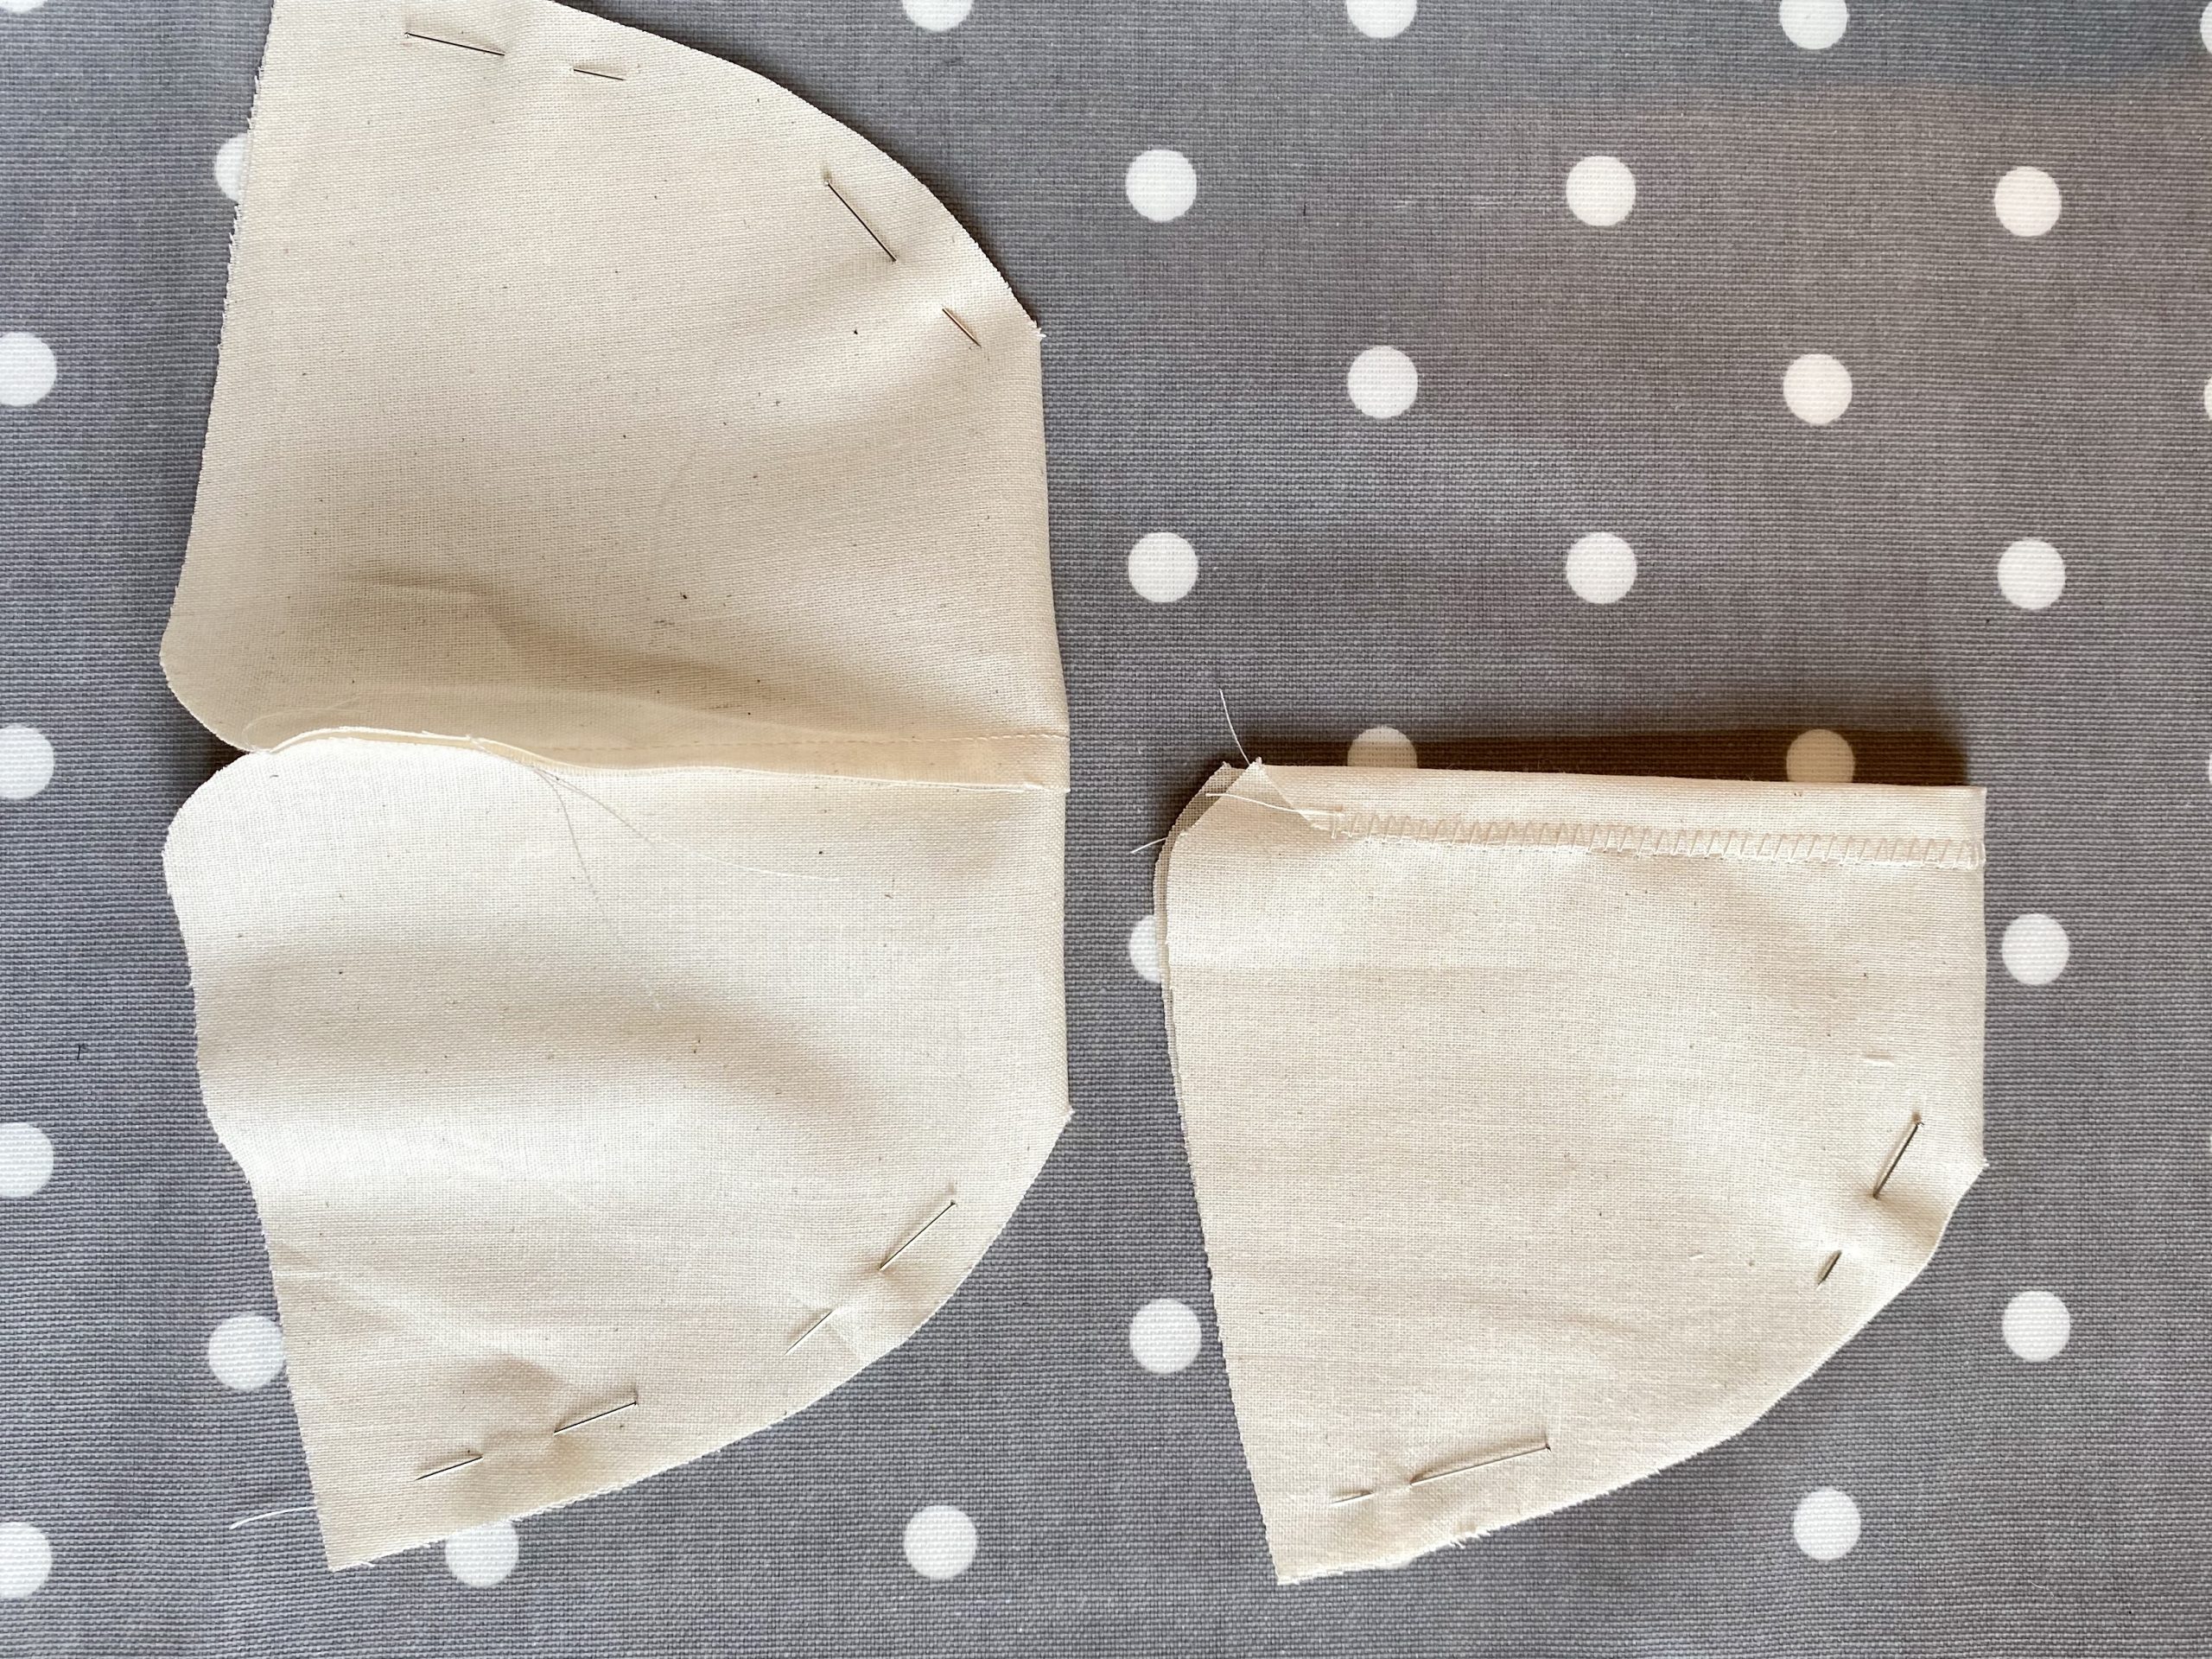
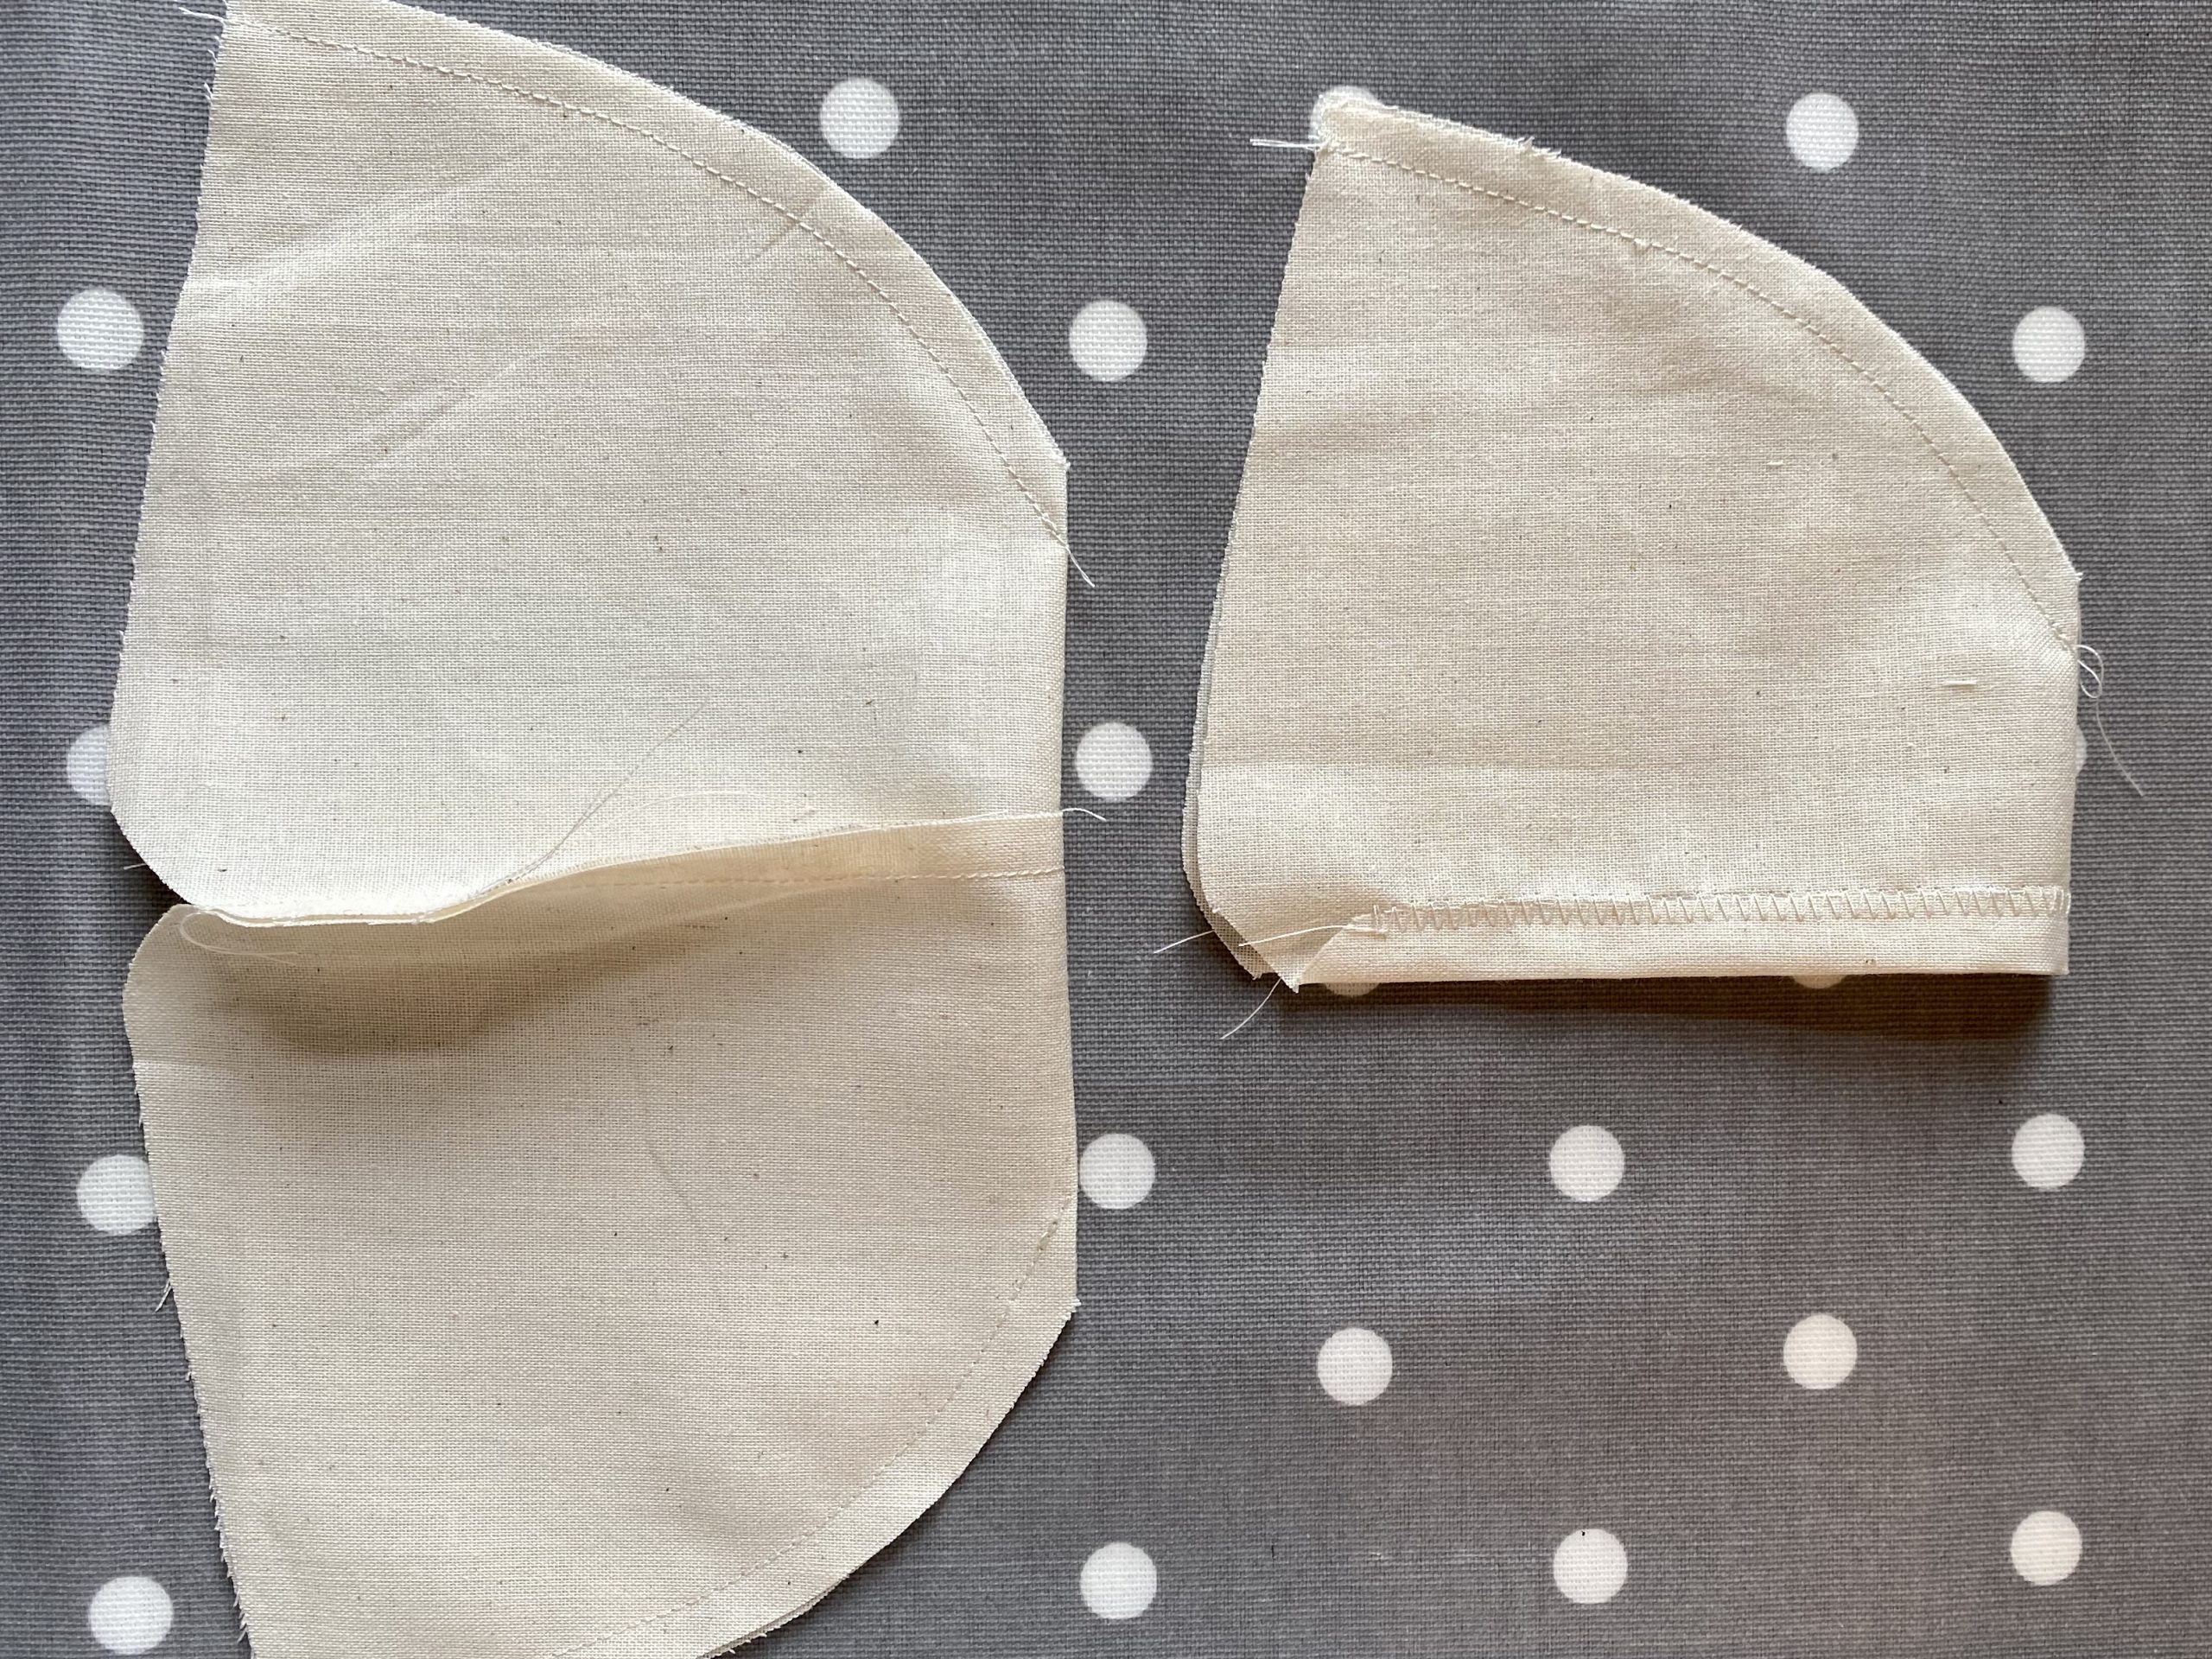
  • Open out the seams you have just stitched.
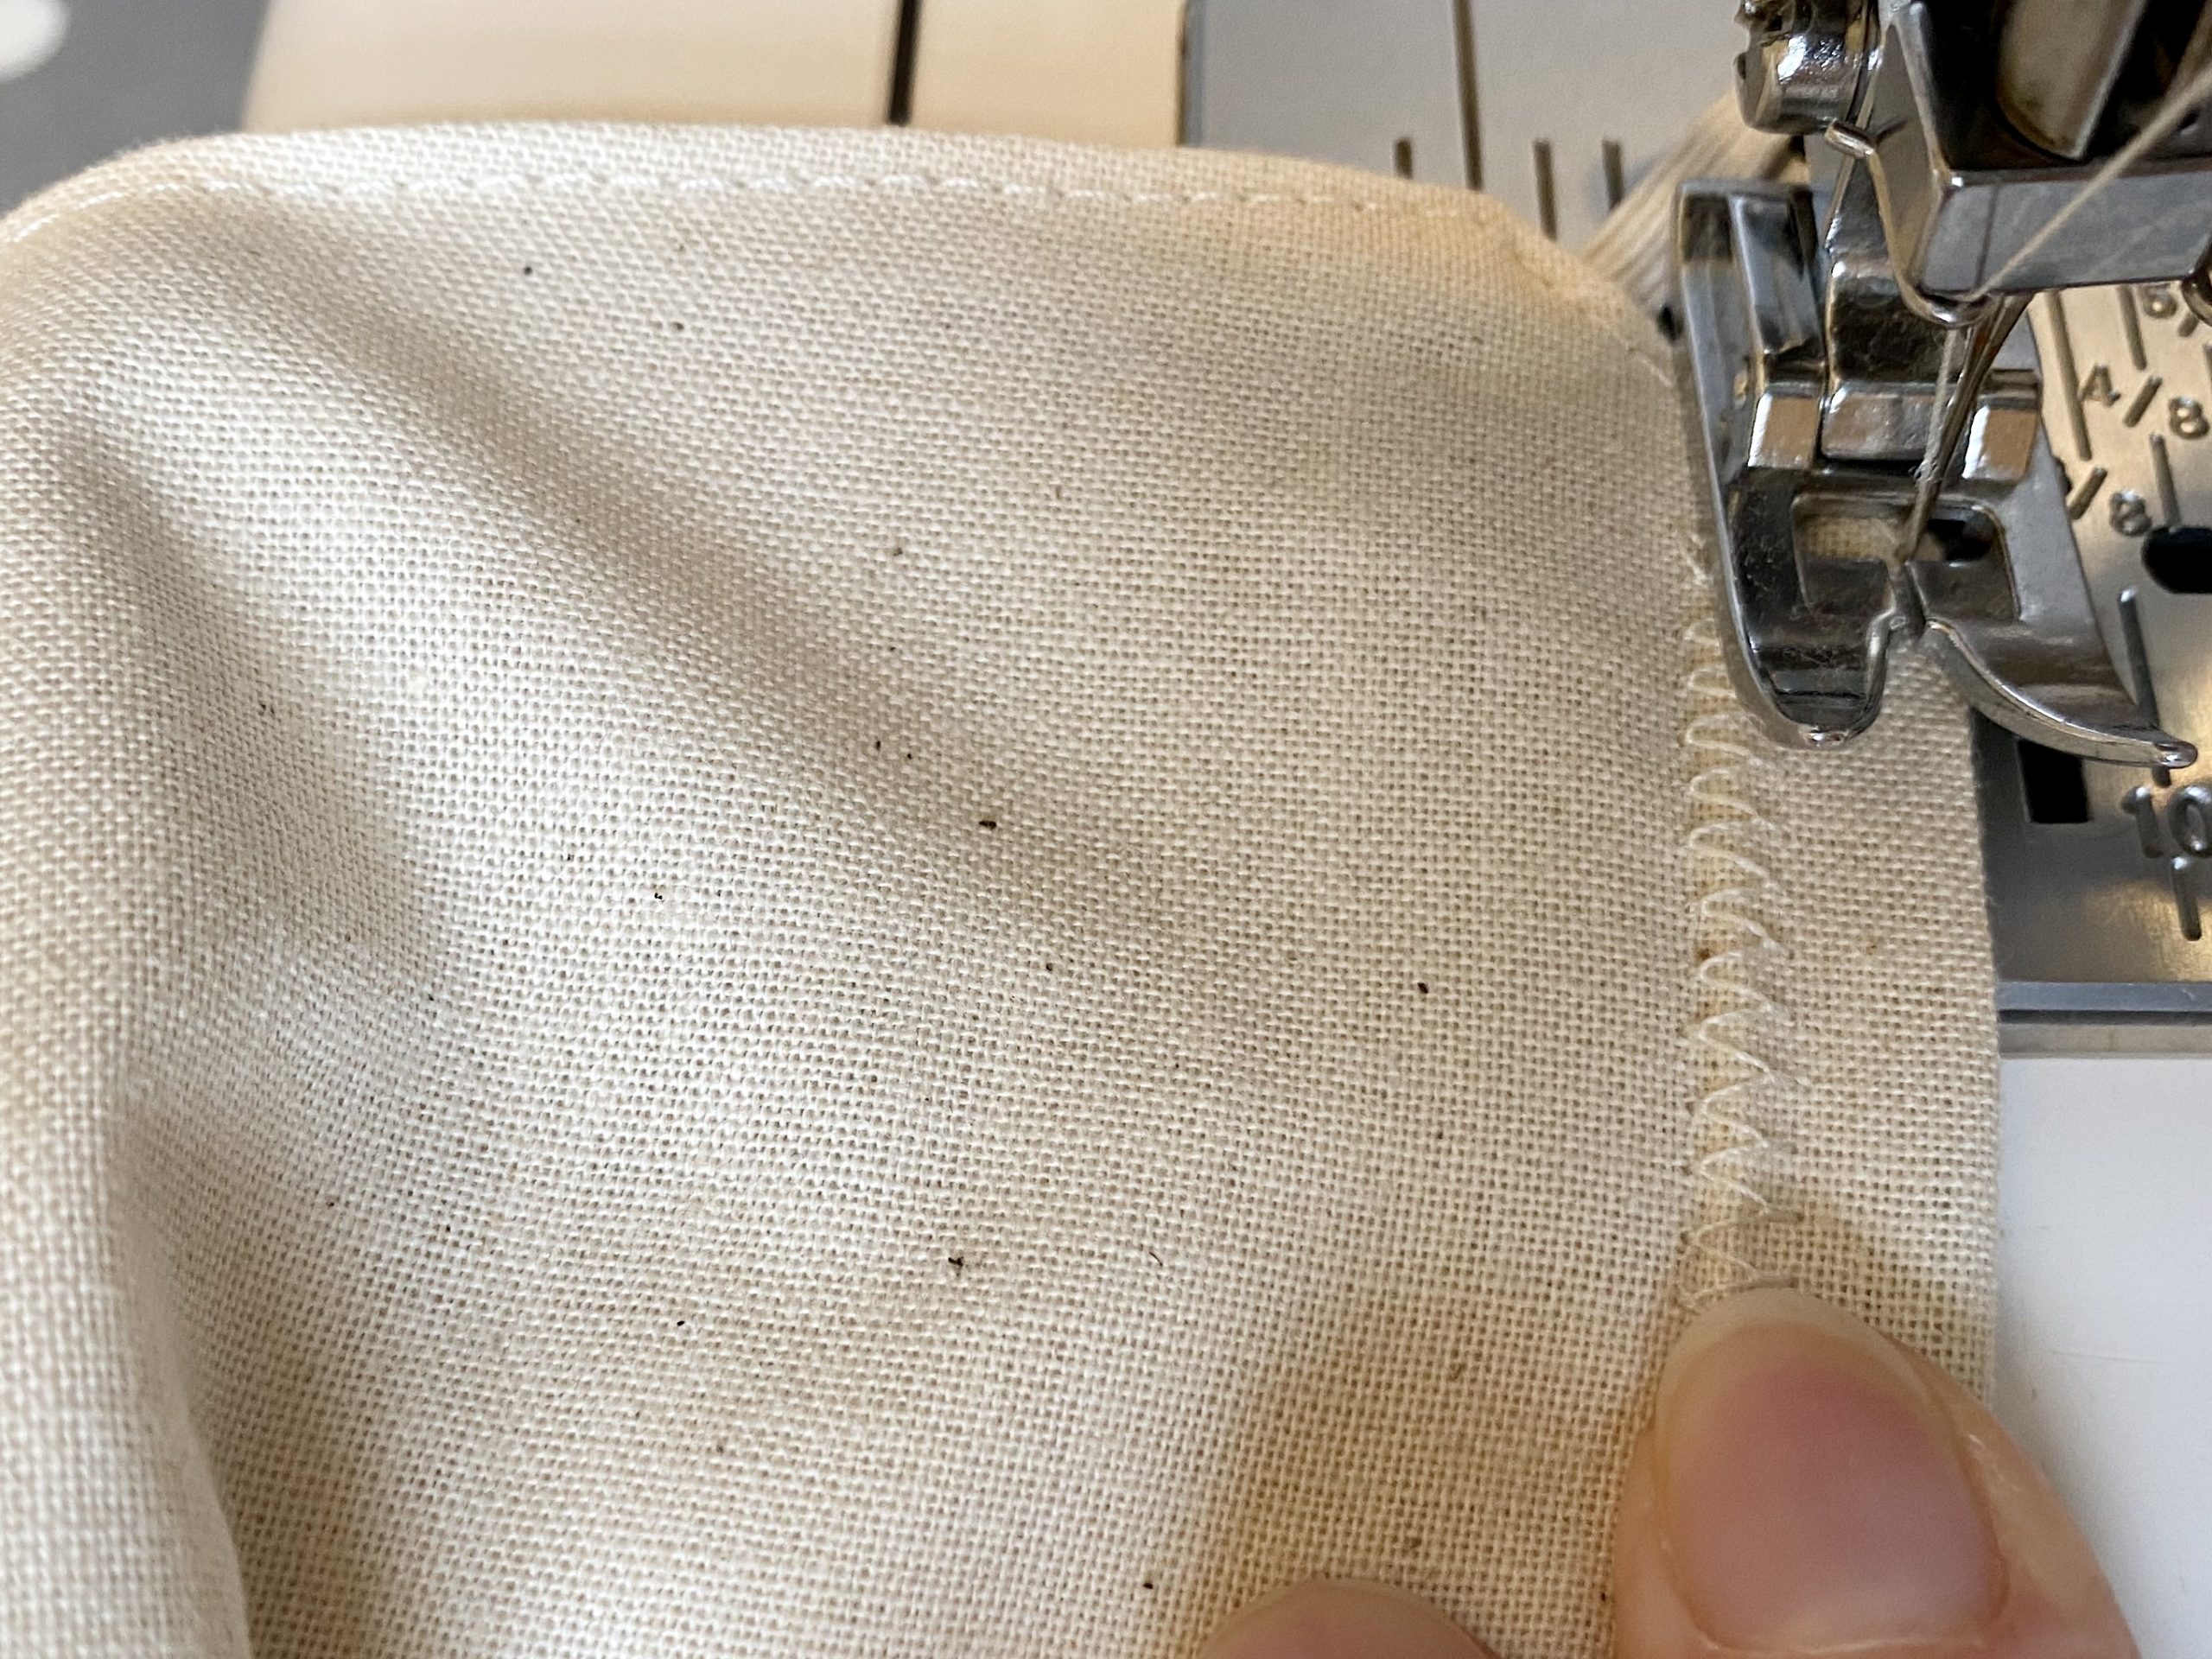
  • Top-stitch these seams from the right side so that the seam is pulled flat and stitched down on to the seam allowance.


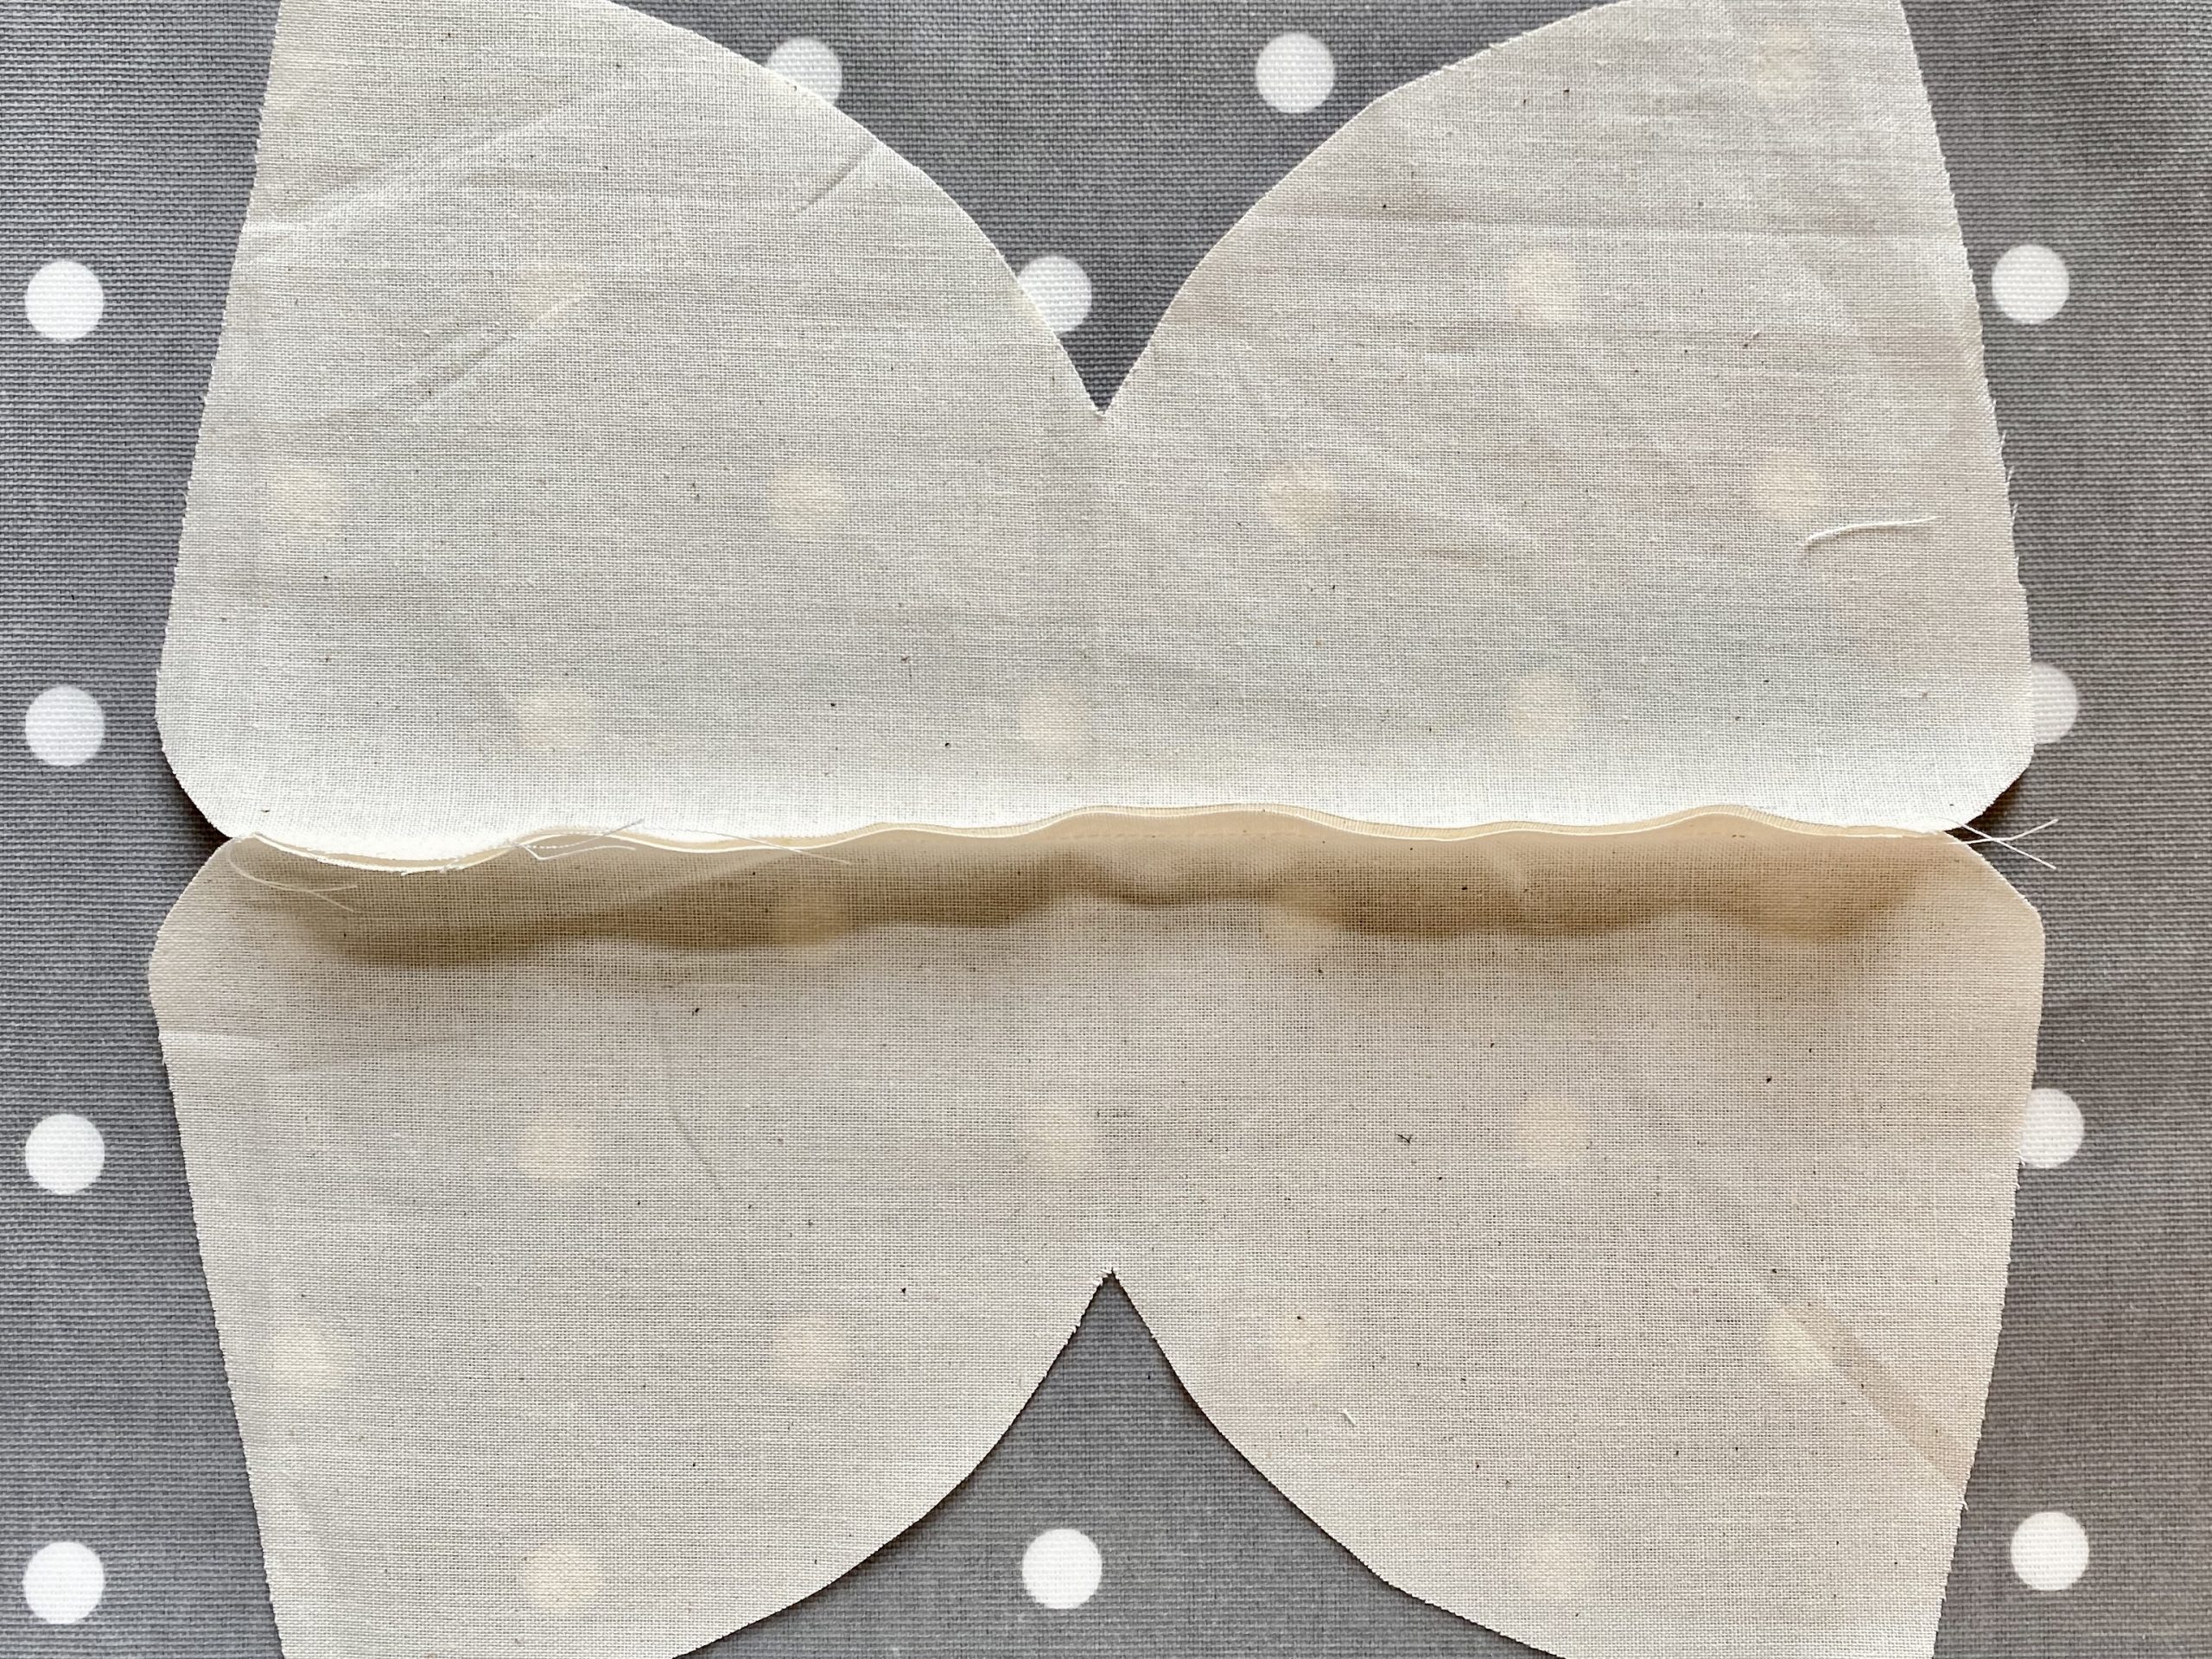
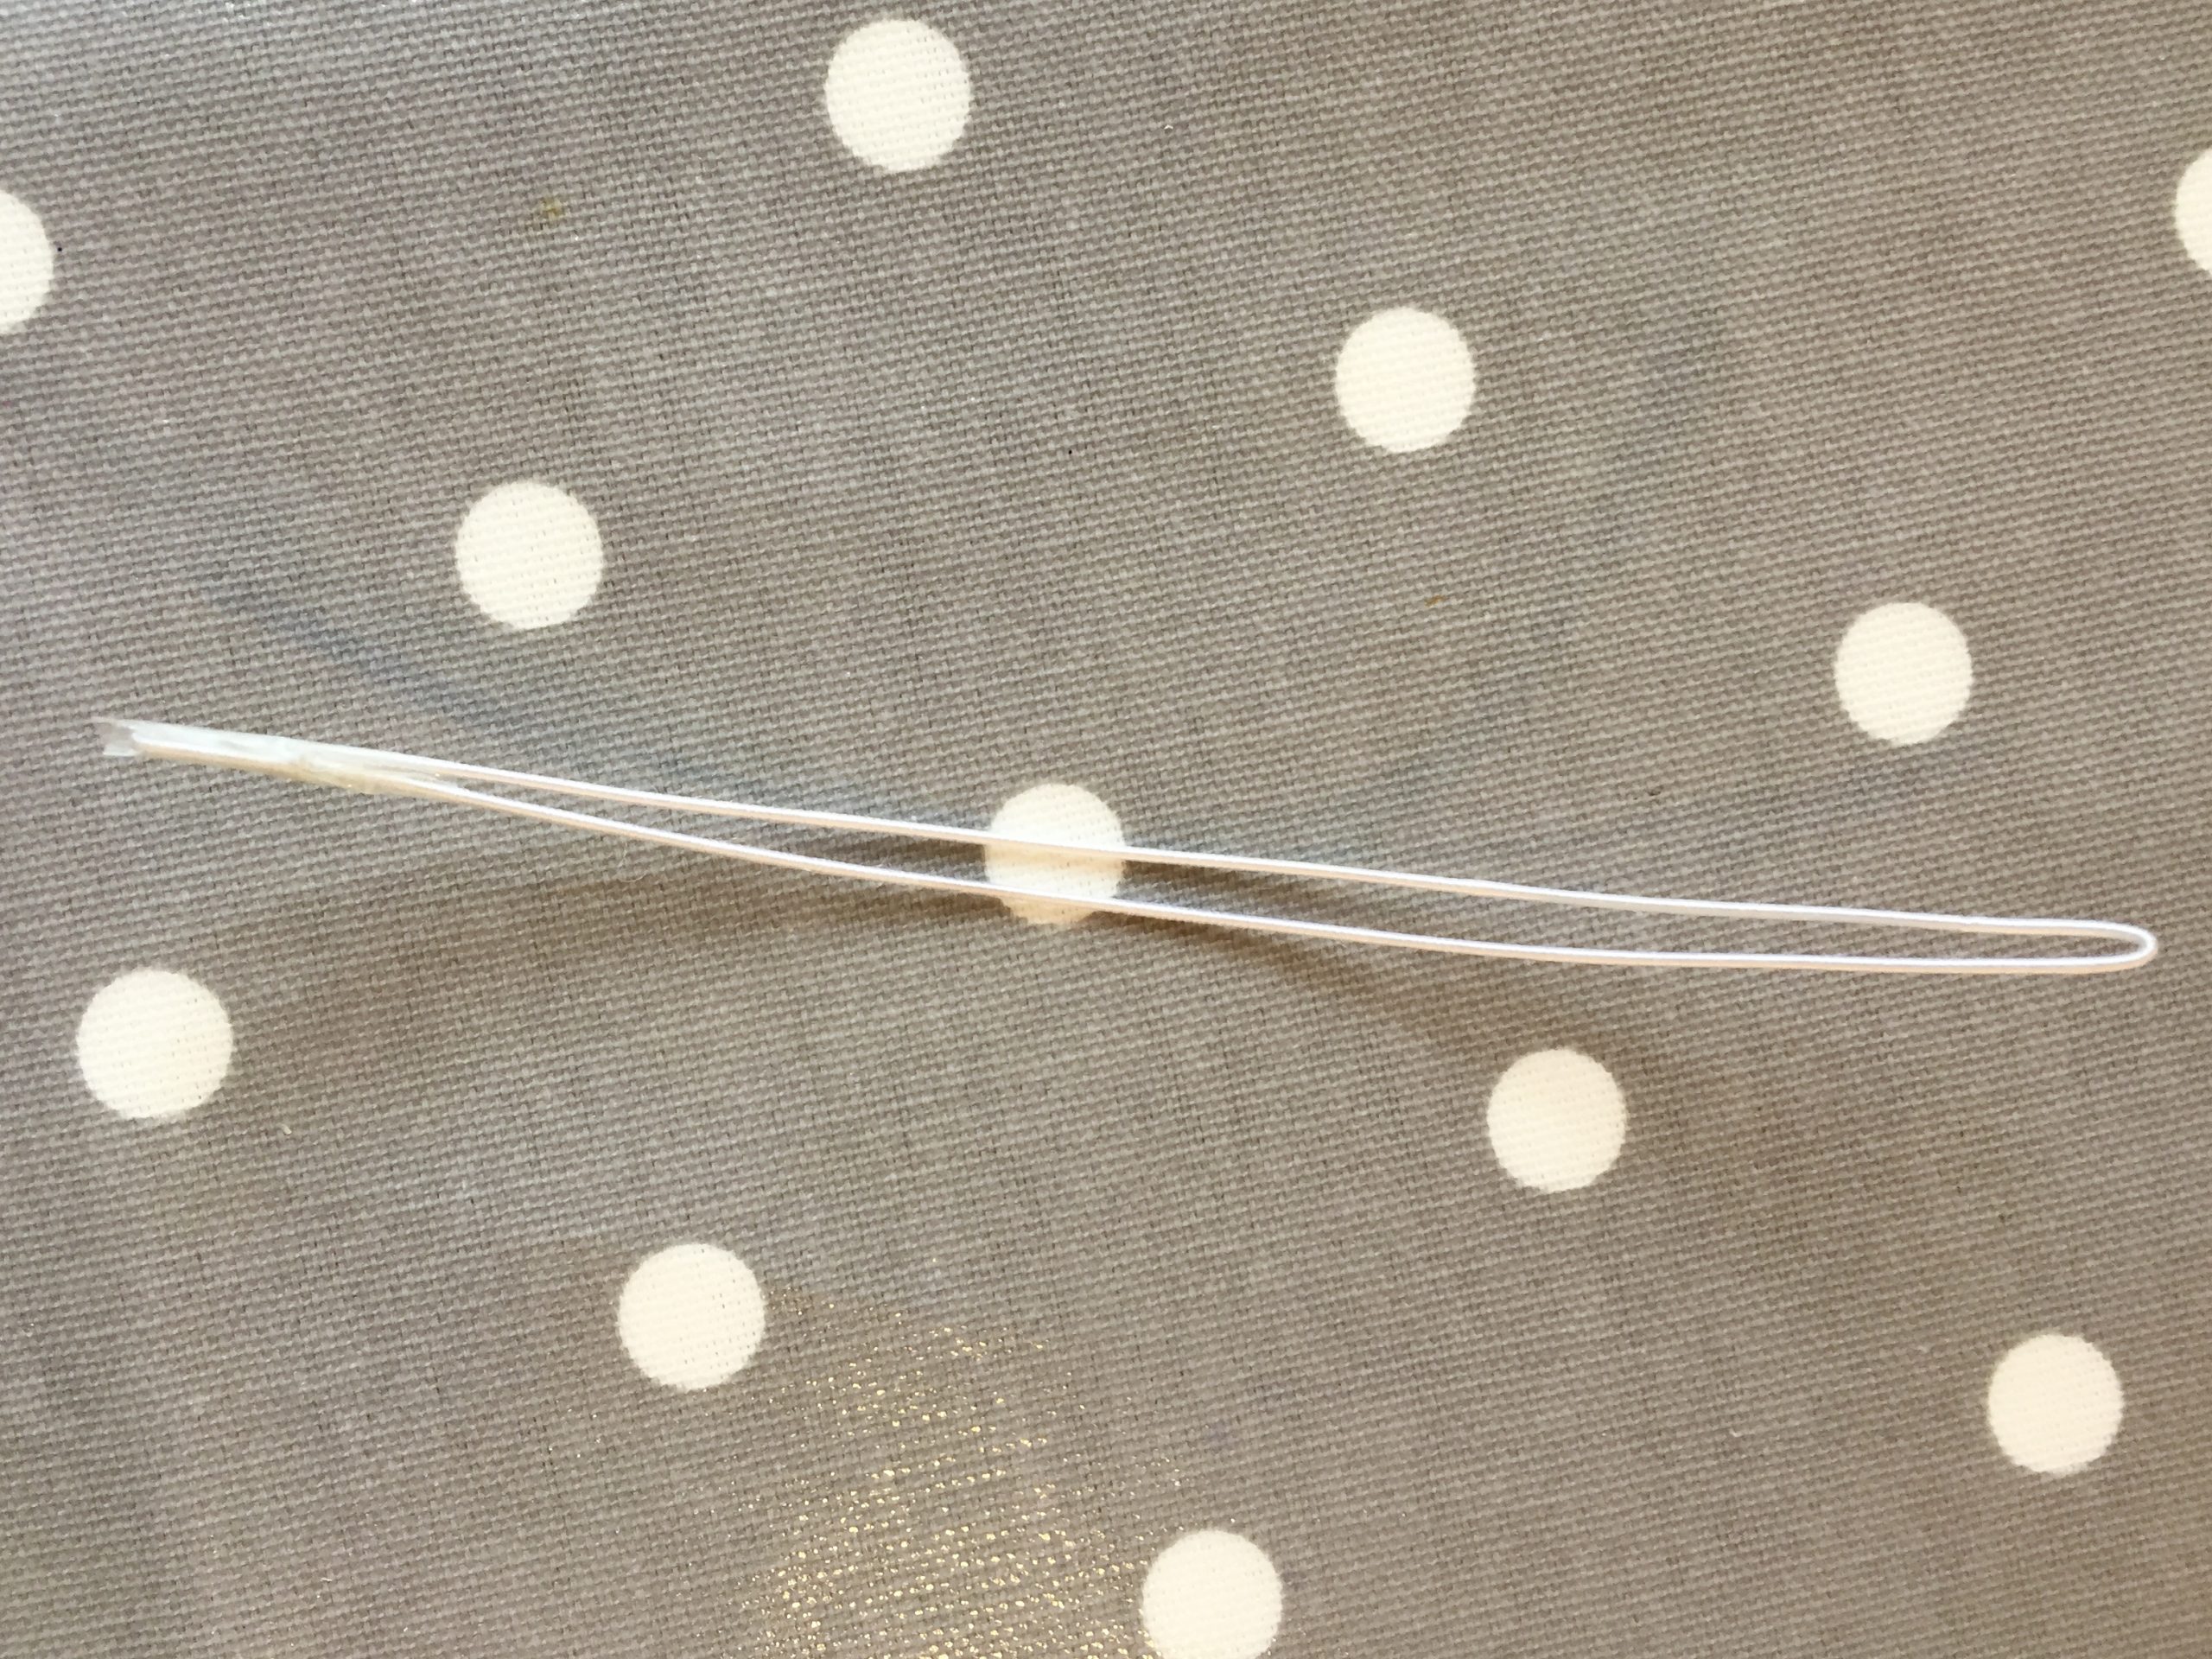
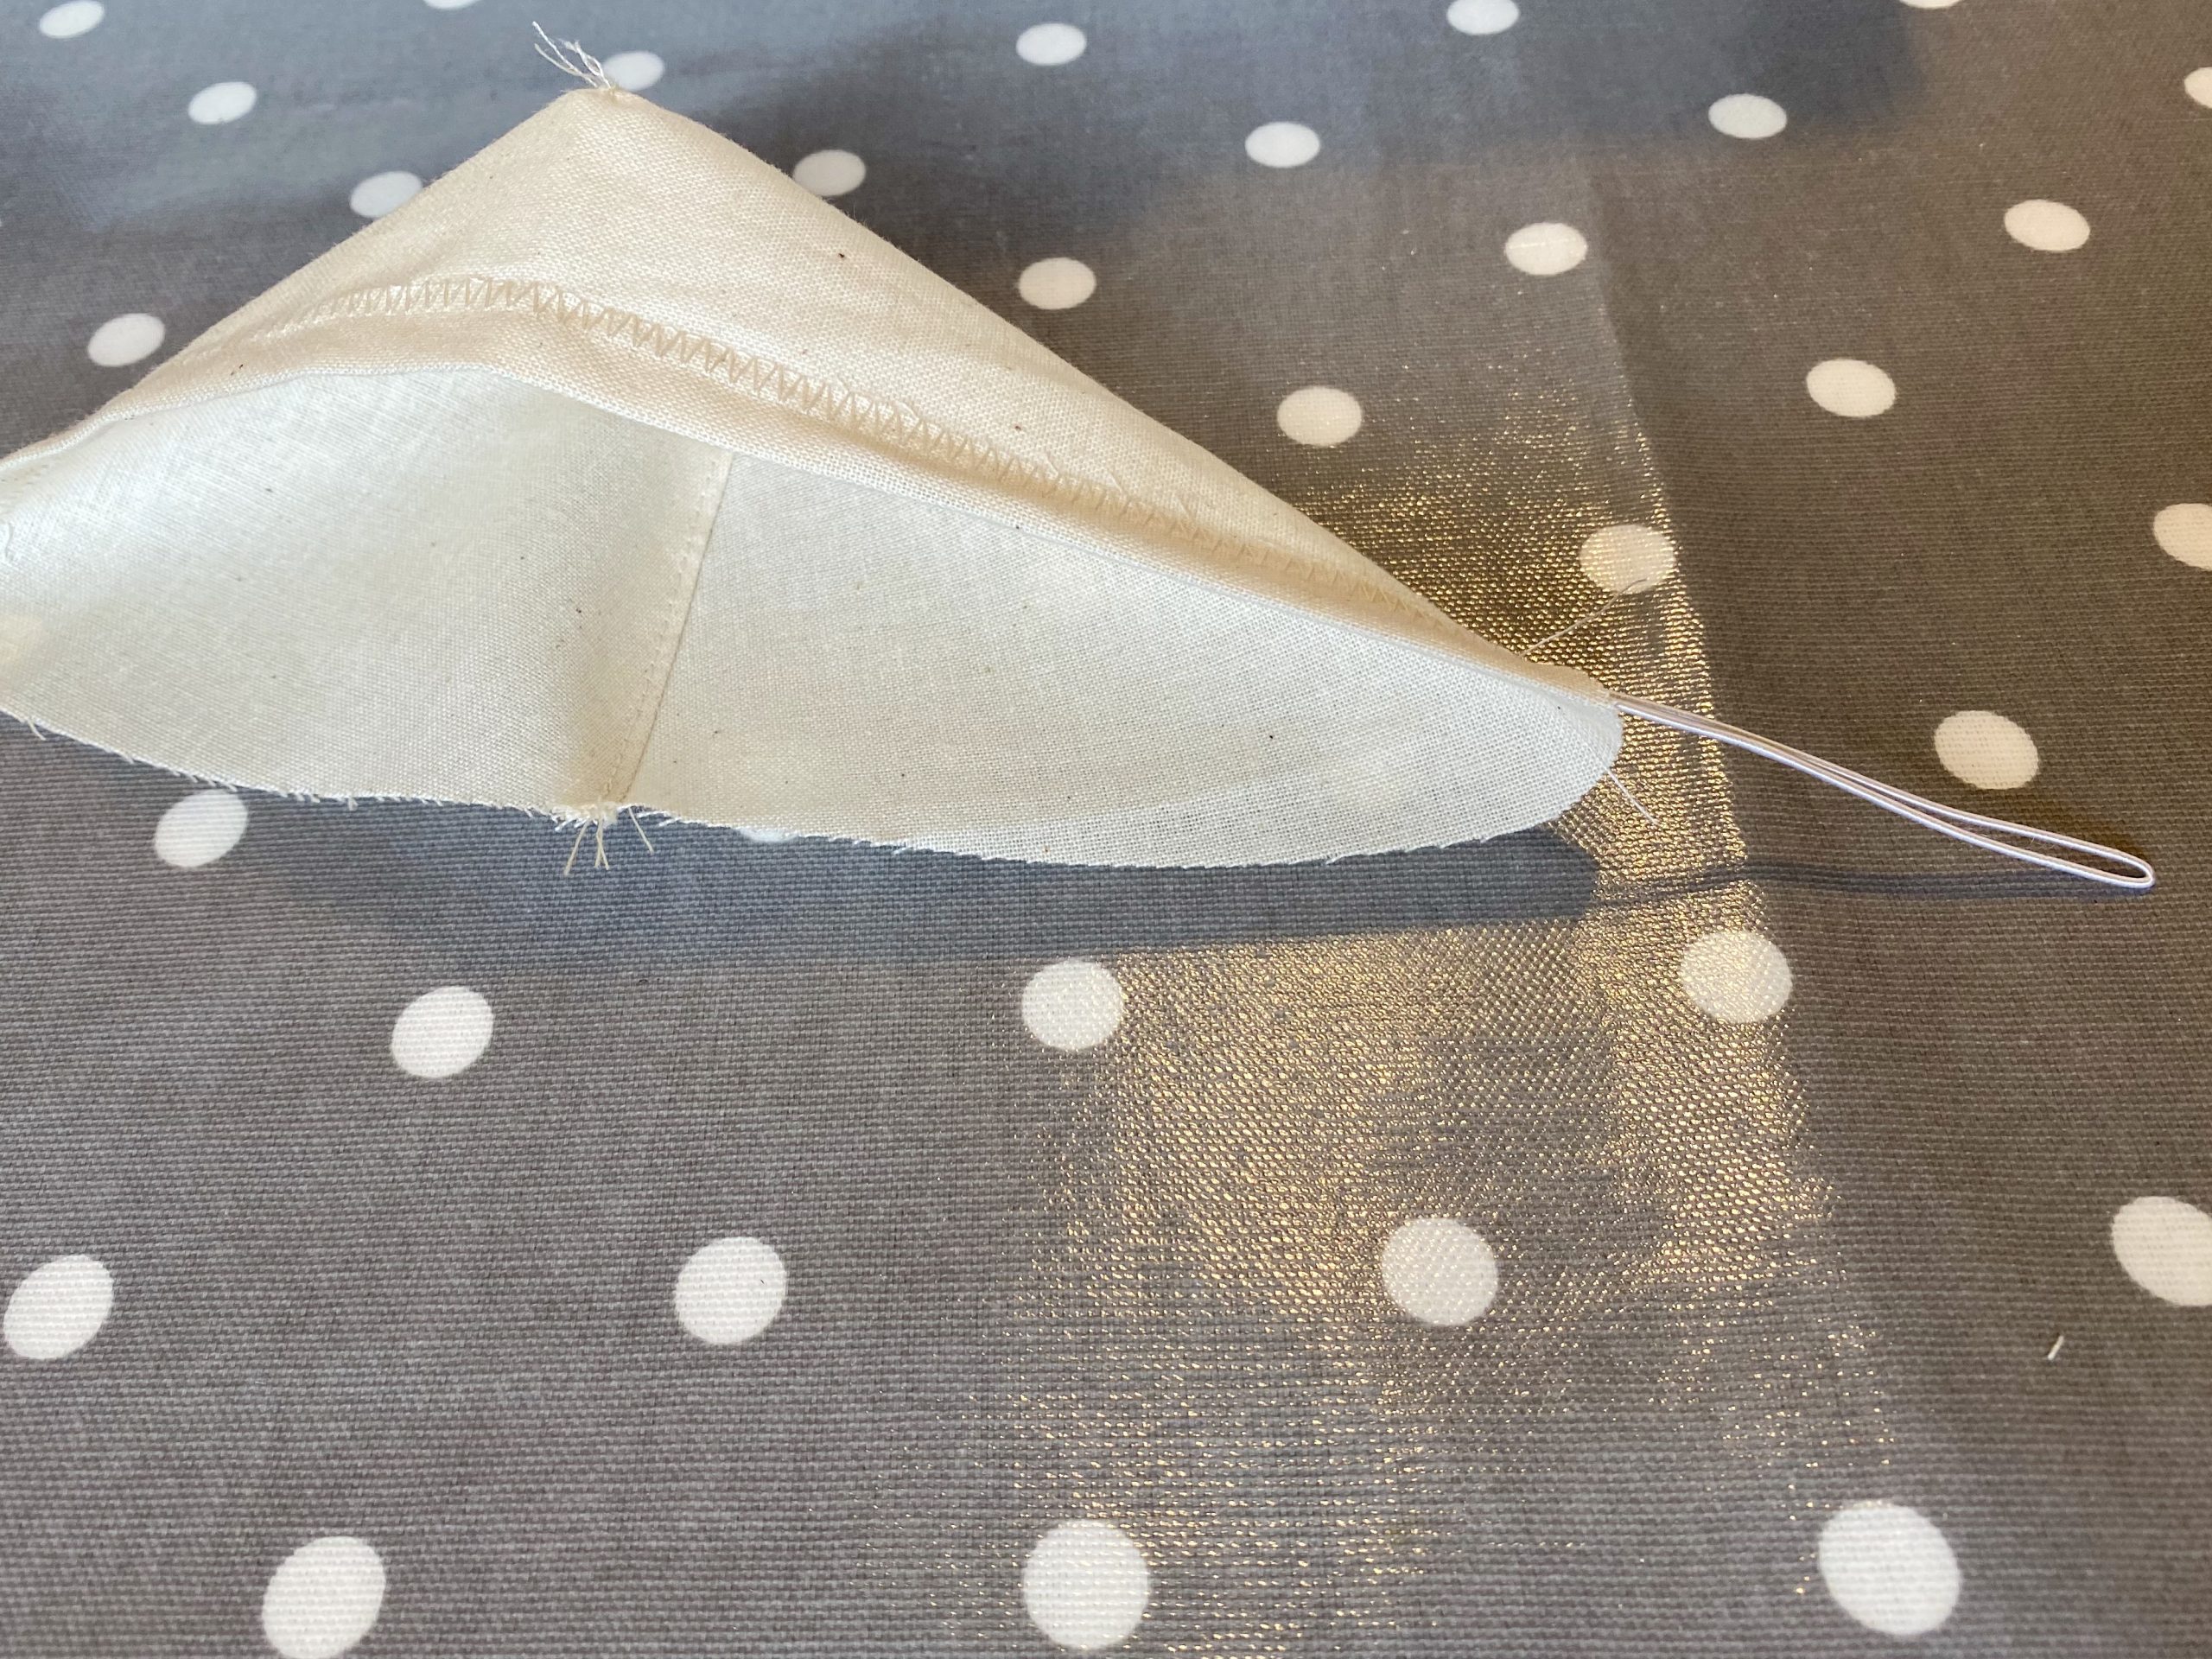
  • Cut the wire  and make sure the ends aren’t sharp by bending the wire or using sticky tape.
  • Feed the wire through channel.


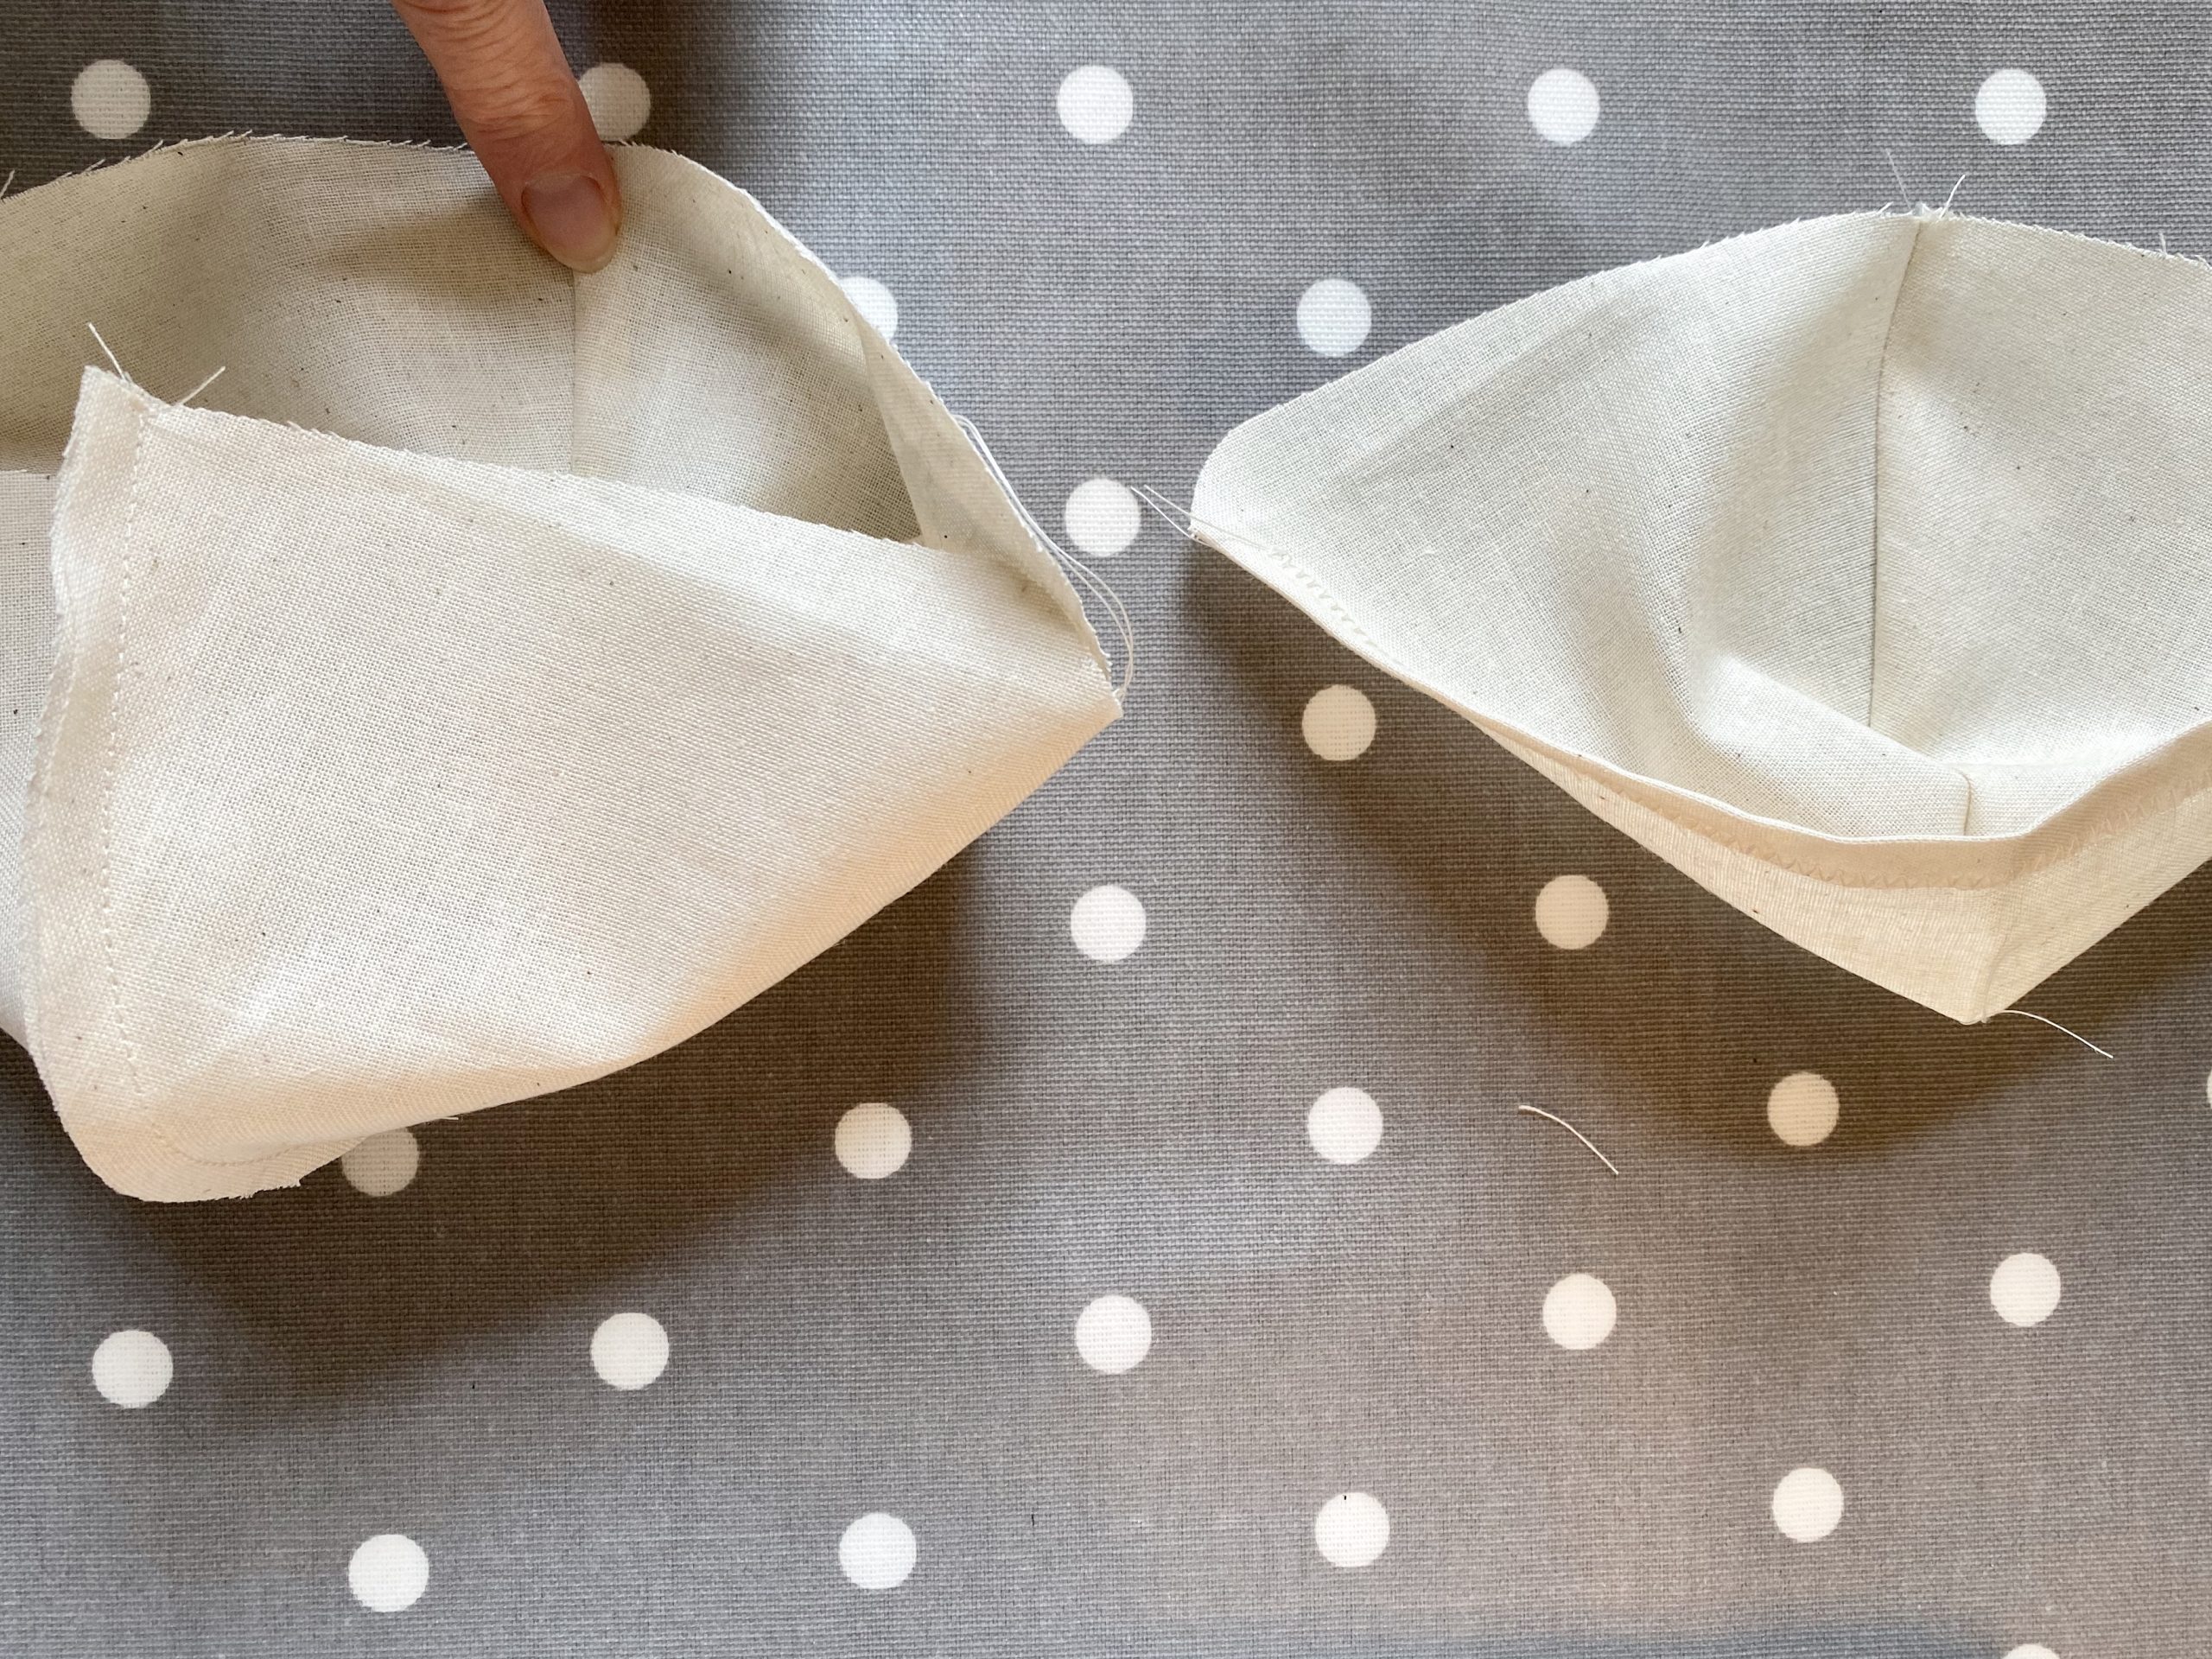
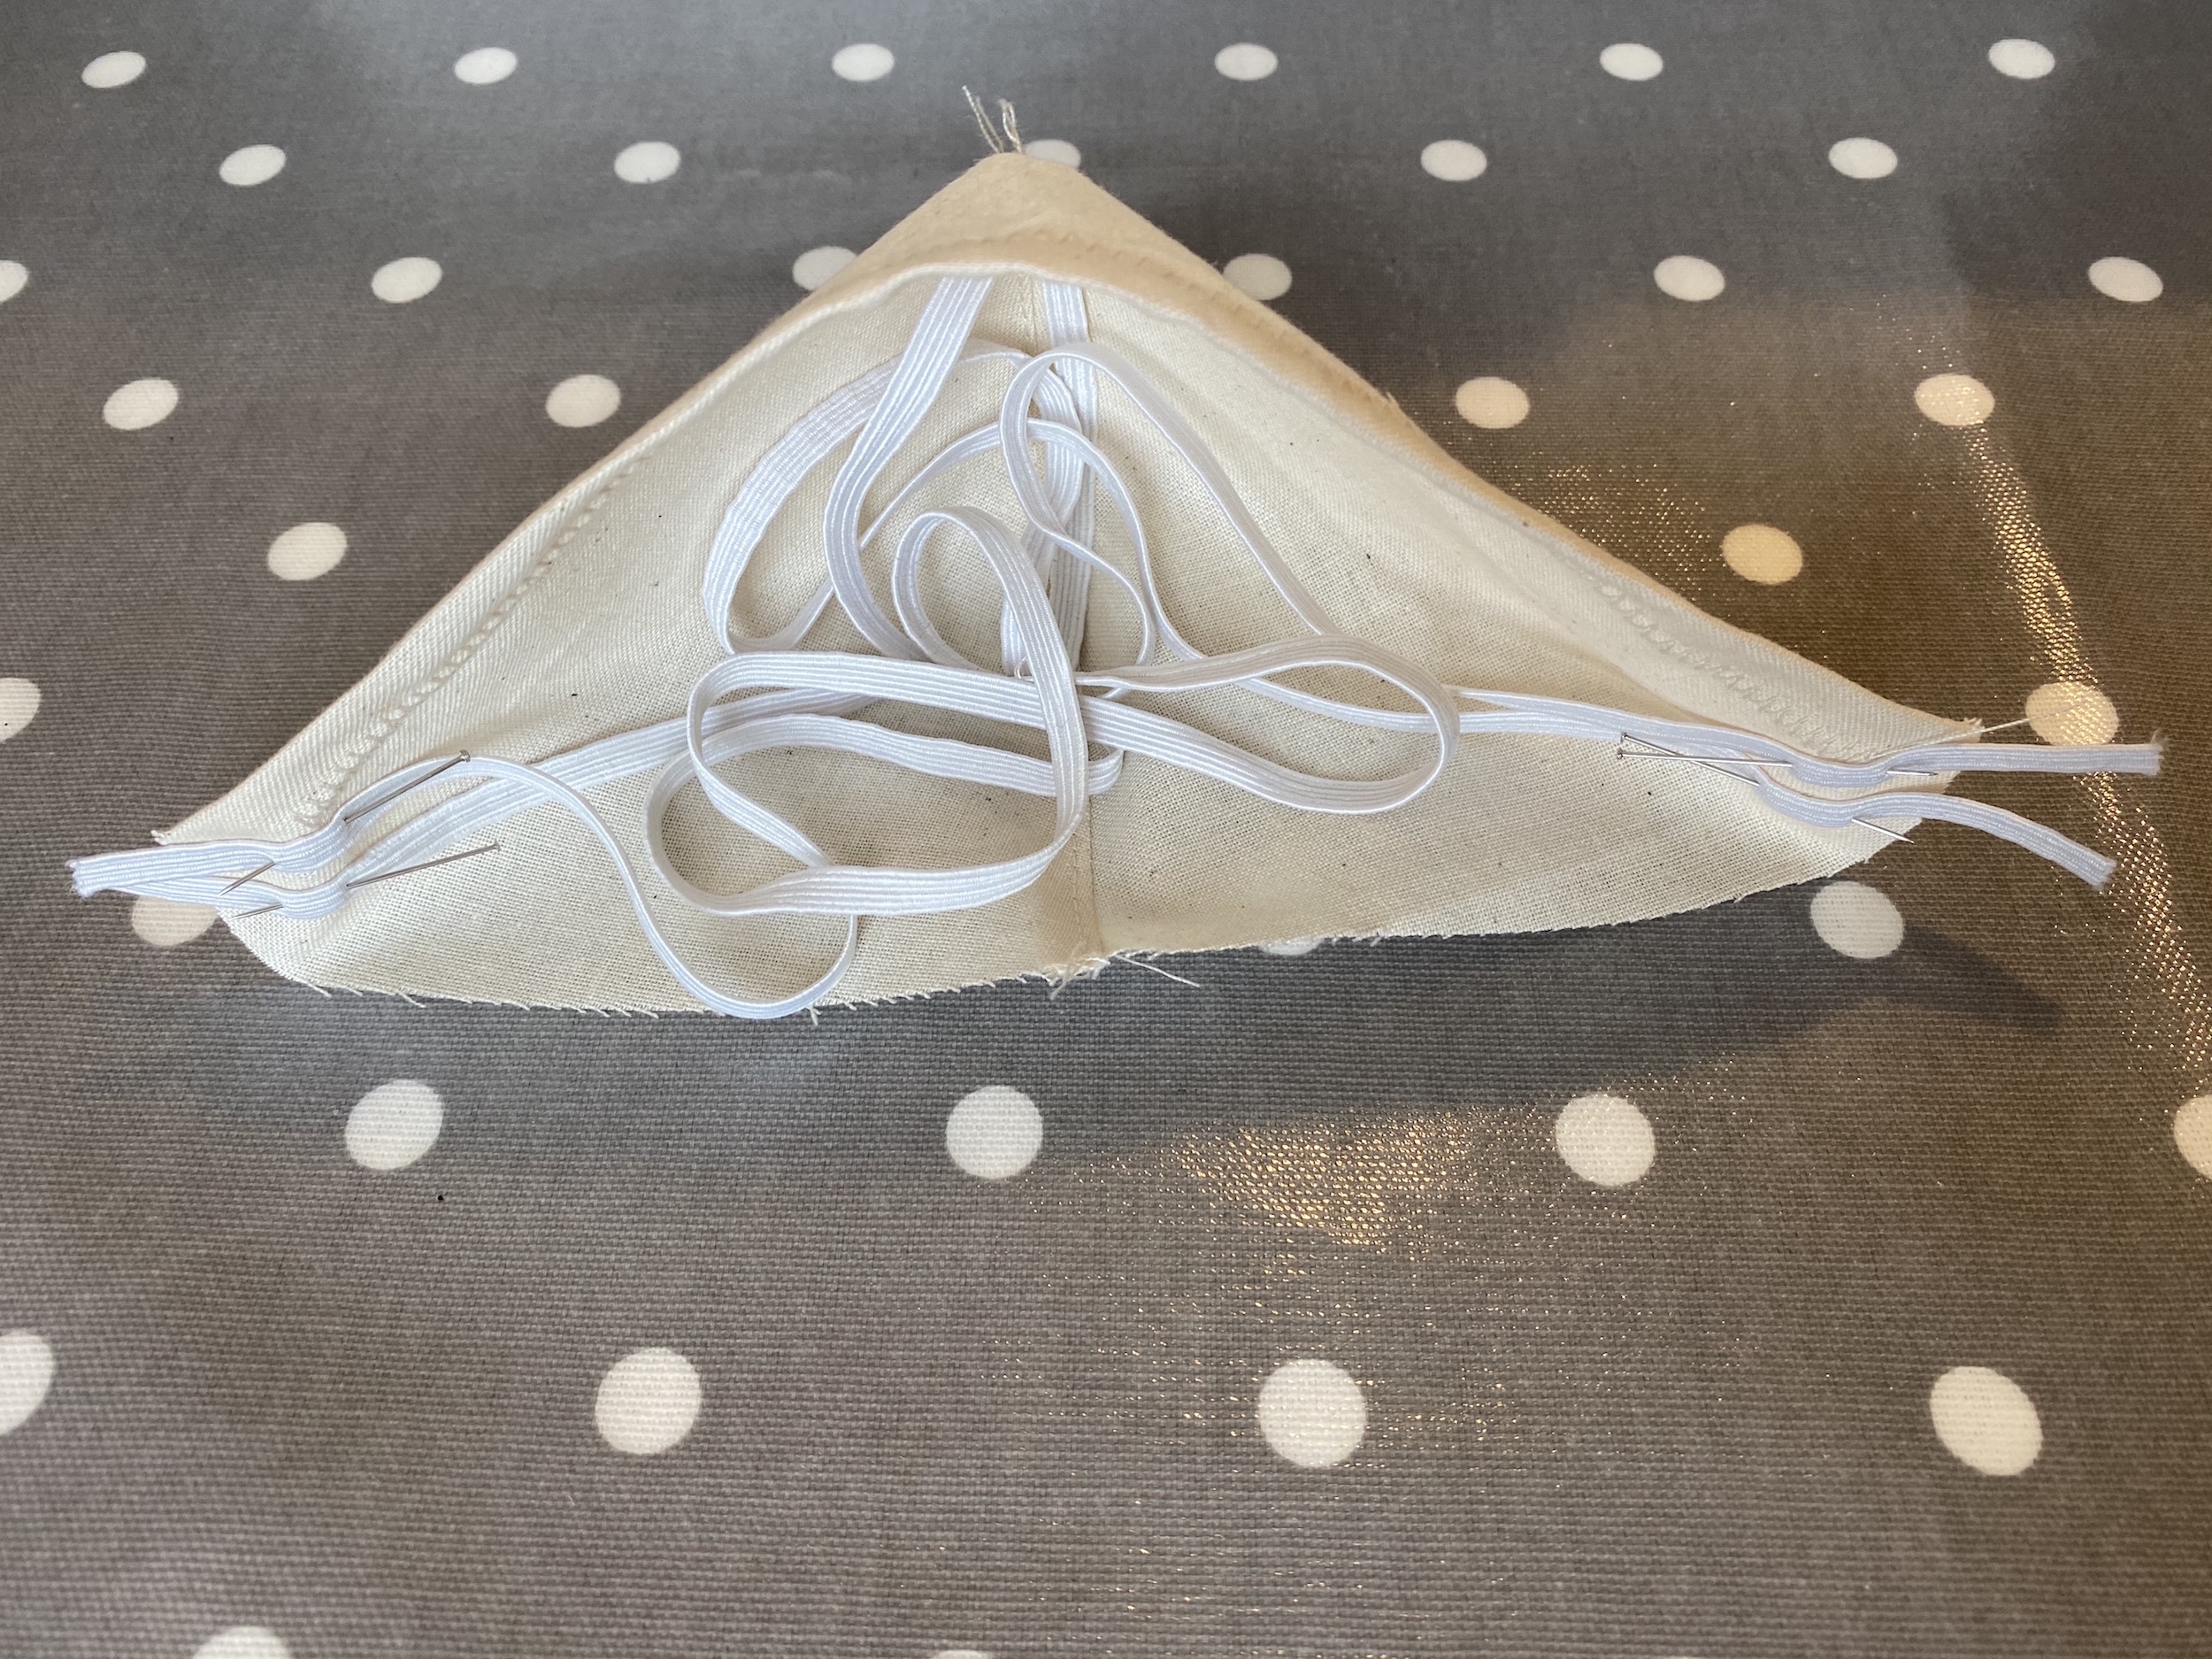
  • Cut the elastic/tape in half, then cut each piece in half again… two for each side.
  • Pin and sew the elastic/tape as shown on to the right side of the fabric. LOOK AT EDIT BELOW!!
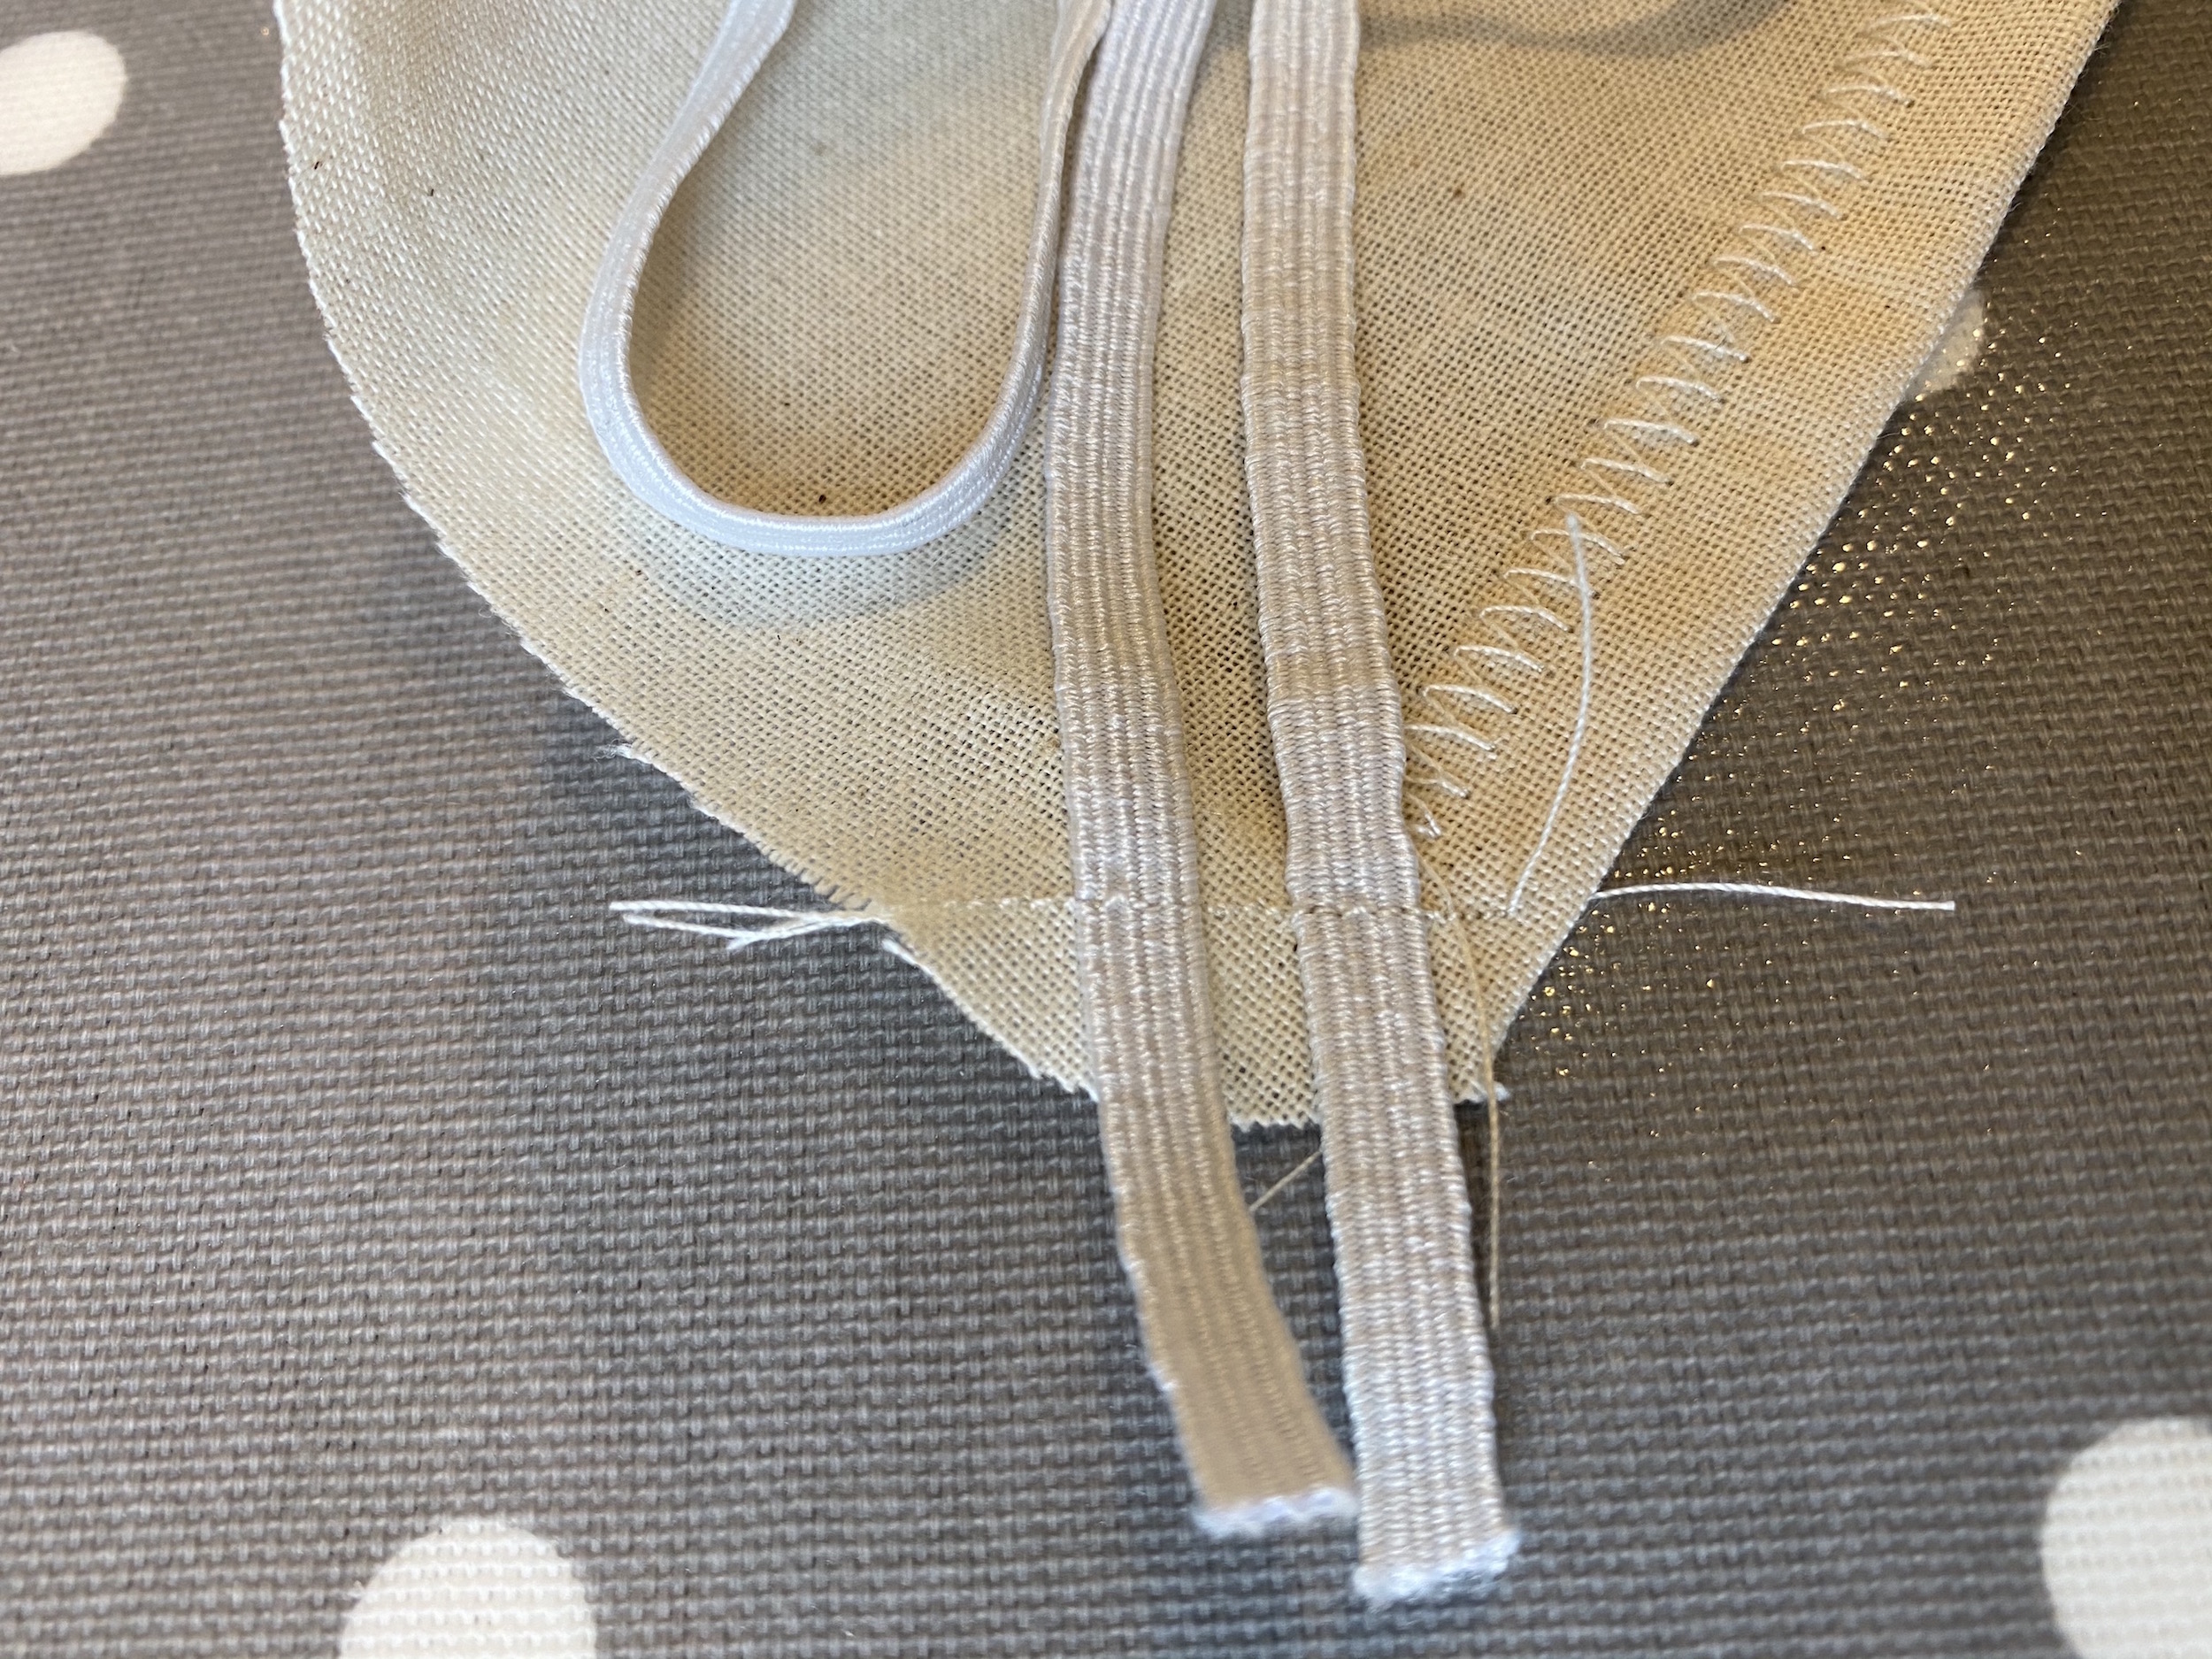
     

EDIT

  • Having worn the face mask out a couple of times, I decided it would be even more comfortable if I moved the position of the elastic/tape to the corners, coming out at an angle, rather than straight out of the sides.  I have edited the pattern to show the elastic position.


CONTINUED…

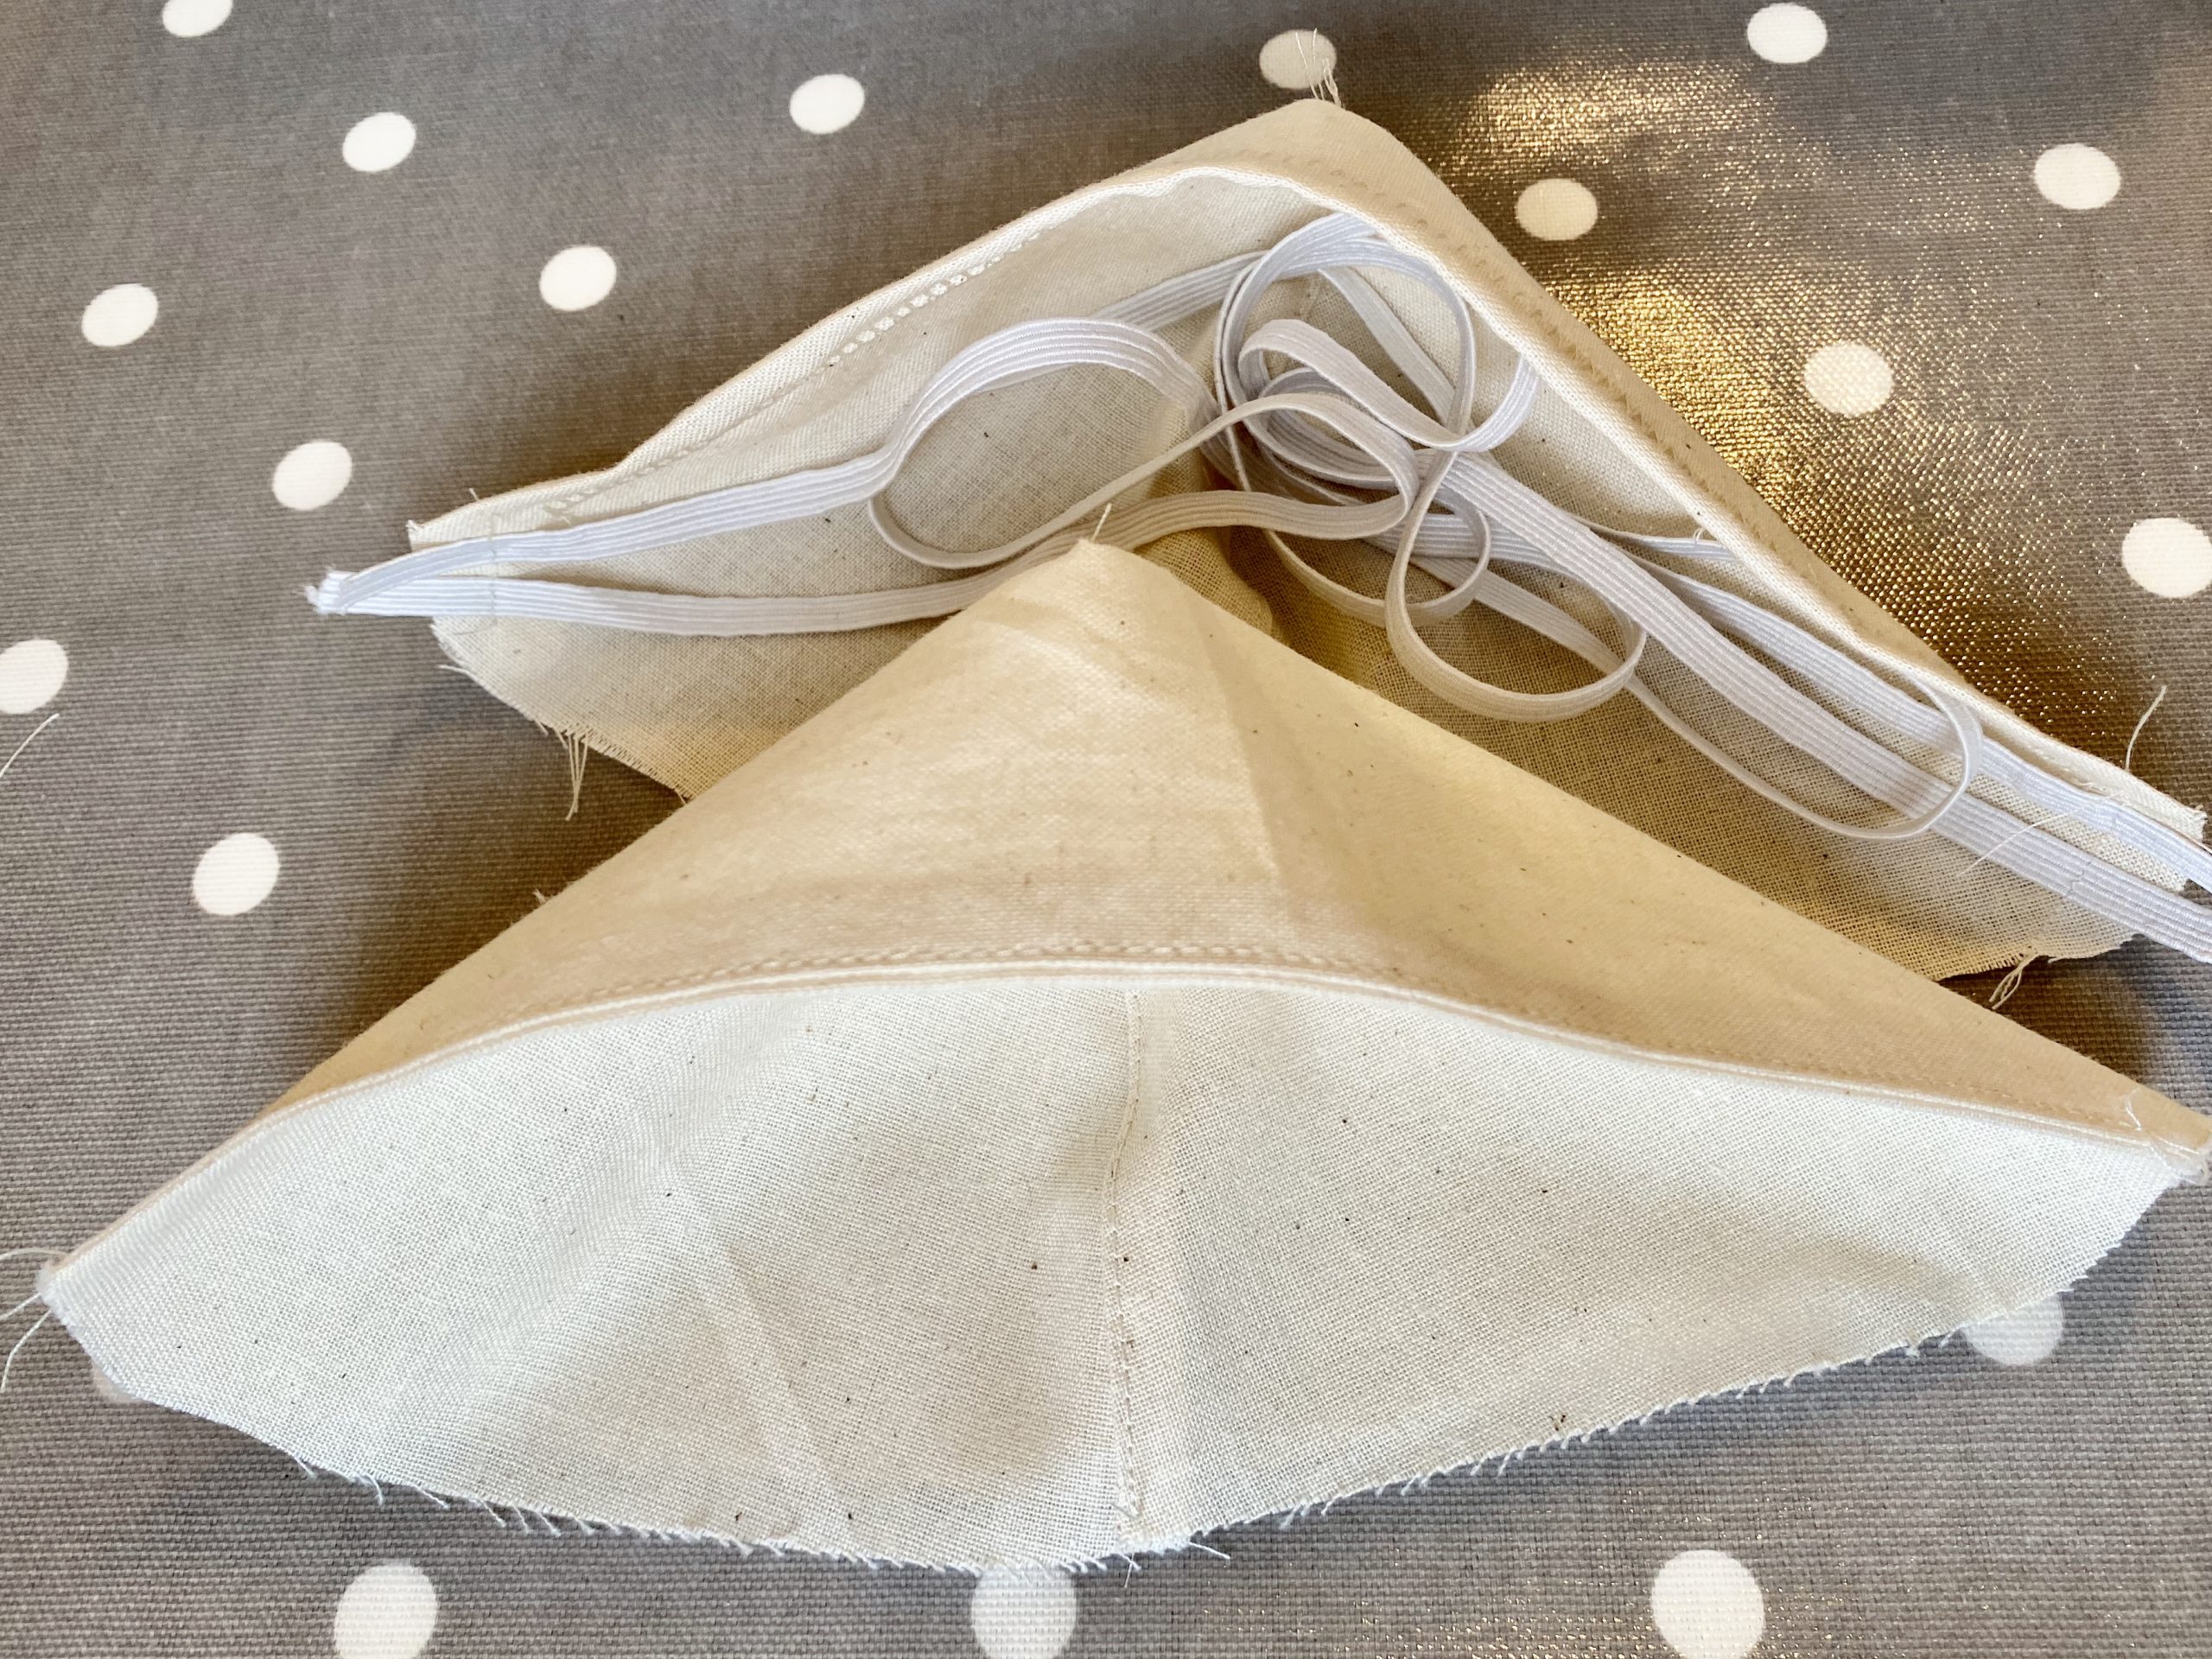
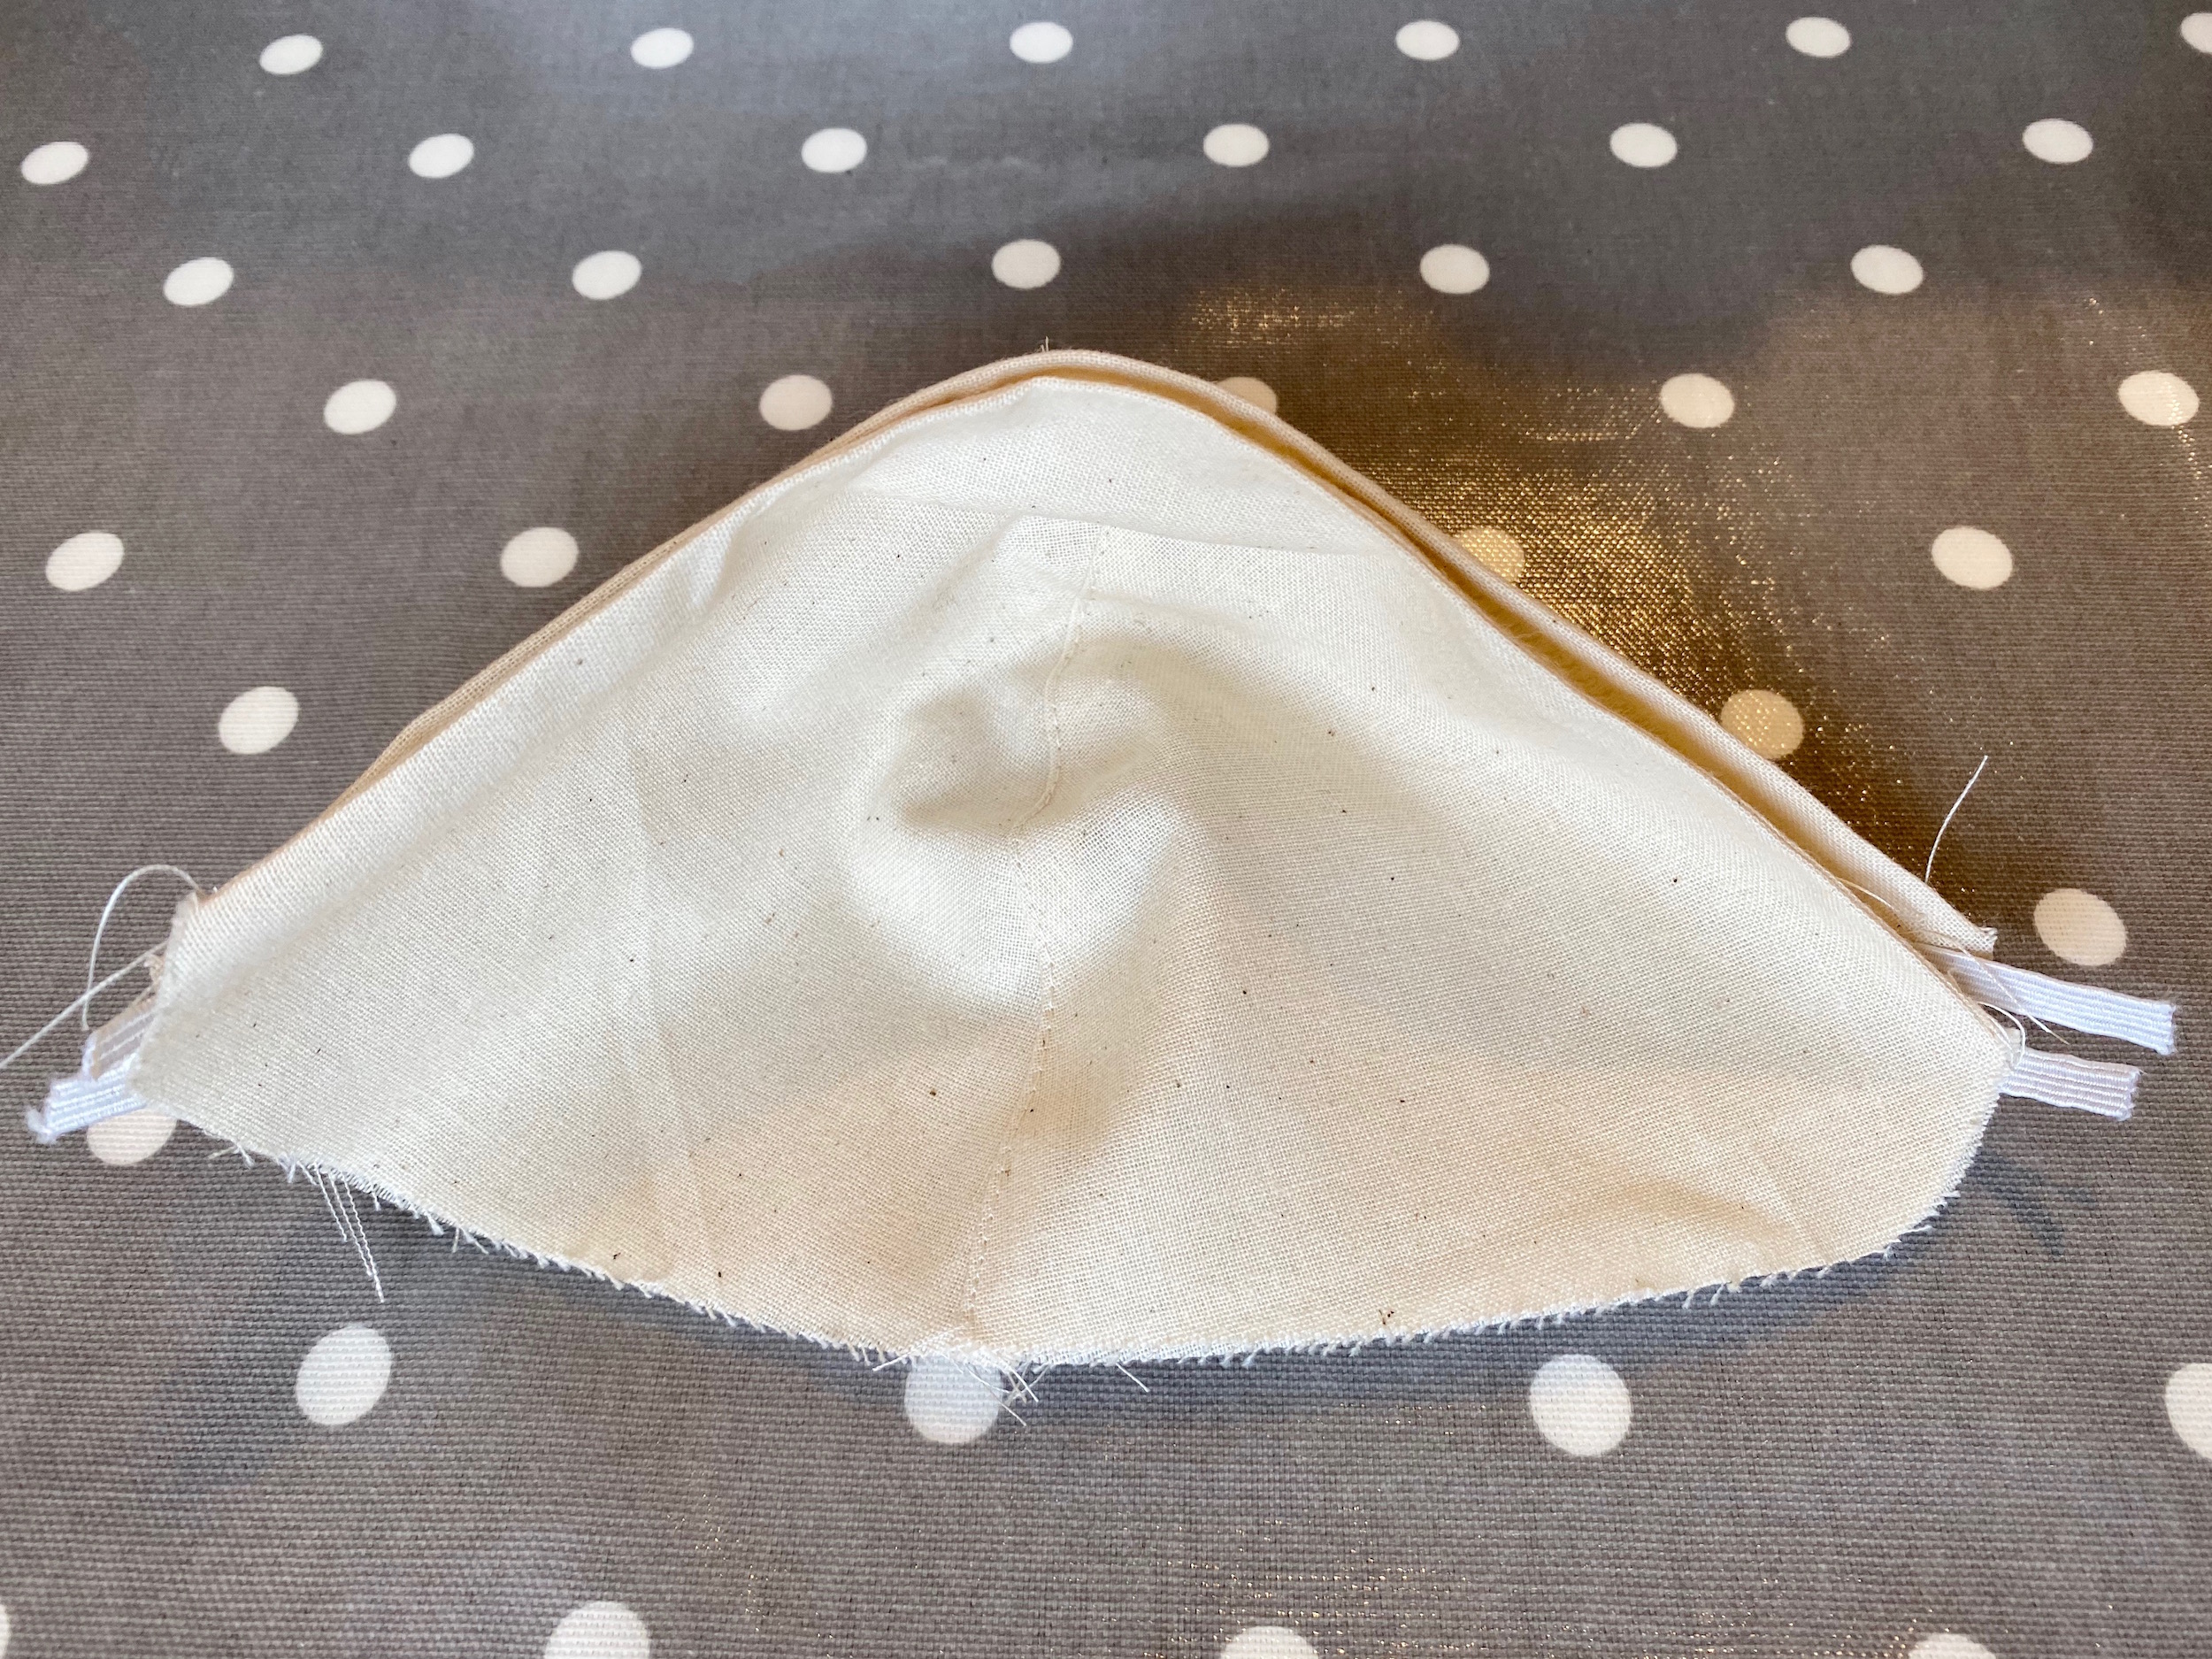
  • Take the pieces that were seamed together and fold them right sides out, along the straight seam so that they are the same shape as the piece with the wire in.  Press carefully and top stitch this seam to keep it flat if necessary.
  • This double piece slots, right sides together with the other, sandwiching the elastic between.


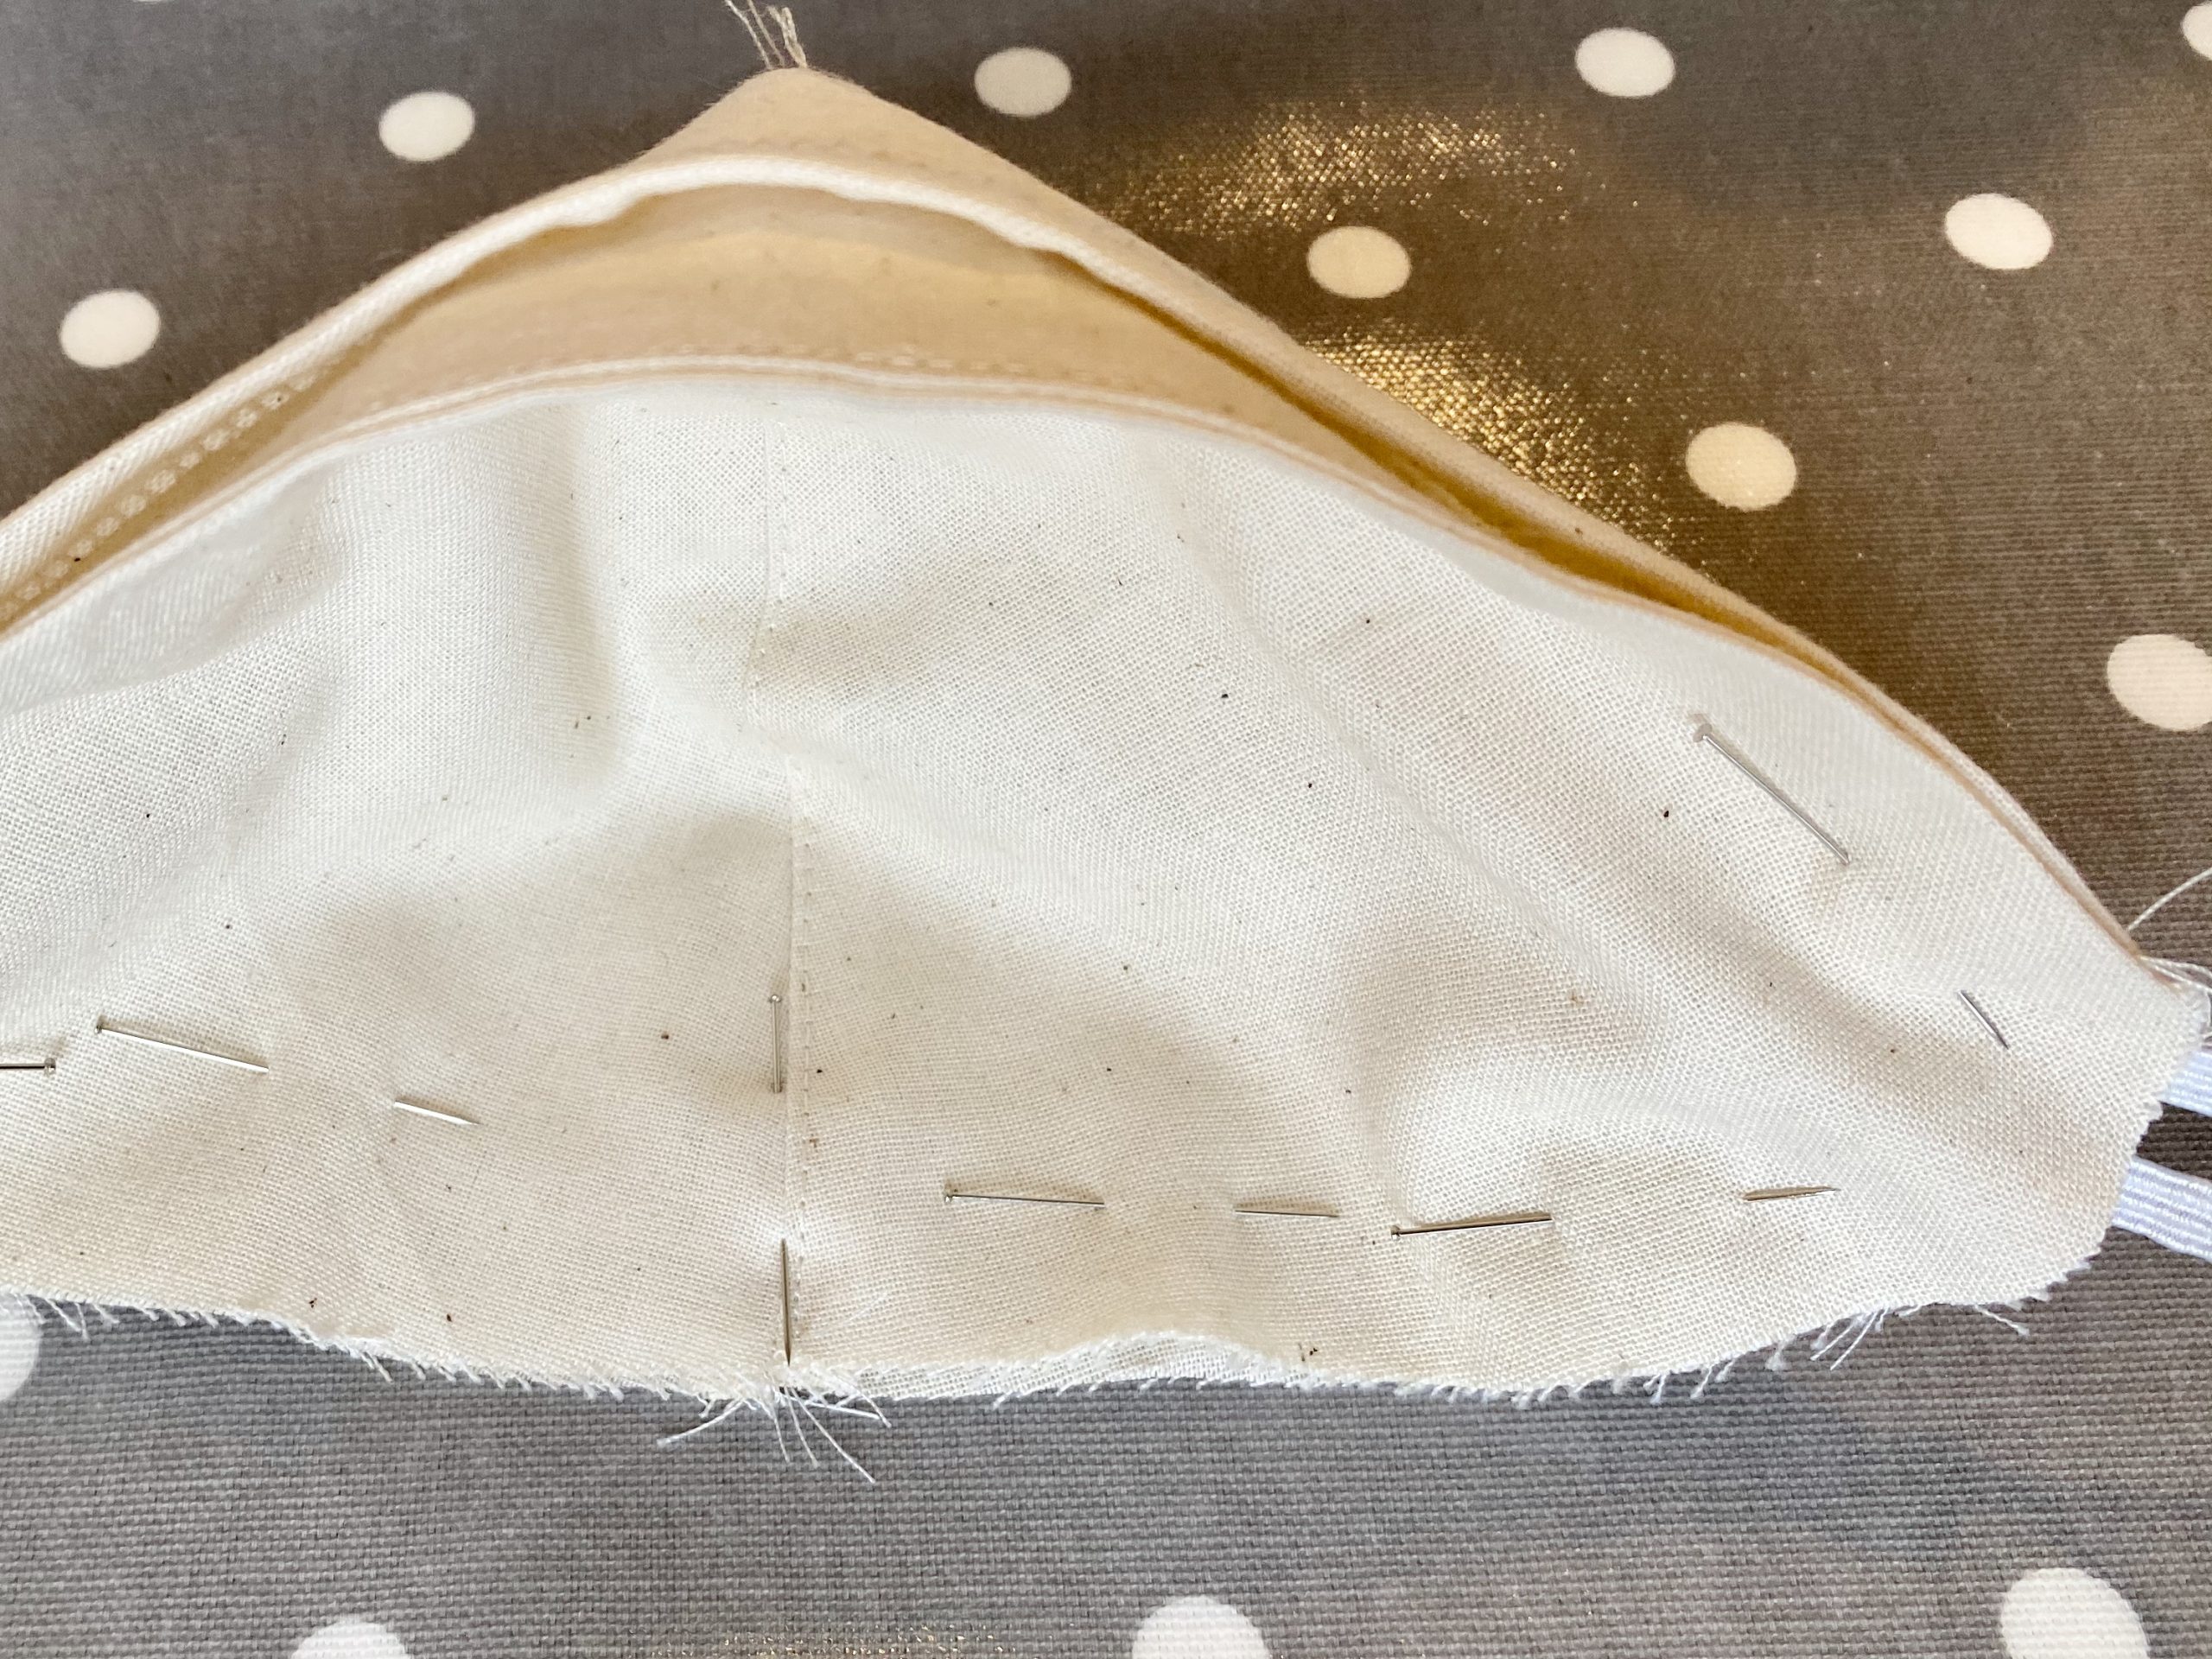
  • Pin, with all the edges exactly together, down the side, along the bottom edge to and up the other side.
  • Stitch together with a foots width seam allowance.


  • Turn it all right side out and press nice and flat


  • Top-stitch close to the edge, about 5cm along the top edge, down the side, along the bottom edge, up the other side and about 5cm along the top edge on the other side.


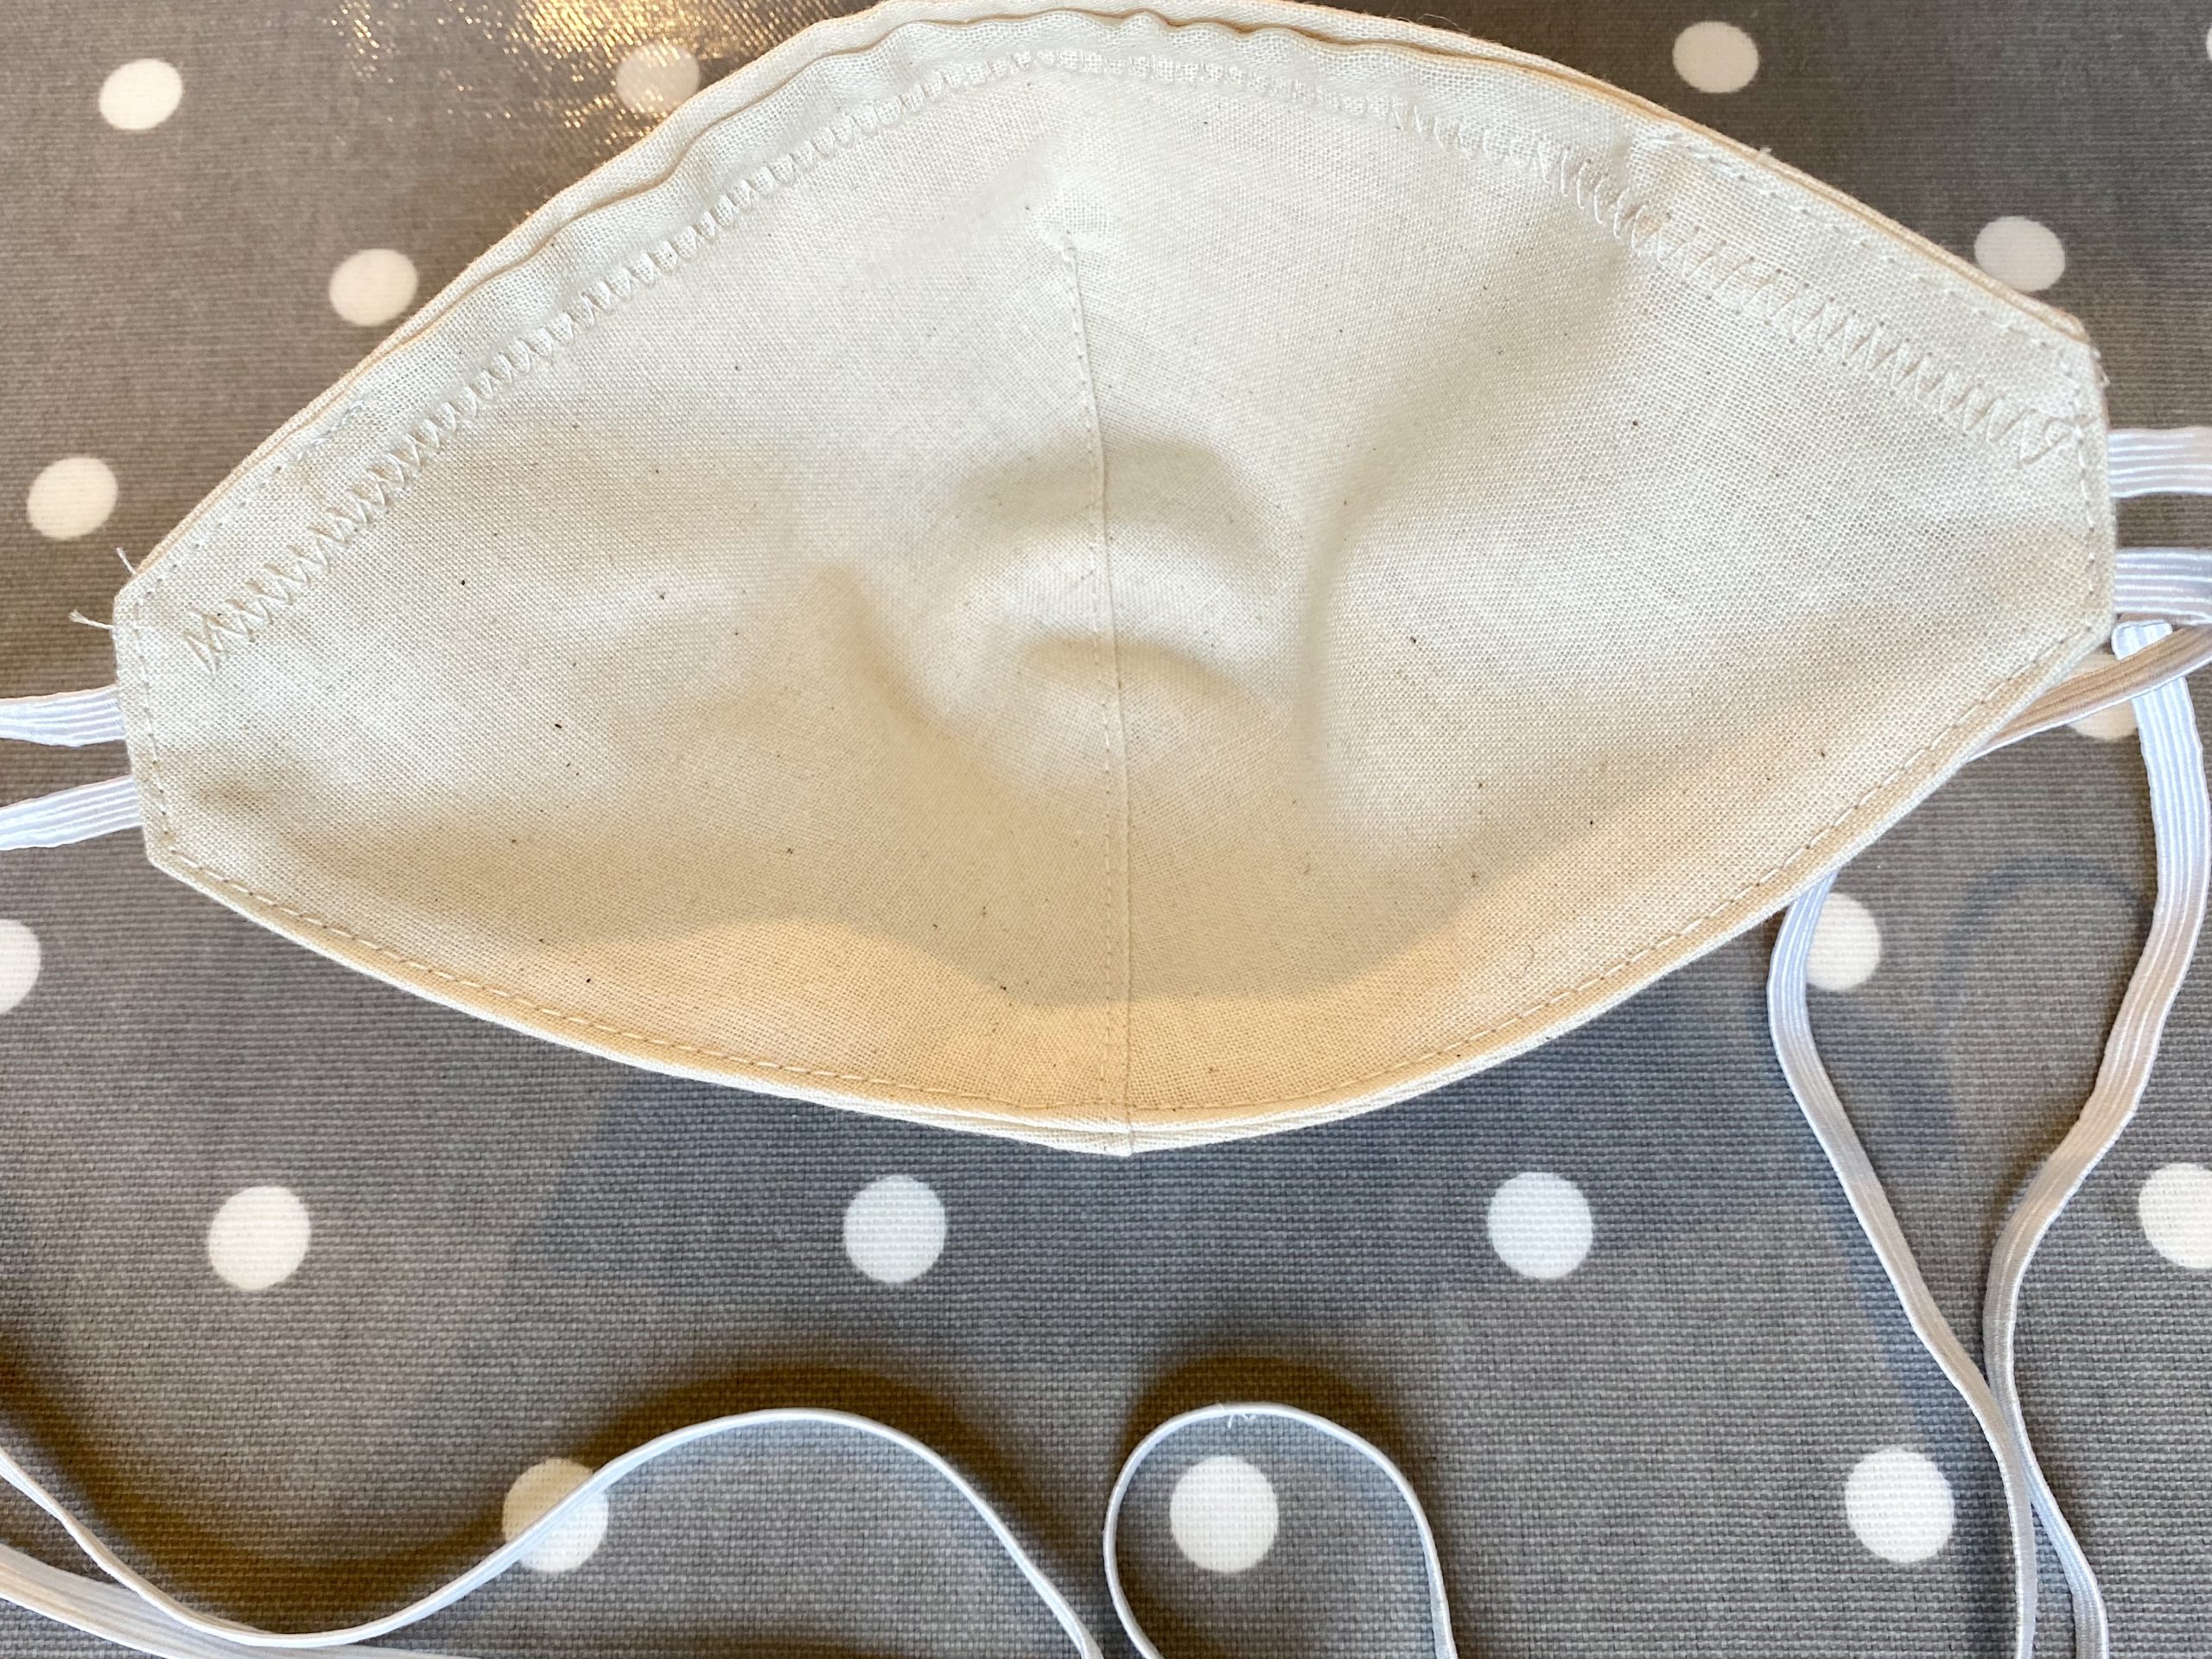
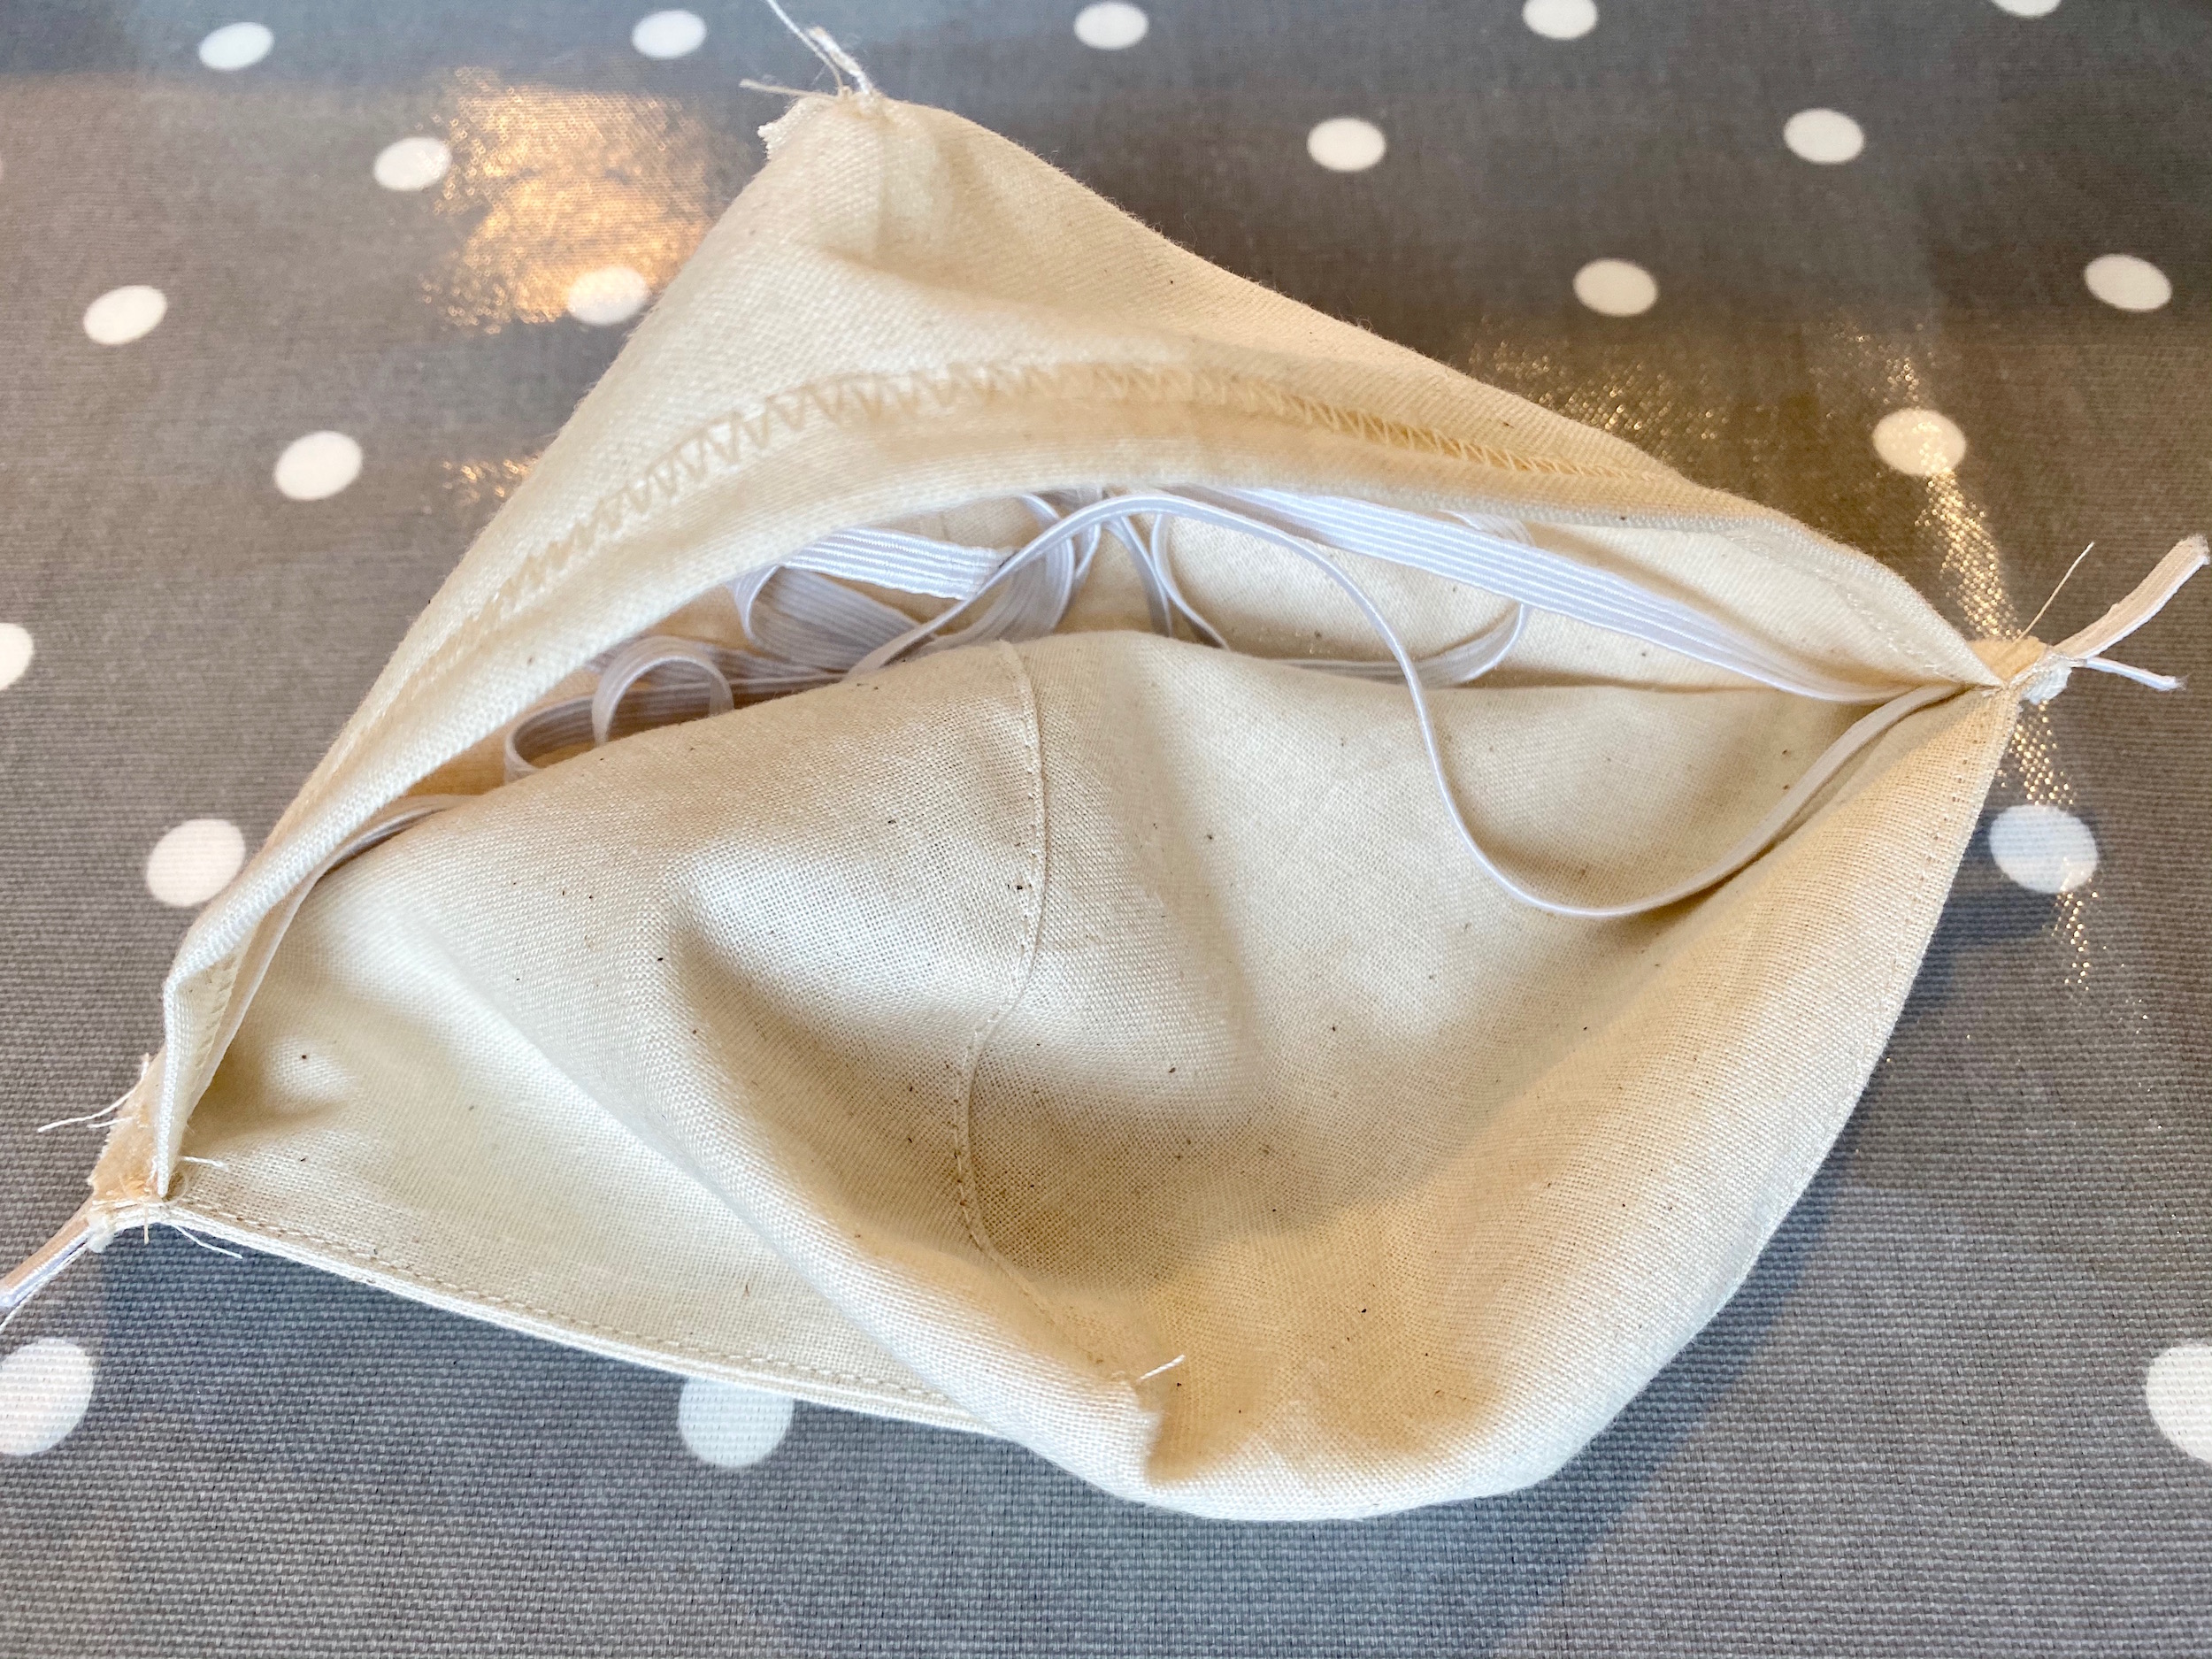
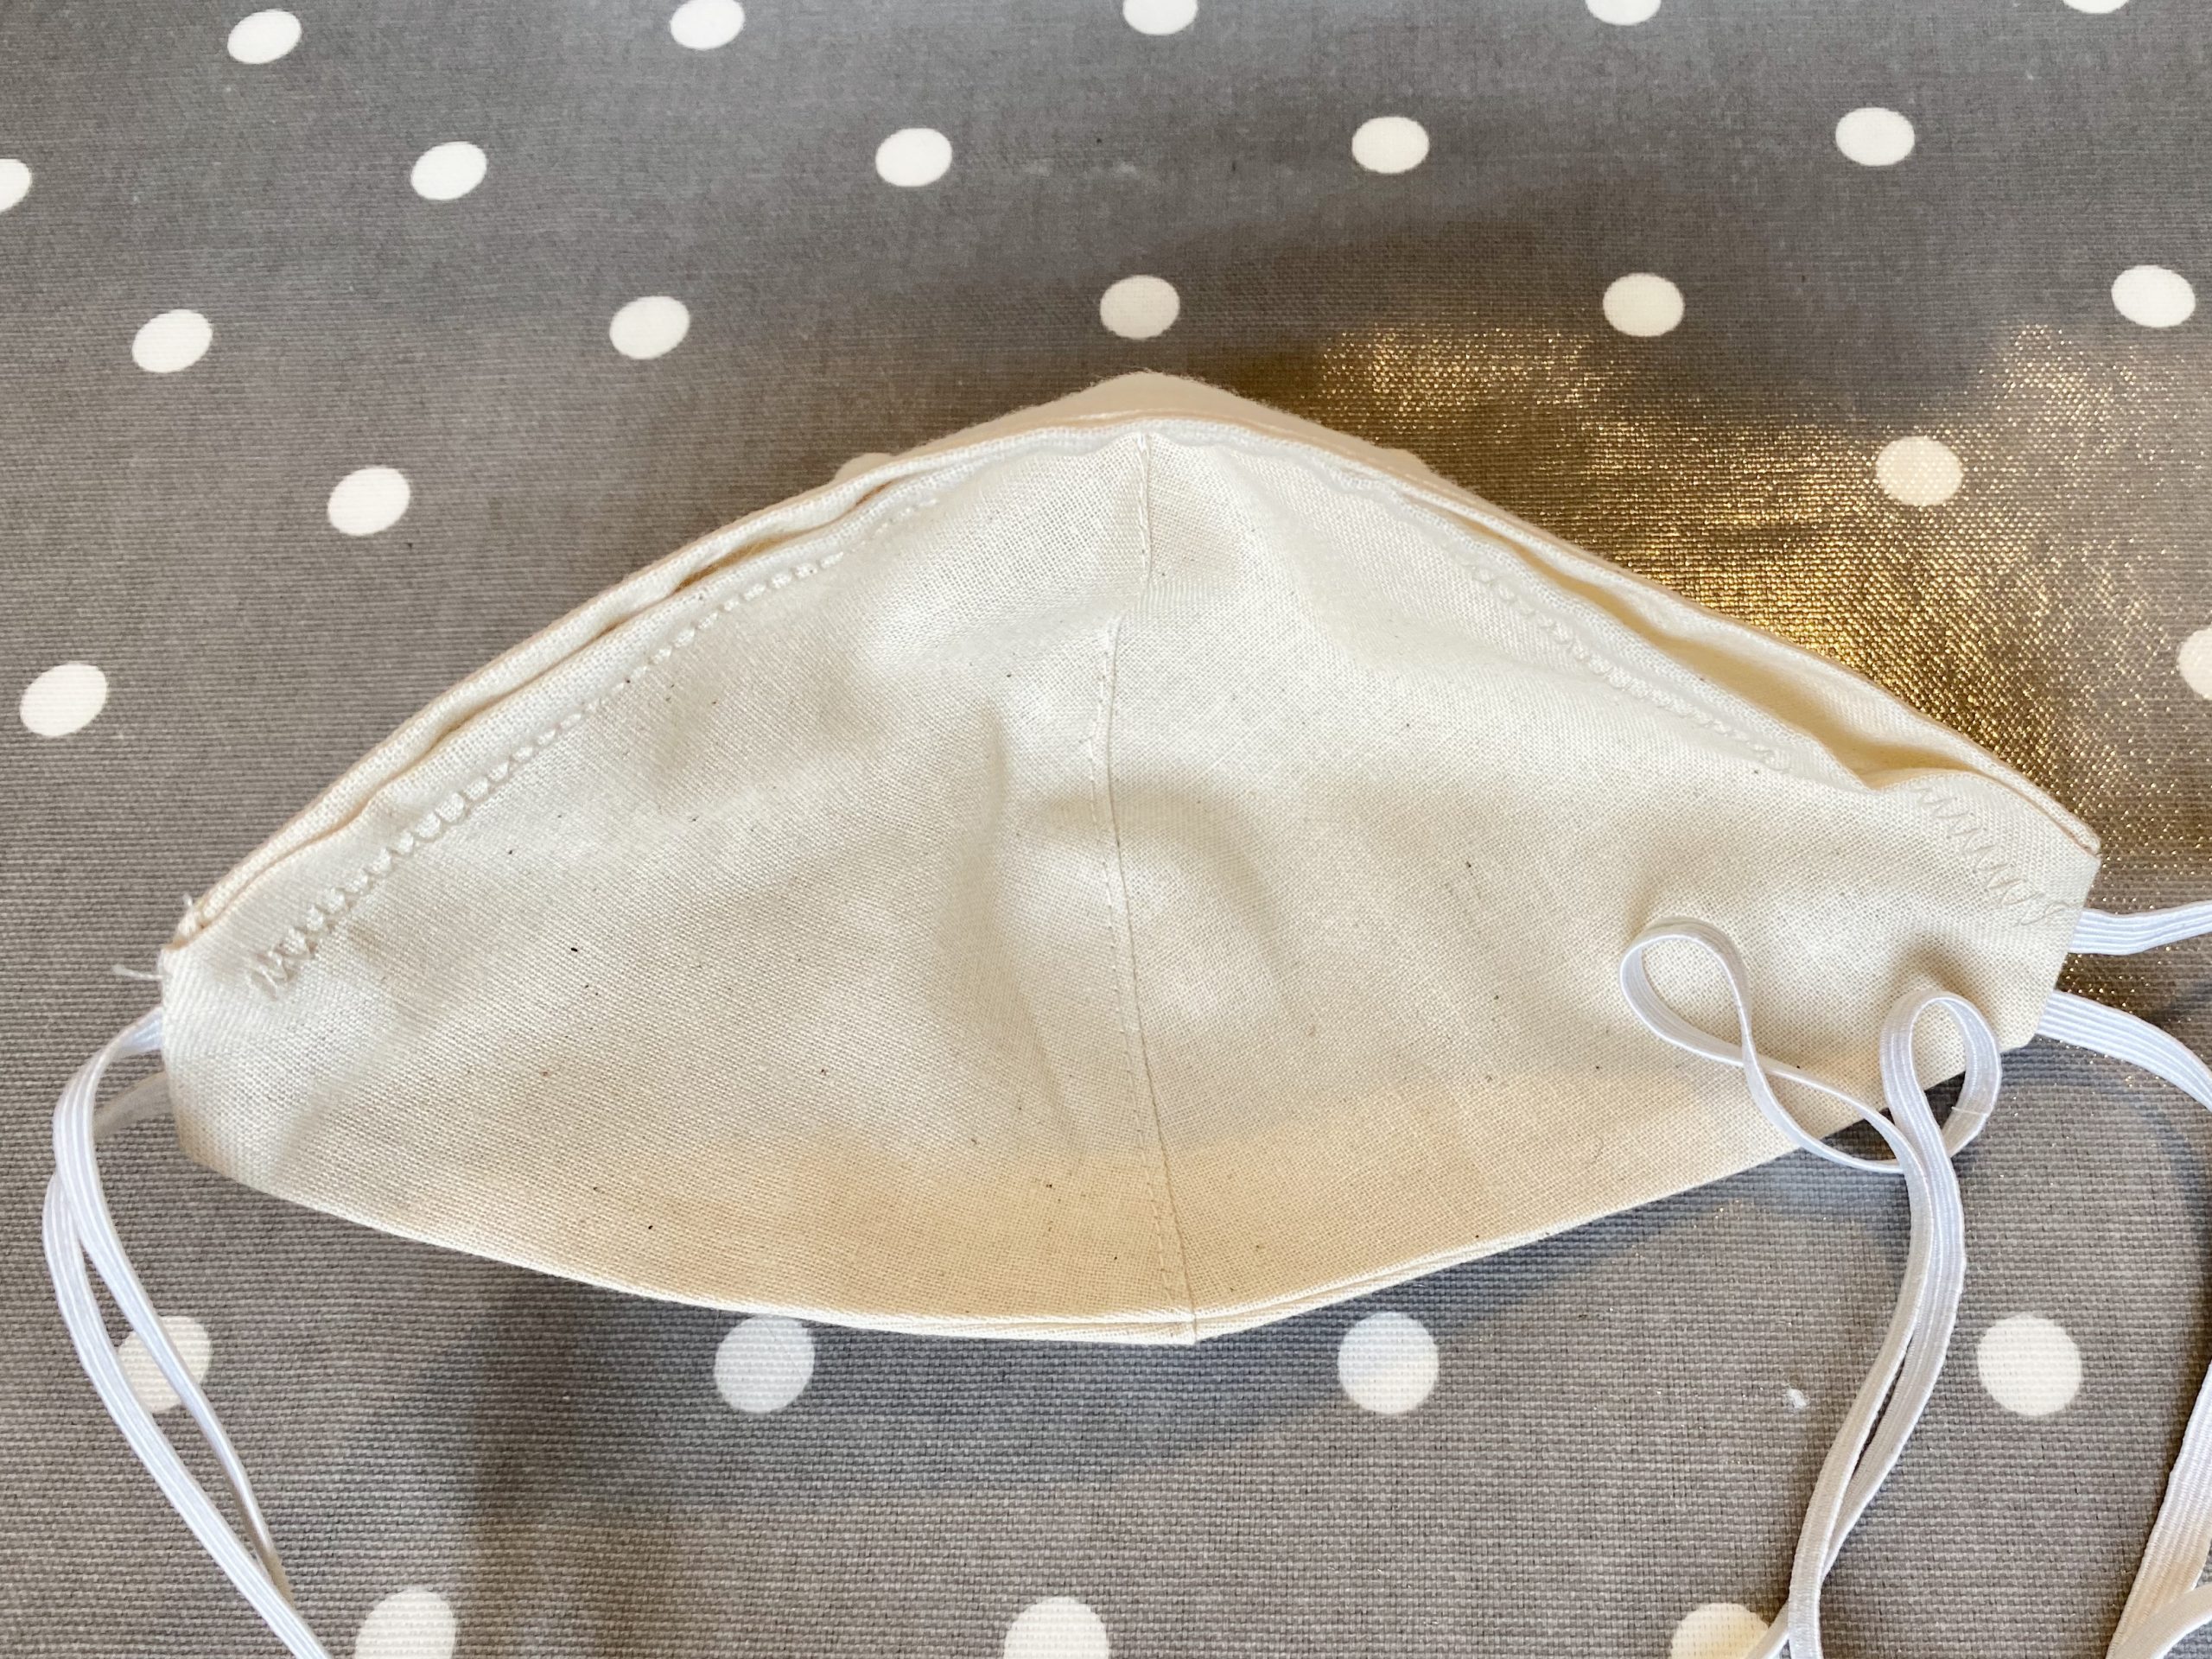
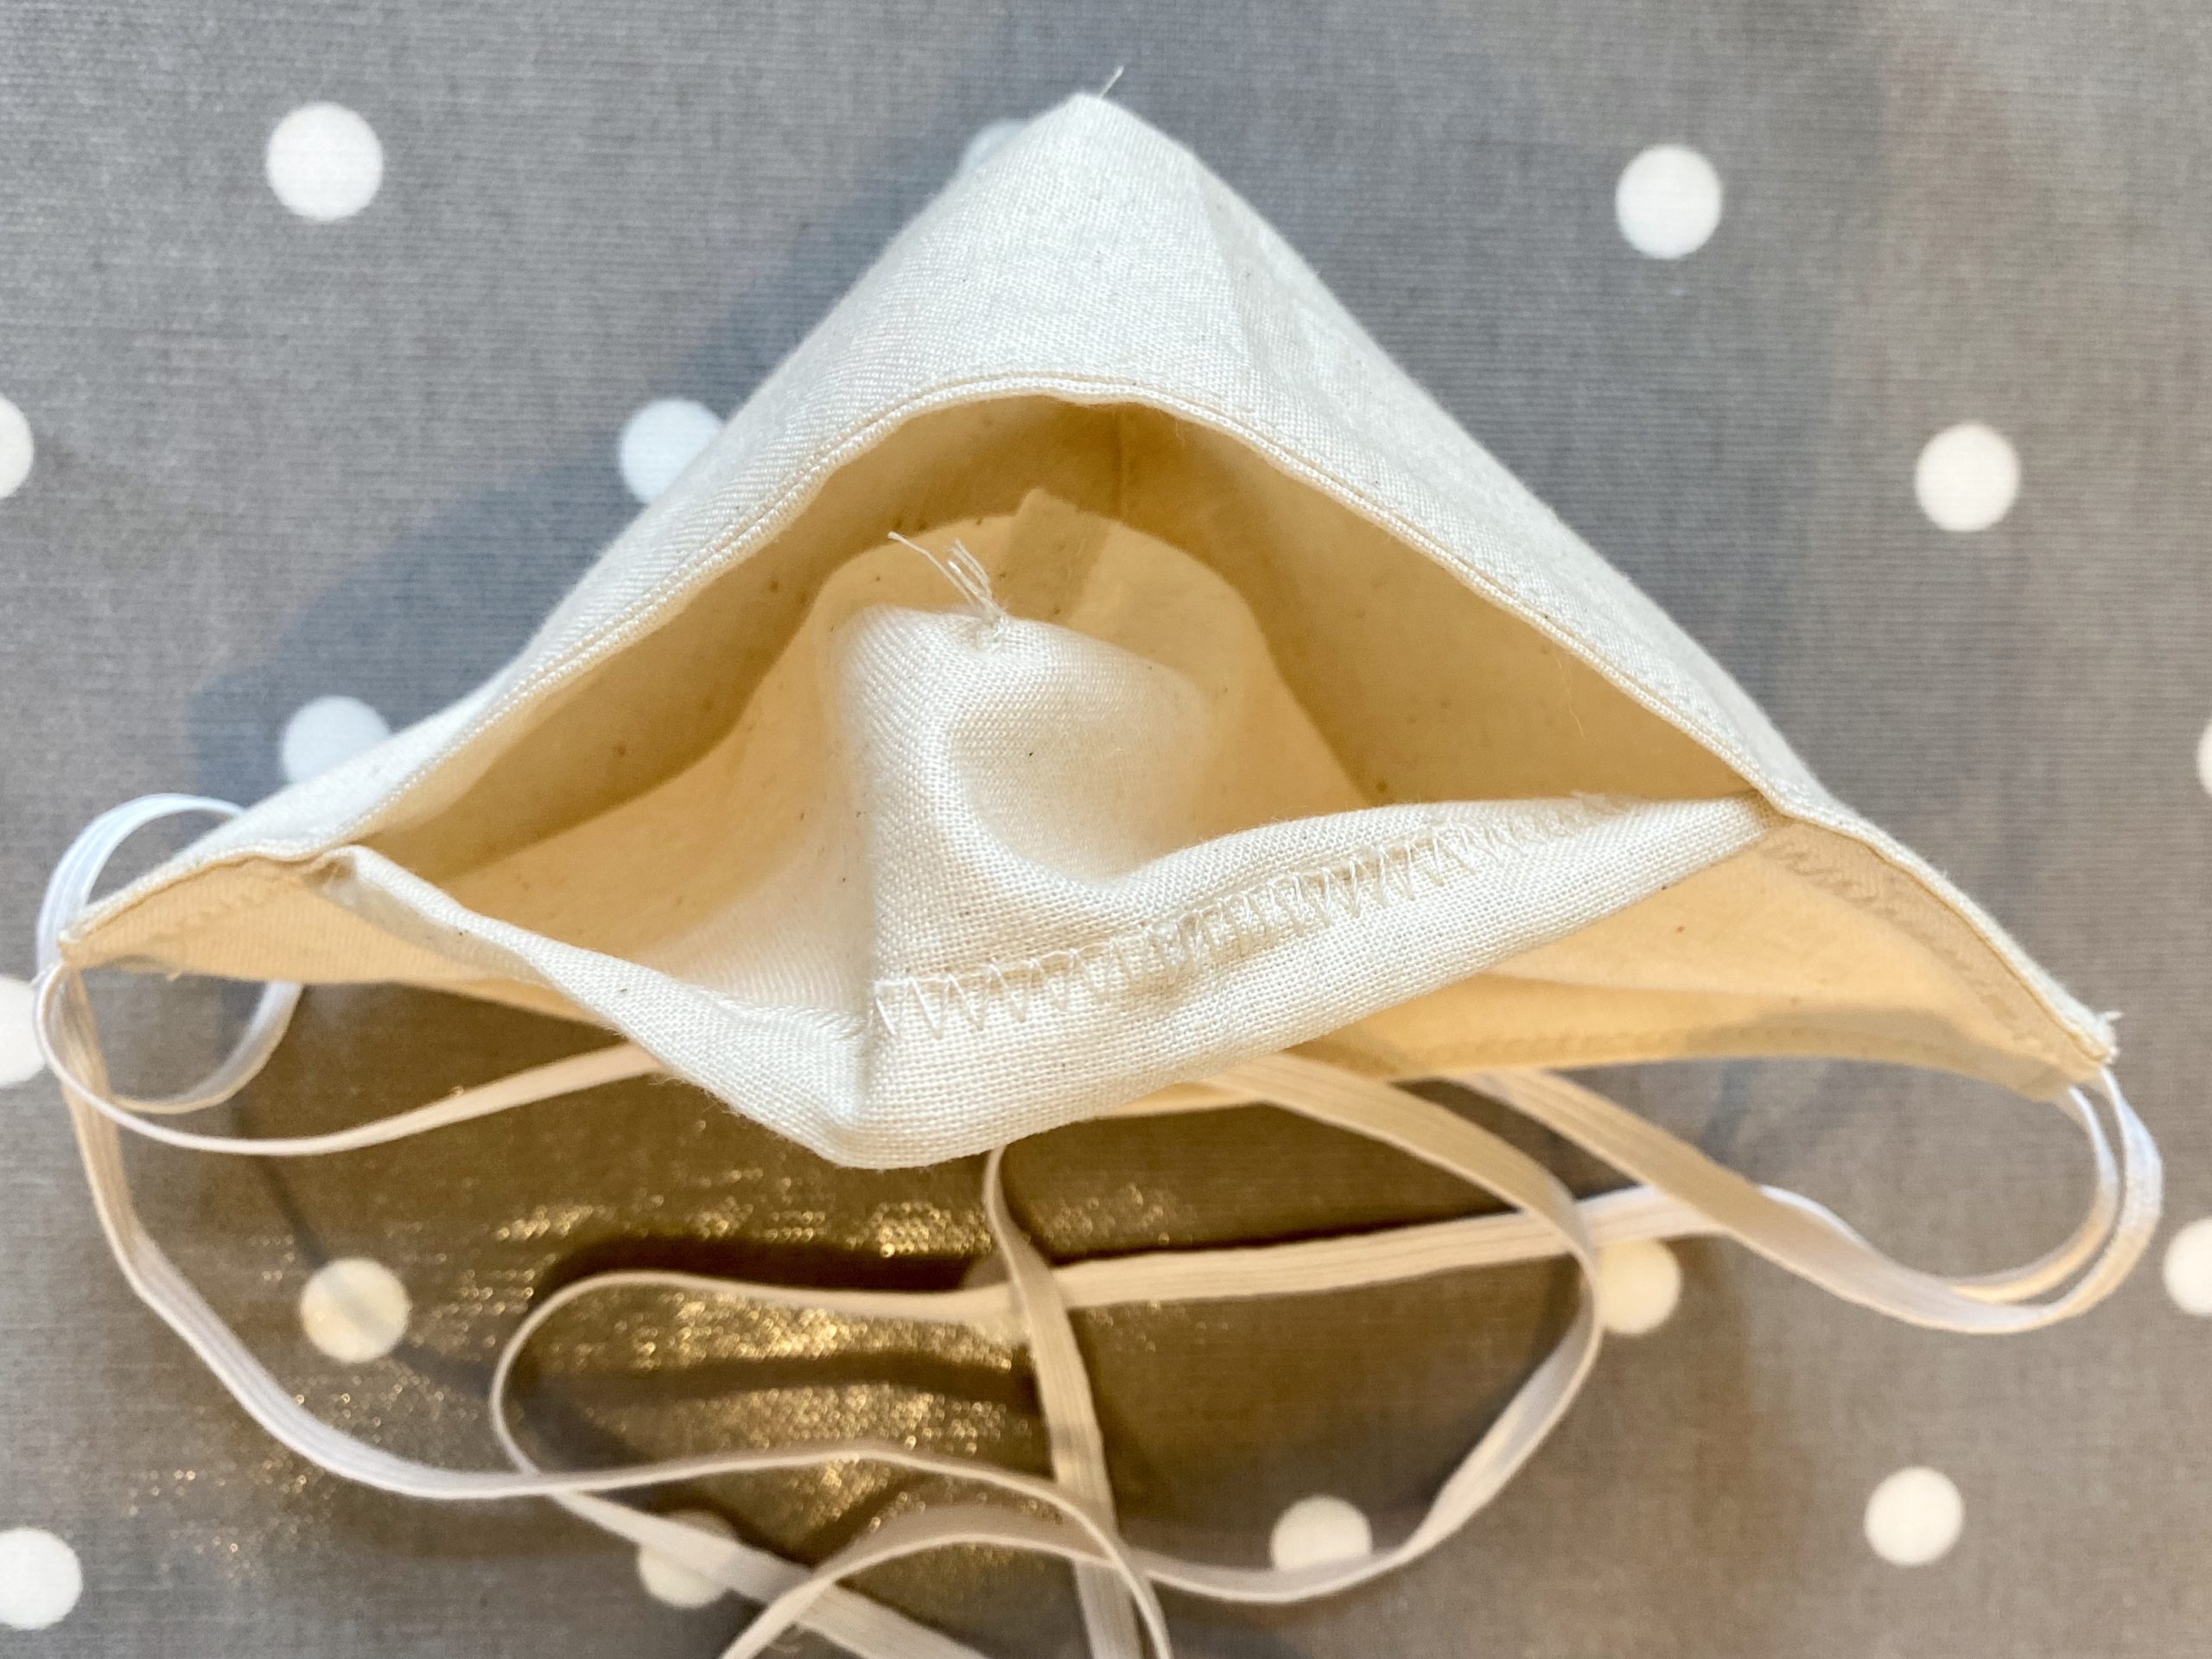
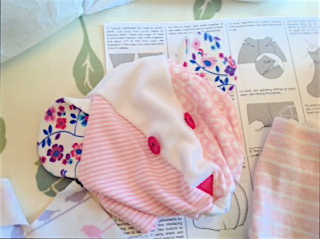
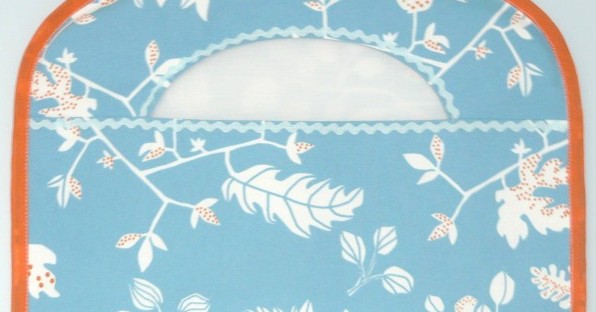
  • The picture below shows the pocket where you could put a filter if so desired. The top elastics/tapes should be comfortably tied together and worn above the ears and the bottom elastics/tapes should be comfortably tied together and worn below the ears.


SEW ALTER – UPCYCLE YOUR CLOTHES

Learn how to Alter & upcycle your clothes 

Over the last month, I’ve been making a real effort to dress in a more sustainable way.  Clothes you buy are actually far too cheap. Those of you who know how much work goes into making a garment will agree that it is absolutely impossible to produce clothes for the price that many shops sell them at. It’s ultimately the seamstresses who get exploited.  These skilled workers are being made to work for nothing while their employers get rich. It also makes self employed seamstresses feel unable to charge a fair amount for their work as people have got used to inexpensive clothing and textiles.  

Not only is Fast Fashion unethical but it has been proved to be harmful to the environment. Huge quantities of unsold clothing goes to land fill because these companies make more money if they over produce but always have new designs to sell. The other issue is polyester clothing.  Did you know that polyester is basically plastic and we all know how bad plastic is for the environment! 

I have bought plenty of Fast Fashion in the past, which I will keep and wear because I don’t want to add to landfill, but there will be no more Fast Fashion for me! It’s actually a relief.  There’s far too much choice in those shops, it takes ages to decide and then you always end up buying something that is not quite right because its cheap!

So from now on I will only upcycle and alter the clothes I own, or ones I have swapped with family and friends.  Or, I don’t have a problem with buying second hand clothes to get creative with.  And if I really want to treat myself to something new, I will either make it myself or pay the right amount for a garment that can be proved to be ethically and sustainably made. 

Many of my students have said in the past “It doesn’t make sense to spend all this time and money on making something when I can buy it for a fraction of the price”, and to be honest I have always sort of agreed with them.  Well not any more.  I feel a renewed energy to teach as many people as possible how to be make their own clothes and also how to make the ones they own already, last for as long as possible. 

So, all of this new thinking has lead me to design and add a new class called SEW ALTER.  It’s all about learning some simple techniques to fit, mend or restyle your clothes.  It will not only save you money but will also, in a small way, help to save our planet!

In a SEW ALTER session you will bring along a garment or two to alter or upcycle with my guidance. To get the most out of this class, you will need to have a good knowledge and confidence when using a sewing a machine so you can follow simple instructions and work independently. Please be realistic with your abilities as I can not teach you how to thread up and use a sewing machine in this session. It is only three hours long and there will be six students all needing different advice.

 Below is a list of achievable alterations. Please note you may only get one of these alterations completed in the time depending on your ability and the amount of unpicking involved!  Please do not bring items that are very expensive to practice on! To save time it would be a good idea to bring your clothes already pinned. 

EXAMPLES OF ACHIEVABLE ALTERATIONS:

  • Lengthen/shorten – sleeves, trouser legs or skirts.
  • Take in/let out – waist, seams and  darts.
  • Alter a simple neckline.
  • Remove/add – sleeves, collar, frills or other detail.
  • Replace – zip, buttons
  • Mend – rips, holes

Any additional fabric or haberdashery needed will have to be supplied by you.

These sessions will take place on a Saturday morning during school holidays from 10am till 1pm.  All sewing machines and equipment are provided but you can bring your own machine if you prefer. The cost is £30.00


A BIT MORE ABOUT THE SEW BASIC COURSE

There is a Sew Basic Course starting soon so I thought it would be a good idea for me to tell you a little more about it.

Sew Basic is a five week course designed to leave the student confident on a sewing machine and with enough skills to get going on some exciting sewing projects. Each class lasts two and a half hours.

Though it sounds like a course just for beginners, I’ve actually had more experienced sewers attend this course who’ve felt that it has really improved their technique and finish. They’ve also found out the reasons for those annoying little things can go wrong when you’re sewing!

All the way through this course I will give you the information you need to get the best finish to your work. The costumes I used to make for film and TV always had to look as good on the inside as they did on the outside in case they got ripped off in a passionate scene!!

I encourage all students to work at their own pace so nobody feels rushed or held back. There will be lots of individual attention… I’ll give extra support to those who need it and extra challenges and information to those who want it. I am happy to answer any questions you may have so no one should ever feel unsure in my classes.

I have everything here that you may need, though if you would like to learn on your own machine that’s absolutely fine and probably quite sensible. You will receive a course book of all the techniques we are going to cover, which also has lots of instructions to remind you how to do the techniques and plenty of room to make extra notes of your own.

Sew School London

FullSizeRender

WHAT IS COVERED…

The first 2.5 hour class is all about the sewing machine… threading up the correct way, when and how to change the tension, how to get better foot control. You will learn about different stitch lengths and types and when to use which one. We also cover a basic seam and how to finish off the seam allowance so it doesn’t fray.

FullSizeRender_2

The second class is all about enclosed seams, hems and bias binding. Enclosed seams are really useful if you want what your making to look great on the inside but don’t want to line it. And having a variety of different hems to choose from means you will always be able to choose the best type of hem for what you are making.

FullSizeRender_3                FullSizeRender

In week three we cover lots of very useful sewing techniques…  How to sew a perfect curve, bagging out, facings and understitching, darts, and piping. It’s a busy 2.5 hours!

In fourth class you will learn all about gathering as well as putting much of what you’ve learnt so far into practice by making a sweet little (doll sized) tiered skirt.

Sew Basic London

The fifth and final class is about openings – buttonholes and a simple zip. You will learn these techniques in a practical way by turning your buttonhole sample into a teeny cushion and the zip sample into a pencil case… both very pleasing techniques to master!

FullSizeRender


DATES AND BOOKING

Please have a look at the BOOKINGS page for dates of the next Sew Basic courses

Each Basic Course has five classes in total.  All classes are on Thursday Mornings from 10.30am till 1:00pm


The total cost of this course is £140.00 

£80.00 must be paid to book your place.

The balance of £60.00 is due on the first lesson.

Only six places available so please book your place early.

To do this go to the Bookings page.

Sew School Students in Business

I feel so proud whenever one of my Sew School students emails me a picture of something they’ve made or brings it to a sewing session to show me, some Sew Clubbers have even done craft fairs selling various things they’ve made (mainly to fund their sewing habit!), but when a student goes into business using  skills they have learnt from Sew School then I could almost burst with pride!!

Kelly did the Sew Basic Course  in February 2014. She then joined Sew Club and came along every month full of enthusiasm, a big bag of projects from home and a list of questions! A serious collector of fabrics, it made total sense when Kelly started Fabric Love, an online fabric store, in January 2015.  This is all very impressive considering that Kelly is a mum of three boys all of primary school age! Fabric Love is a great place to find gorgeous, quality fabrics for your next crafting or dressmaking project and to share your beautiful makes with others. After a year in business Fabric Love has gone from strength to strength but with Kelly in the sewing seat I’m not at all surprised.  http://www.fabriclove.co.uk

12419373_555173767966838_4550624084318540755_o      11056069_543720245778857_2293827431463402770_o


Sian completed the Sew Basic Course in 2014 whilst on maternity leave and after returning to work still manages to fit Sew Club in once a month.  Sian always has a challenging project on the go and I really enjoy helping her develop her ideas.  With another baby on the way, Sian invested in a very clever sewing machine and launched her business making and selling beautiful personalised sewn gifts in December 2015. It’s Sew Personal is collection of personalised gifts, made from high quality materials all handmade to order.  Sian has been super busy this Christmas and received some fantastic reviews, nearly all commenting on the quality of her products  which doesn’t surprise me as when it come to sewing Sian is a perfectionist! http://itssewpersonal.co.uk

It's Sew PersonalSew Personal    12592697_1564234260567969_1419069252193719064_n


Emma had private lessons with me for quite some time several years ago.  Full of fabulous creative ideas and big plans, she needed help turning her ideas into garments. She was already pretty good on the sewing machine but wanted to develop her dressmaking skills to progress her passion of becoming an established designer. With a natural eye for pattern and colour, Emma learnt to create her own printed fabrics and these became the basis of her clothing designs.  It’s an incredibly difficult industry to break into but Lucy Peach Slice has been nominated for several design awards and has received lots of exciting reviews.  “Eclectic, adorable, original, amazing. That’s how we’re describing the stunning fashions for girls from UK label Lucy Peach Slice.” babyolgy.com.au  I still assist Emma with her samples and love being involved in the creative process from fabric to garment. http://lucypeachslice.com

  1492681_274568366029192_1917880990_o   10548037_399619260190768_3975864450068374095_o


Although Caroline has not gone into a sewing related business I am still very proud of her as she was one of my first ever Sew Basic students and still comes to Sew Club every month where she creates her own style of clothes to match her stunning jewellery. https://www.facebook.com/mybeautifulgothic

10537032_1660046647604591_8670804712425648102_n 12118661_1662447284031194_2187949051104479619_n


BEST DOOR STOPPER FILLING TO USE

This month’s Sew Club project was a cube shaped Door Stopper. Of course we worked on getting nice corners and so on but mostly we chatted about what’s the best door stopper filling to use.  The ones you buy in the shops have something heavy at the bottom to give it the necessary weight and polyester filling on top to push out the shape.  When I last did this project  I used dried beans as they were on special offer but some of my students were concerned that beans or rice could attract mice!!  Thinking this was a very good point, I decided to look into an alternative.

Whilst browsing the internet I soon discovered ‘weighted plastic beads’ designed for the job.  They are advertised specifically to weight down toys, door stoppers and blankets for Autistic children.  Unfortunately these beads would work out too expensive as I needed enough for 15 doorstops and like to keep costs to a minimum for my students. I also thought of using marbles but again they would be too expensive. And another idea was bags of sand, something I’d seen used so much in shop bought stoppers.  Although this would be much more affordable, I was worried I’d end up with sand all over my floor!

After looking at lots of options, I decided to go for a 10mm pebble gravel, which was a bargain from my local garden centre and gave a lovely crunchy beach sound!  The added bonus was that our garden path would be getting the left overs! The gravel was put in little plastic bags to keep it all together at the bottom of the doorstop and then the rest of the door stop was filled with polyester stuffing.

Another great tip is to use cushion inners/pads  for the polyester stuffing.  It’s much cheaper than buying specific stuffing.  I always stock up on these when I have to go to Ikea…  as well as calico which they sell at about £2 per metre.  It makes a very stressful experience feel a bit more worth while!!

IMG_3466 IMG_3489

SEW CLUB – Level 2

My level 2 Sew Club students have produced some impressive work over the past few months. I feeling very proud to be their teacher!


Sian's beautiful bear was made out of old baby grows just in time for her daughters 1st birthday. It was a real challenge for Sian but definitely worth the effort. We've all loved watching it come together at Sew Club!

IMG_1131

Sian’s beautiful bear was made out of her daughters old baby grows.  It was finished just in time for her daughters 1st birthday. It was a challenging project but definitely worth the effort. We’ve all loved watching it come together at Sew Club!

IMG_1089  Sew Club London

Above Left – Bindi did a fantastic job at copying a favourite pair of trousers.  She made her own pattern, and perfected the technique of shirring with elastic on the bobbin.  I love the fabric she choose which was thin but weighty so it hung down rather than puffed out! It’s so important to choose the right fabric when you’re copying a garment. It must feel and drape the same way as the original or else however perfect your pattern is, your copied pair won’t look the same.

Above Right – Maxine is making a fashionable shift dress in a gorgeous Liberty print.  Liberty print is a beautiful quality fabric… it’s light and floaty but not see through! It is a bit pricey, especially if you need a lot but I think it’s definitely worth the cost for a special occasion.


IMG_1074  IMG_1145


Above Left – Kate has made a sweet summer dress for her daughter based on an old favourite.  You don’t need much fabric for this style of dress so it’s a great way to use up any odd lengths that are too small to do much with.

Above Right – Sarah wanted to make a pair of pyjama bottoms similar to some Boden ones she had worn to threads!  She found a really lovely cotton print from John Lewis and a simple pattern with clear instructions.  In Sew Club we have found some pattern instructions to be too wordy and confusing so if you’re relatively new to dress making it’s worth looking around for one with less information rather than too much!


SEW CLUB – Summer 2015

PEG BAGS
IMG_1140IMG_1142

In May my monthly Sew Club students made some striking peg bags. They were all edged with bias binding, which is very affordable by the roll from Ebay. The small wooden hangers are from the children’s department in Ikea.

The more projects we do with bias binding the better and more confident my students get at it! We always sew our bias binding on in two stages to get a better finish. Remember… the first stitch line that attaches the bias binding to the edge marks where to fold the bias over to on the other side. Sewing slowly and accurately is the key!


FABRIC STORAGE ROLLS

IMG_1092           IMG_1090 IMG_1079     IMG_1097

In June my Sew Club students made a pretty and useful fabric storage roll to practice inserting a zip. Based on a jewellery roll, these cotton versions can be used to store all sorts of things, not just jewellery. I use mine to hold an ‘out and about’ first aid kit!

They were so popular that all the spare ones I had cut out were bought! I always hand out a printed instruction sheet with details on what to buy, measurements to cut out and reminder steps on how to sew it all together so my students can make another one at home if they want to.